


Special offers from our partners!

Find Replacement BBQ Parts for 20,308 Models. Repair your BBQ today.
12
WARNING
• Keep grill area clean and free from combustible materials,
gasoline and other flammable vapors, liquids, and spare
L.P. cylinders.
• DO NOT obstruct the flow of combustion and ventilation air.
• Keep the ventilation opening(s) of the L.P. cylinder enclo-
sure free and clear of debris.
• A barbecue grill becomes hot during use. DO NOT touch
grates, or cooking surfaces.
• Be sure to tighten all hardware (screws, nuts, bolts, etc.)
at least once a year or each grilling season.
General Use and Correct Burner Flames
Condition The Grill
• Before using the grill for the first time or after storage,
operate grill 15 minutes on high setting, with lid removed, to burn
away oil.
• Once the oil has burned away, check the burner flame per
next step.
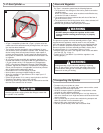
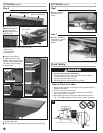
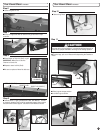
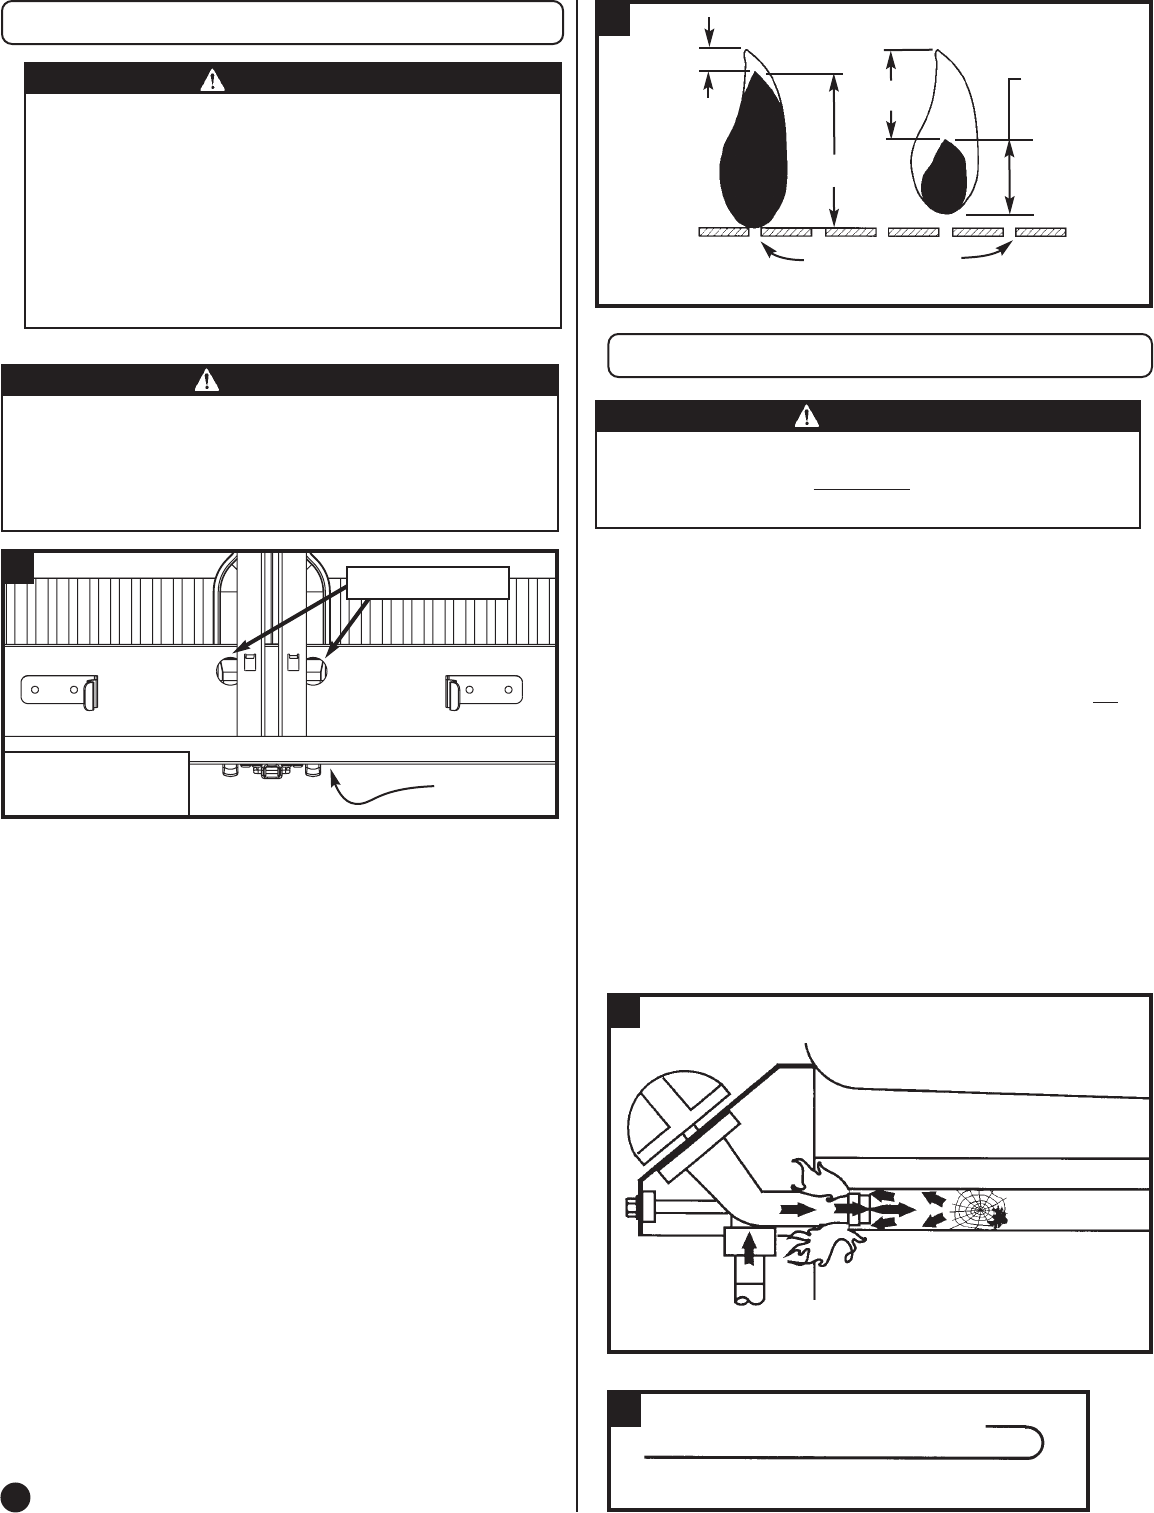
The Burner Flame
• Keep the cooking surfaces in place.
• Observe the burner’s flame from above, through the grates.
• Flames should appear similar to the good flame shown in
Fig. 17 and as follows:
• A good flame should be blue with yellow tip.
• Some yellow tips on flames up to 1" in length are accept-
able as long as no carbon or soot deposits appear.
• If flames are excessively yellow and irregular, the oil
residue may not be completely burned off, or the venturi
may be clogged or may not be properly positioned over the
orifices. Allow grill to cool before repositioning venturi over
valve and orifices.
• Grills that have been in use for a while sometimes begin to
show more yellow flame. A build-up of food deposits, fats
or cooking seasonings can cause yellowing flames.
Clean the burner to remove residue and check for clogged
burner holes or blocked venturi (see “Cleaning the Venturi”
pg. 12).
• Regular use of your grill will actually help keep it operating
more smoothly.
• Each grill may heat differently. Some units will heat some-
what more to the center and back of grill. Flavor of grilled
food will improve the more you use the grill and as you become
familiar with it.
Steps For Cleaning Venturi:
1. Remove the burners from grill.
2. Look inside lower end of venturi tubes for nests, webs or mud.
3. To remove the above obstructions, use an accessory flexible
venturi brush or bend a small hook on one end of a 20-inch-
long flexible wire such as the one shown in Fig. 19.
4. Inspect and clean the burner if needed.
5. Replace the burner assembly into the grill.
6. Make sure the valve orifices are inside the venturi tubes.
7. Secure burner back into grill bottom.
18
19
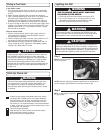
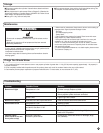
WARNING
Spider’s nests or wasp’s mud inside the venturi may cause fire
at valve. If a fire occurs, immediately
turn off gas supply at L.P.
cylinder valve (see representative illustration in Fig. 18).
Cleaning the Venturi
Note:
Spiders and small insects can spin webs and build nests inside the
venturi tubes. This especially occurs in late summer and fall before
frost when spiders are most active. These nests can obstruct gas flow
and cause a fire in and around the burner valves. Such a fire can
cause operator injury and serious damage to the grill. To help prevent
a blockage and ensure full heat output, clean and inspect venturi tubes
often (once or twice a month). NOTE: Water or air pressure will not
normally clear a spider web.
REPRESENTATIVE ILLUSTRATION
Good
Bad
Yellow
Blue
Holes in Burner
Yellow
Blue
17
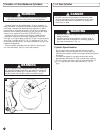
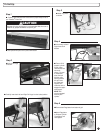
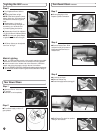
WARNING
After each time the grill is set up or moved, and before lighting the
grill, verify that the Valve Orifices are properly located inside the
six openings to the Burners. One View Port for each of the six
Valve Orifices is located underneath the grill as shown in Fig. 16.
Remove the grease trays to reveal the six View Ports.
16
VIEW PORTS
BOTTOM VIEW
OF GRILL
FRONT