Special offers from our partners!

Find Replacement BBQ Parts for 20,308 Models. Repair your BBQ today.

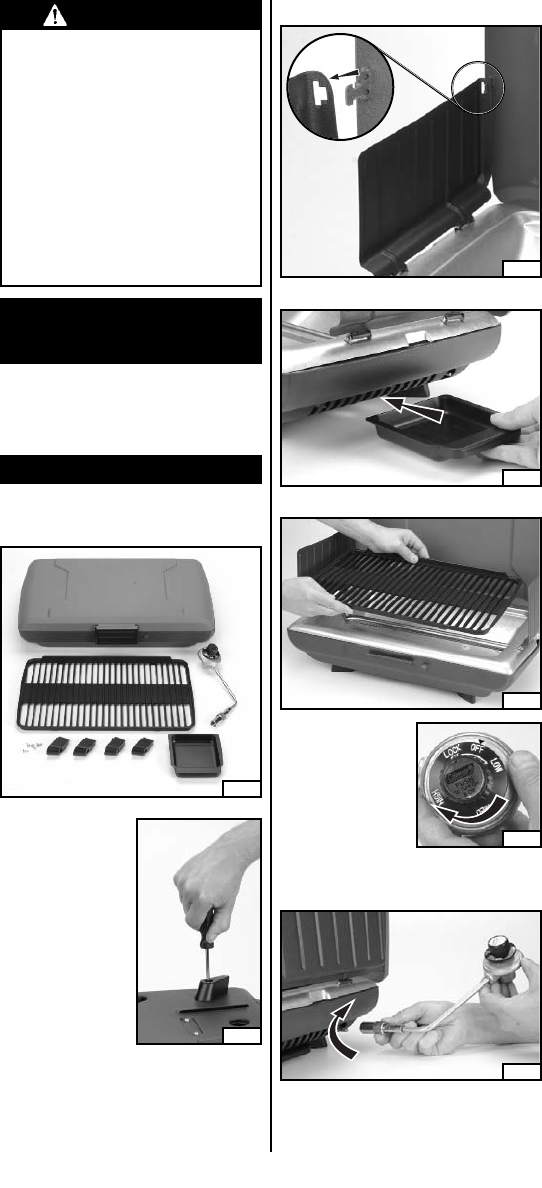
Fig. 3
■ Assemble WINDBAFFLES to LID.(Fig.3)
Fig. 4
■ Install drip tray below right side of grill.(Fig.4)
Fig. 5
■ Install grill with raised edge in back.(Fig. 5)
Fig. 7
Fig. 6
■ Turn off regulator
valve. (Fig.6)
■ Screw regulator into grill hand tight.(Fig. 7)
English-4
CAUTION
• SERVICE SAFETY
• Keep all connections and fittings clean.
Inspect propane cylinder and grill propane
connections for damage before attaching.
• During set up, check all connections and fit-
tings for leaks using soapy water.Never use a
flame.Bubbles indicate a leak.Check that the
connection is not cross-threaded and that it is
tight.Perform another leak check.If there is
still a leak, remove the cylinder and contact
Coleman for service or repairs.
• Use as a cooking appliance only.Never alter
in any way or use with any device or part not
expressly approved by Coleman.
• Clean grill frequently to avoid grease accumu-
lation and possible grease fires.
Technical
Characteristics
Input:11,000 BTU/H
Category: Pressure regulated propane
Fuel:
16.4 oz.disposable propane cylinders
Regulator: 9924
To Set Up
Fig. 1
■ Remove components from carton. (Fig.1)
■ Assemble feet to
grill. Attach each
foot to grill using
one screw.(Fig.2)
NOTE:Screwdriver
is not provided.
Fig. 2


