


Special offers from our partners!

Find Replacement BBQ Parts for 20,308 Models. Repair your BBQ today.
8
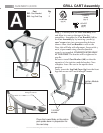
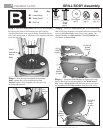
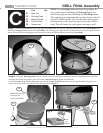
ASSEMBLY GUIDE
GRILL FINAL Assembly
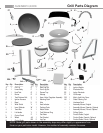
Part Qty.
C6 –
Battery
1
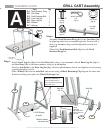
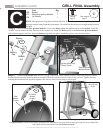
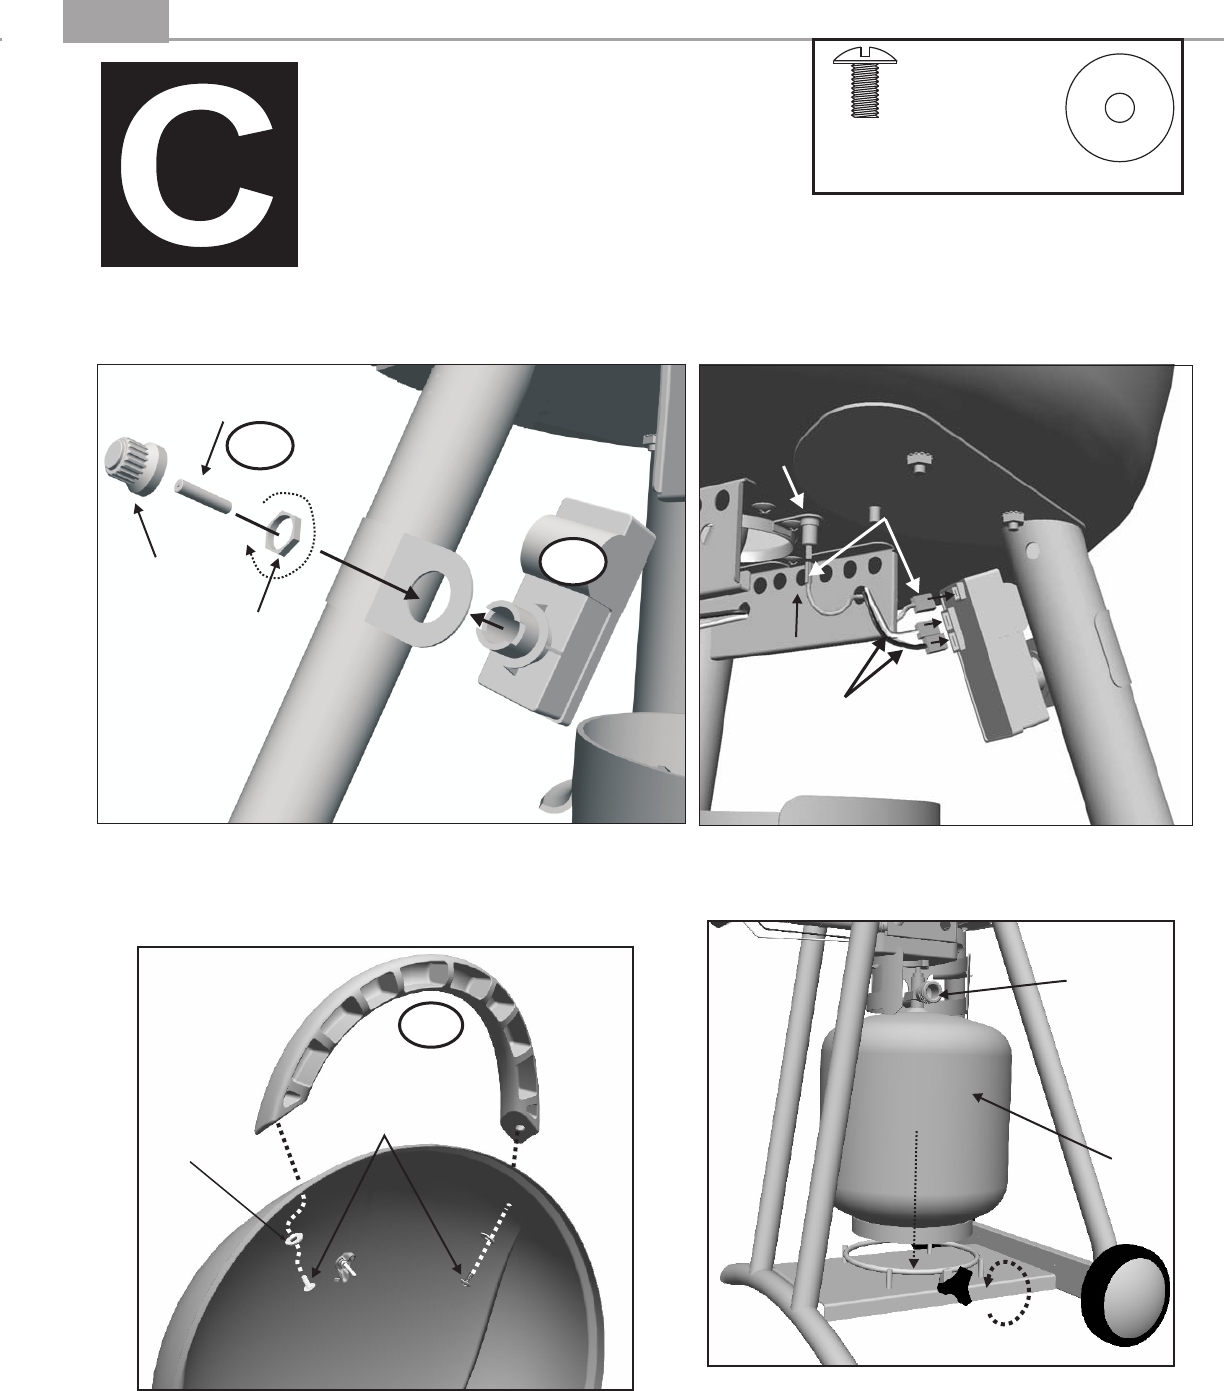
Step 3 - Install the Electronic Ignition Module, Unscrew the Battery Cap and module nut from the module. Insert the
module into the module bracket. Secure with the module nut. Install the Battery (C6) in the Electronic Ignition Module
(C7) with the negative end first. Screw the Battery Cap back into place. Install the ignition wires as shown below.
Loosen Tank Retaining Bolt,install cylinder, then tighten.
20lb.Propane
Cylinder
Cylinder valve
facing RH side
of grill.
Step 4 - Install the Lid Handle (C8) with 2 10-24x3/8" screws and 2 fiber washers as shown. Install the propane cylinder.
Be sure to loosen the tank retaining bolt far enough to allow the cylinder to rest securely on the cart base. Tighten the tank
retaining bolt and attach the propane regulator (not shown) when you are ready to use the grill.
NOTE: The Ignition wiring shown below will only fit into the module one way. Be sure the
wires are routed away from the heat source. Do not allow the wires to rest against hot areas of
the grill.
Battery
Cap
Battery
Module
Nut
-
+
C6
C7
C8 –
Lid Handle
1
C7 –
Electronic Ignition Module
1
Fiber
Washer
(2 each)
C8
10-24x3/8"
Screws
(2 each)
Congratulations! You have successfully completed the assembly of your grill. Prior to using your grill, be sure to follow the
leak check instructions found in the Care and Use Guide.
Visit www.sizzleonthegrill.com/user-forums to chat with Patio Bistro® owners just like you!
(qty 2)
Fiber Washer
10-24x3/8"
(qty 2)
screw
Ignitor Wire to
Ignitor Electrode
Ignition Wires from
Control Panel
Rear of Ignition
Module shown
Ignitor
Electrode