


Special offers from our partners!

Find Replacement BBQ Parts for 20,308 Models. Repair your BBQ today.
ASSEMBLY
6
ASSEMBLY GUIDE
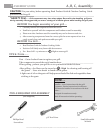
Part Qty.
B1– Grill Base 1
B2– Wind Shield 1
B3– Grill Lid 1
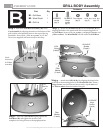
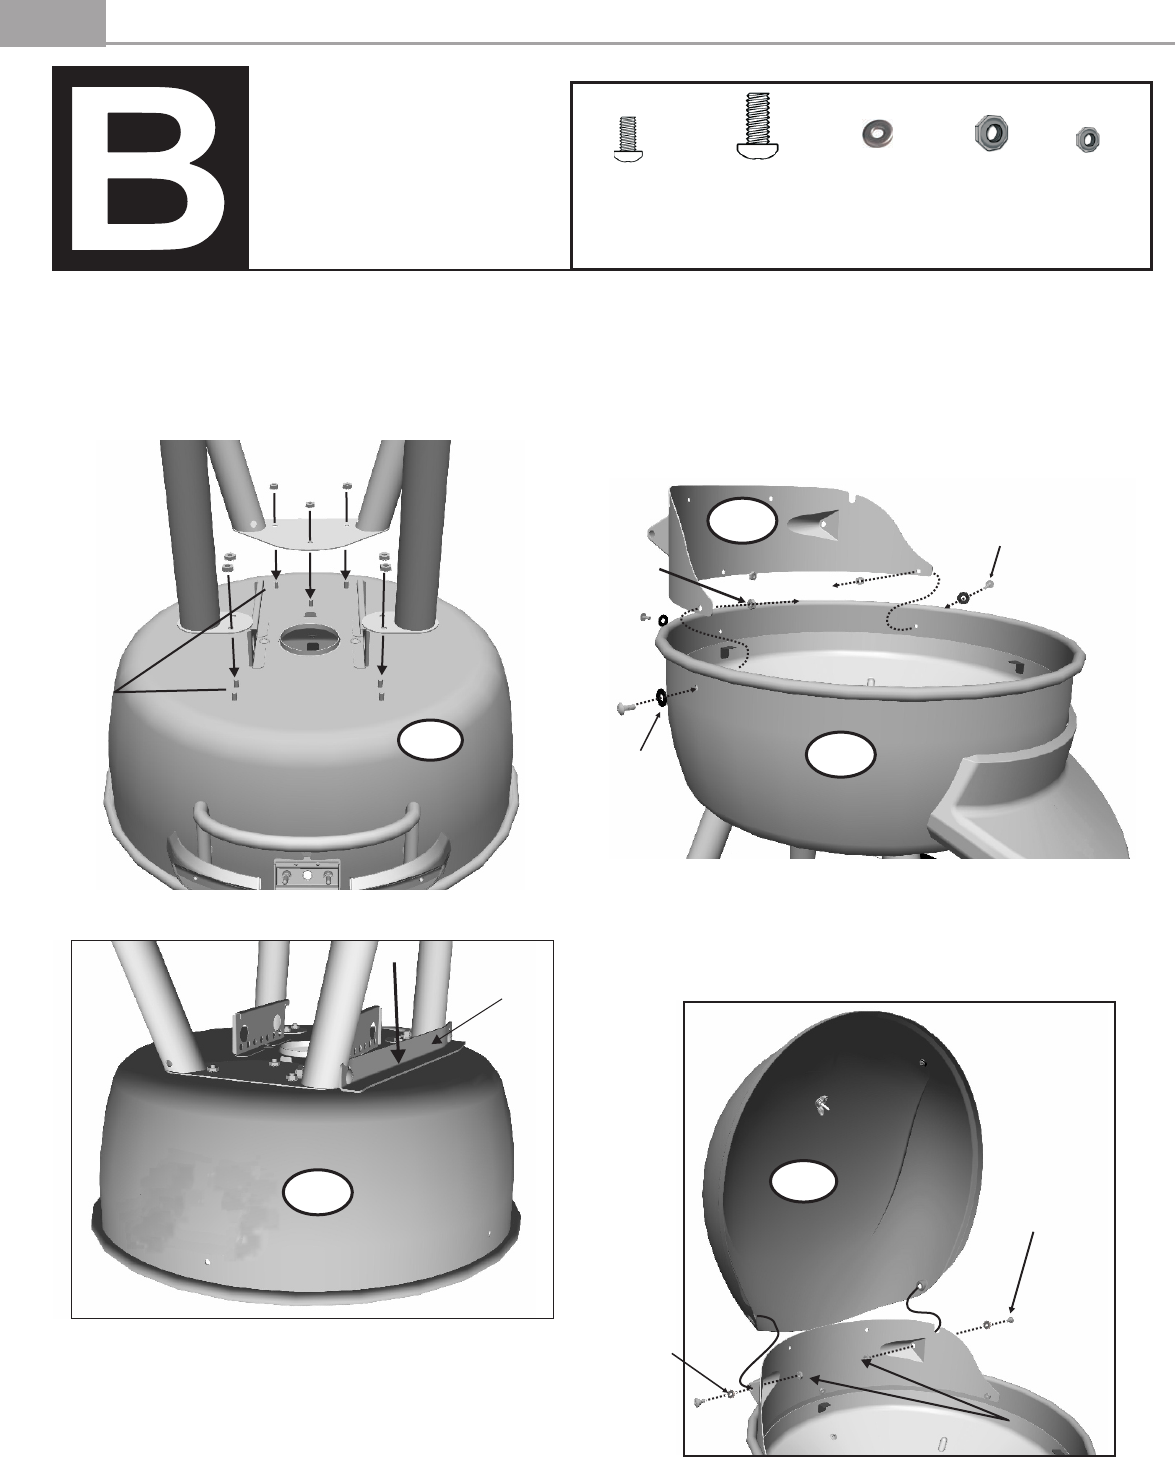
GRILL BODY Assembly
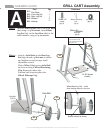
Step 1 - Attach the Grill Base Assembly (B1) to the
Cart Assembly by aligning the studs on the bottom of the
grill with the corresponding holes in the tops of the leg
assemblies. Secure with 7 each 10-24 nuts. A 3/8" Nut
Driver (not supplied) will work nicely for this step.
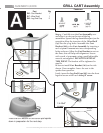
Step 4 - Attach the Grill Lid (B3) by aligning the hinge holes
in the lid to the matching holes in the Windshield (B2). Insert 2
Hinge Screws into the holes and secure with 2 1/4-20 nuts and
two Fiber washers from the inside of the grill.
10-24
Nuts
(3 each)
10-24x3/8"
Screws
(3 each)
Fiber
Washer
(3 each)
Step 3 - Attach the Windshield (B2) to the Grill Base (B1) by
aligning the holes in the panels with the corresponding holes in
the Grill Base. Secure with 3 10-24 nuts, 3 10-24x3/8" Screws, and
3 fiber washers. The Windsheild will rest inside the Grill Base.
B2
B1
B3
B1
Studs
located on
Grill Base
Assembly
Fiber
Washer
(2 each)
(qty 5)
Fiber Washer
(qty 10)
Fasteners
10-24x3/8"
(qty 3)
screw
10-24 Nut
(qty 2)
Hinge
(qty 2)
1/4-20 Nut
screw
Hinge
Screws
(2 each)
1/4-20x3/4"
1/4-20
Nuts
(2 each)
1/4-20x3/4"
Step 2 - Press the Cart Bracket tightly against the
Grill Base (B1) and tighten the screws. Once
complete, turn the grill over to the upright position.
B1
Cart
Bracket
Visit www.sizzleonthegrill.com/user-forums to chat with Patio Bistro® owners just like you!