


Special offers from our partners!

Find Replacement BBQ Parts for 20,308 Models. Repair your BBQ today.
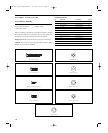
17
DB
BR
BS
DD
7
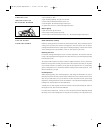
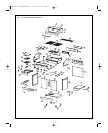
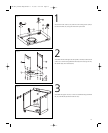
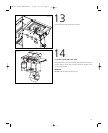
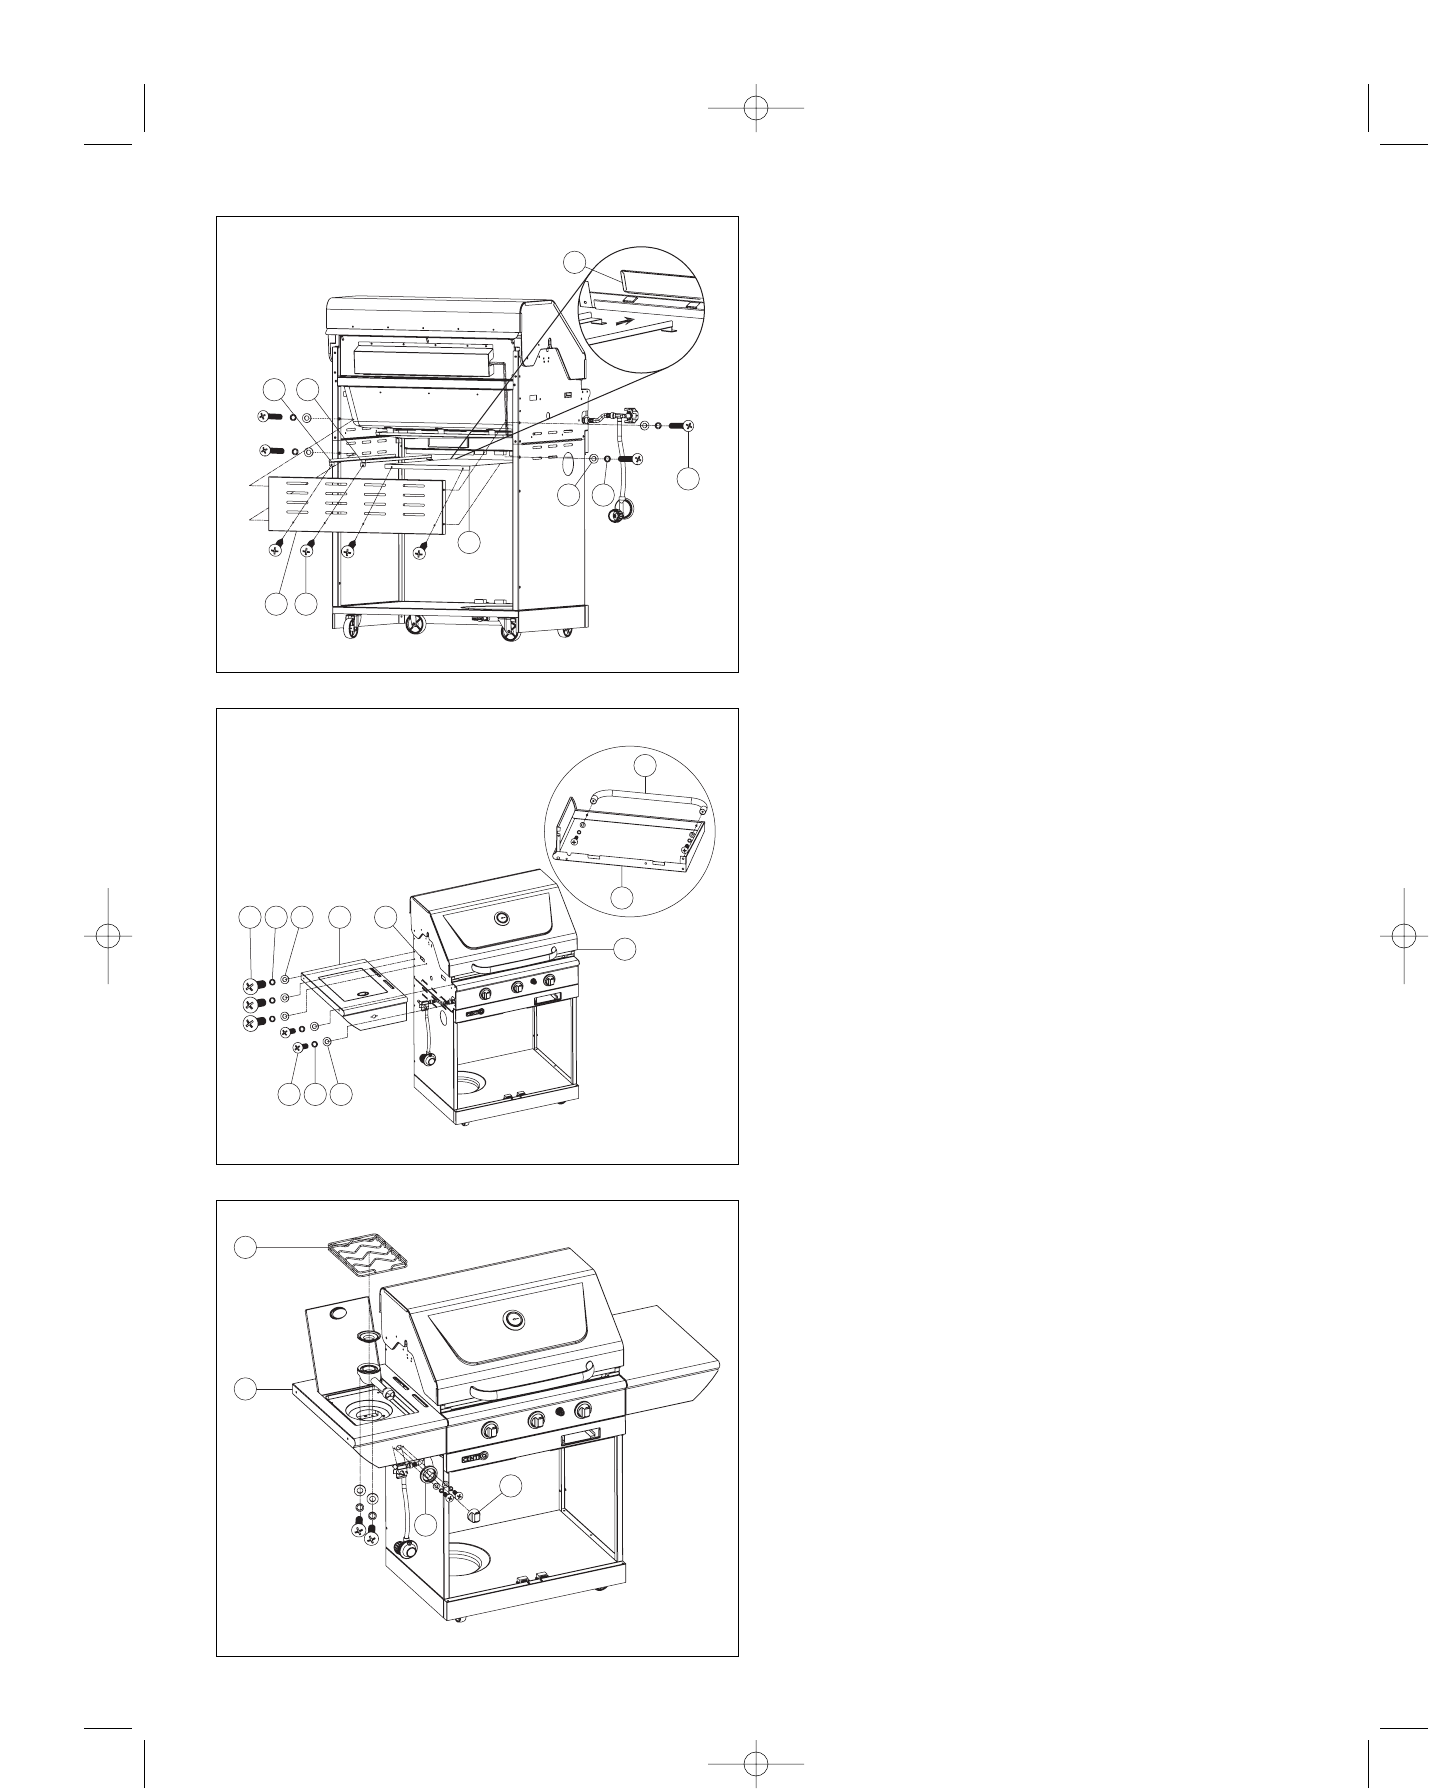
Insert the left and right grease tray bar (CE & CF) into the holes of
upper rail (CK) as shown. Insert the tank heat shield (CD) into the
upper rail (CK) next to the 2 grease tray bars as shown. Assemble the
upper rear panel (BU) to the burner box and cart assembly using hard-
ware #1, #3, and #4 (x4).
Fix the upper rear panel (BU) to both grease tray rails (CE & CF) and
heatshield (CD) using hardware #9 (x4) as shown.
DH
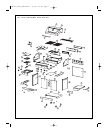
DA2 3 4
6 7
BC
DF
BB
8
8
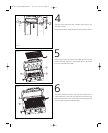
Remove the screws and washers from towel bar (DH). Assemble the
towel bars (DH) to the side shelf (DF) by using the hardware removed.
Assemble the side burner shelf (DA) to the burner box assembly by
using hardware #2, #3, and #4 (x3) to fit the 3 holes at the back
part of the left upper panel (BB) as shown.
Use #6, #7, and #8 (x2) to attach the side burner shelf (DA) to 2
front holes of the left upper panel (BB).
Assemble the side shelf (DF) to the upper right panel (BC) by using
the same hardware.
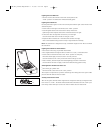
9
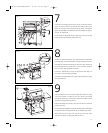
Push the side burner valve stem (part of BD) and mount it by using
screws and washers included on the valve bracket, threading
through the side burner control panel. Affix the bezel (BR) onto the
value stem using hardware provided.
Push the knob (BS) onto the valve stem with the arrow on the knob
pointing upwards.
Insert the side burner (DB) into the frame and attach #6, #7 and #8 it to
the side burner bra ket using hardware #6, #7, and #8 (x2) as shown.
Gently slide the burner tube over the orifice of the valve. Then
place the side burner cooking grate (DD) as shown.
Fig. 8
Fig. 9
1
CK
CD
9BU
CE CF
+
34
Fig. 7
[CEN 025] G50205 BBQ Manual E 11/4/05 6:54 PM Page 17