


Special offers from our partners!

Find Replacement BBQ Parts for 20,308 Models. Repair your BBQ today.
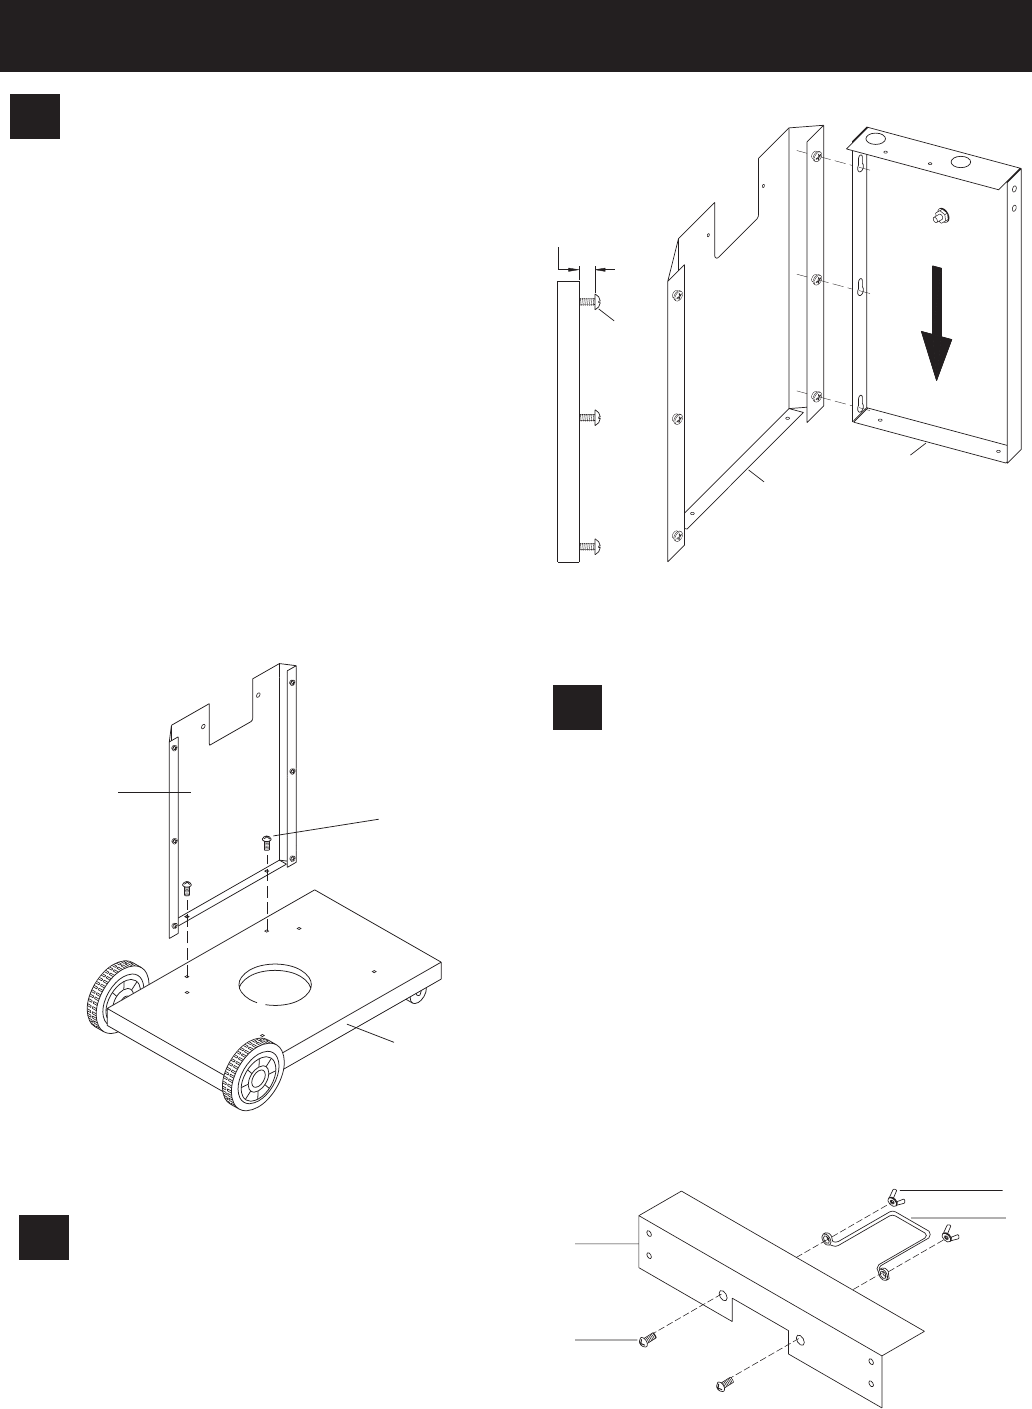
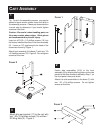
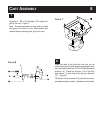
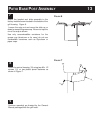
Attach drip pan bracket (17) to the cart with
two ˘-20 x 3/4 phillips screws (15) and two ˘-
20 Wing Nuts (2). Figure 3.
3
1
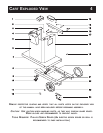
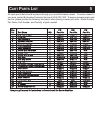
CART ASSEMBLY
6
Tip: To aid in the assembly process , you may be
asked to leave certain screws loose until later in
the assembly process. Please pay close attention
to each step to determine if you should tighten
screws at that time.
Caution: Be careful when handling parts, as
they may contain sharp edges. Work gloves
are recommended to prevent injury.
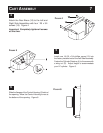
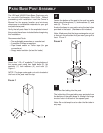
Insert six #10-32 x 1/2 phillips screws (19) into
the factory installed clip nuts on the front assembly
(6). Leave an 1/8" gap beneath the head of the
screws as shown by Figure 1.
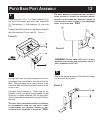
Attach front assembly (6) to base (7) with two ˘-20
x 3/4 phillips screws (15). Figure 2. Do not tighten
screws at this time.
2
Fasten side assemblies (3,18) to the front
assembly (6) by aligning the keyholes on the side
panels to the three screws installed by Step 1, on
the front panel, then push down.
Attach the side assemblies to the base (7) with
two ˘-20 x 3/4 phillips screws. Do not tighten
screws at this time.
6
15
7
FIGURE 2
15
17
2
16
FIGURE 3
1/8"
19
6
3
FIGURE 1