


Special offers from our partners!

Find Replacement BBQ Parts for 20,308 Models. Repair your BBQ today.

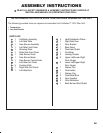
30
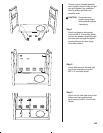
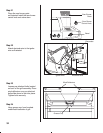
Step 17
Press the two raised points on the
back of the bezel into the
corresponding holes on the sear
burner front panel. Then, firmly seat
the valve nozzle into the burner
venturi. Hold in place while you
perform Step 18.
Step 18
Insert the two screws that are
already attached on the sear burner
valve through the corresponding
key holes on the sear burner front
panel and bezel, from the back of
the sear burner front panel.
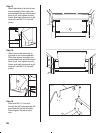
Depending on the sear burner
valve, you will be using either the
outside key holes (Figure 1), or the
inside key holes (Figure 2). Pull the
valve downward or upward to lock
into place. Then tighten the two
screws.
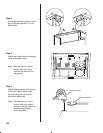
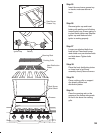
Step 19
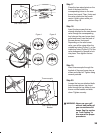
Insert thermocouple through the
keyhole of the sear burner tray as
shown and slide left .Tighten using
wrench provided.
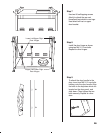
Step 20
Loosen the two pre-attached bolts
from the sear burner tray. Insert
bolts through the key holes of sear
burner nozzle bracket and slide
down. Tighten securely.
WARNING: Never use your grill
without leak testing all
gas connections and
hoses. See the section
on "Leak Testing" in
this manual for proper
procedures.
Figure 1
Figure 2
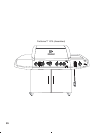
Side Table Holes
Thermocouple
Sear Burner Nozzle
Bracket