Special offers from our partners!

Find Replacement BBQ Parts for 20,308 Models. Repair your BBQ today.

9
LIGHTING THE MAIN BURNERS:
1. Open lid before lighting burner.
2. Make sure all control knobs are in the “OFF” position.
3. Select the burner to be lit. Push and turn the control knob
of that burner to the “HIGH” position
4. Press the electronic igniter and hold for 3–5 seconds to light burner
5. If ignition does NOT occur in 5 seconds, turn control knob to “OFF”, wait 5 minutes to allow gas to
dissipate and repeat lighting procedure.
WARNING
DANGER
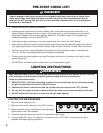
Property damage, bodily harm, severe burns, and death could result from failure to follow these
safety steps. These steps should be performed after the grill has been assembled and prior to
each use. DO NOT operate this grill until you have read and understand ALL of the warnings and
instructions in this manual.
• Ensure that the grill is properly assembled.
• Inspect the gas supply hose for burns, chaffing, kinks, and proper routing before each use. If it is
evident there is excessive abrasion or wear, or the hose is cut, it must be replaced prior to the grill
being used. Replace with hose and regulator Model No. 155-4580-S, which can be obtained by
contacting customer service at 800-527-0717.
• Leak check all gas connections, hose and propane tank. See section on “Leak Testing”.
• Ensure that all electrical supply cords are properly grounded. Keep any electrical supply cord and the
fuel supply hose away from any heated surfaces. Hose should be at least 3 inches from hot surfaces.
• Position your grill on a non-combustible level surface in a well ventilated location, a safe distance
10 ft. (3.1 m) from combustible materials, buildings and overhangs.
• Properly place the empty grease cup under the grease drain hole in the bottom of the grill to catch
grease during use.
• DO NOT block ventilation areas in sides, back or cart compartment of grill.
PRE-START CHECK LIST:
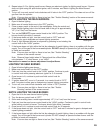
LIGHTING INSTRUCTIONS:
Read, understand and follow all warnings and instructions contained in this manual. DO NOT skip any
of the warnings and instructions contained in the preceding sections of this manual.
Follow the instructions exactly.
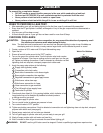
1. OPEN THE GRILL LID before attempting to light a burner so that fumes do not accumulate inside
the grill. An explosion could occur if grill lid is down.
2. Check that all burner control knobs and the cylinder valve are turned to the “OFF” position.
3. Turn on the fuel supply by slowly rotating the cylinder valve knob counter-clockwise to full open.
4. DO NOT stand with head, body, or arms over the grill when lighting.
FOR OUTDOOR
USE ONLY
SOLAMENTE PARA
USO EN EXTERIORES
800-527-0717
For Accessories, Parts or Assistance, Call
or Visit our Website
Para Accesorios, Partes o Asistencia,
Llame o Visite Nuestro Sitio de Internet
Read Instructions
Before Lighting:
1. Open lid during lighting.
2. Select a burner to be lit. Push
and turn control knob of that
burner to “HIGH.” Press
electronic igniter and hold for
3-5 seconds.
3. If ignition does not occur in
5 seconds, turn control knob
to “OFF,” wait 5 minutes and
repeat lighting procedure.
Lea las Instrucciones
Antes de Iluminación:
1. Abra la tapa durante el
encendimiento.
2. Seleccione la hornilla que va a
encender. Empuje y gire la
perilla de control de esa
hornilla a la posición “ALTO”.
Oprima el encendedor
electrónico
y manténgalo oprimido
3 a 5 segundos.
3. Si la hornilla NO se enciende
en 5 segundos, gire la perilla
de control a la posición
"APAGADO"espere 5 minutos y
repita el procedimiento de
encendido.
Scan with a Smart Phone
for More Information
Escanear con un
Teléfono Inteligente
para Más Información
ELECTRONIC
IGNITER
ENCENDEDOR
ELECTRÓNICO
LIGHTS
LUCES
NG Conversion
Kit Required
Kit de la Conversión
del NG Requerido


