


Special offers from our partners!

Find Replacement BBQ Parts for 20,308 Models. Repair your BBQ today.

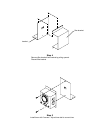
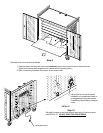
Step 11
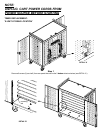
bottom shelf
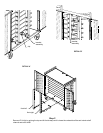
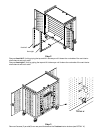
front-right
front-left
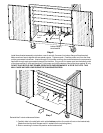
Carefully reinstall E-Units into position by placing bottom in first against the offset and tilting it in sideways to the
top (underneath the channel bracket of the cart top panel).
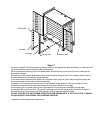
When repositioned correctly, the E-Units power switch should face the front and the full row of outlets should
face the door hinges.
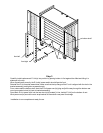
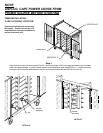
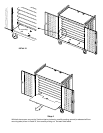
Reinstall the E-Unit bracket assemblies (make sure that the top flange of the E-Unit is aligned with the slot in
the bracket assembly) and tighten screws securely.
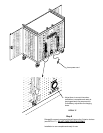
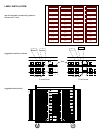
From underneath the bottom shelf, feed the E-Unit power cords (plug end) all the way through the bottom rear
round grommeted cutouts (next to bracket assembly).
Press each E-Unit power cord into the two wire clips located (in line, behind E-Unit) on the bottom of cart.
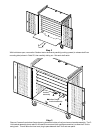
Wind power cords around the cord wrap bracket on the exterior rear panel for storage.
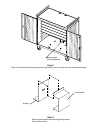
Unwind enough E-Unit power cord from the cord brackets on the rear panel to feed back through each
grommeted hole and into the timer. Plug one E-Unit power cord into the bottom outlet of the timer marked 'A'
only and the other E-Unit power cord into the bottom outlet of the timer marked 'B' only.
DO NOT PLUG BOTH E-UNIT POWER CORDS INTO ONE SIDE MARKED 'A' OR 'B' OUTLETS. THIS WILL
CAUSE AN OVER LOAD DURING THE CHARGING PROCESS.
Installation is now complete and ready for use.
offset
full row side
full row side