


Special offers from our partners!

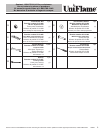
Find Replacement BBQ Parts for 20,308 Models. Repair your BBQ today.
11
Owner’s manual: model NBC3121D outdoor charcoal grill / Manual de usuario: parrilla de carbón vegetal para exteriores, modelo NBC3121D 10/8/03
Contact 1-800-762-1142 for assistance.
Do not return to place of purchase.
Si necesita ayuda llame al 1-800-762-1142
No devuelva el artículo al lugar de compra.
12
Owner’s manual: model NBC3121D outdoor charcoal grill 10/8/03
Contact 1-800-762-1142 for assistance.
Do not return to place of purchase.
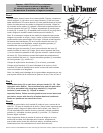
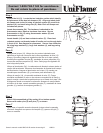
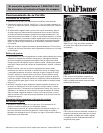
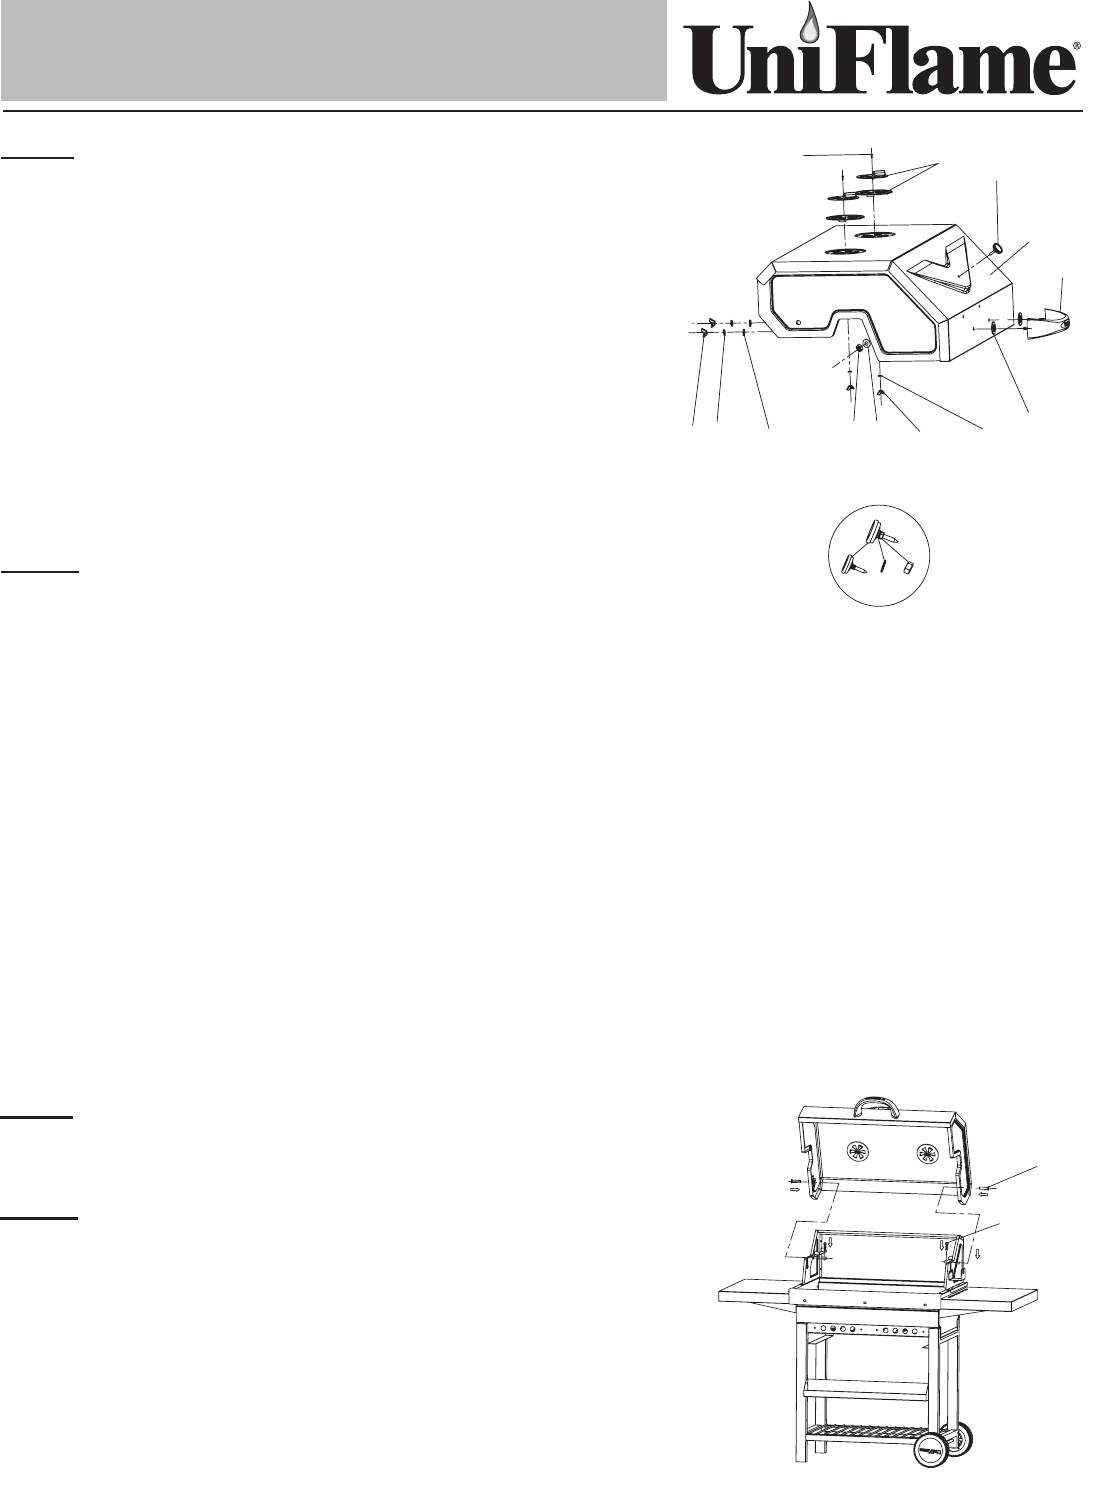
Step 6
Inspect the lid (13). Locate the two indention points which identify
the placement of the dual air dampers (15). Align and attach both
air damper sets to the lid using air damper screws (B), small lock
washers (K), and small wing nuts (G). Note: Each air damper set
includes two pieces.
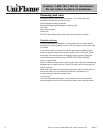
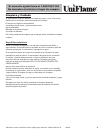
Locate thermometer (24). The hardware is attached to the
thermometer stem. Remove hardware from stem. Secure
thermometer to lid (13) using thermometer washer (R) and
thermometer nut (Q).
Locate handle (14) and heat resistant washer (P). Place heat
resistant washer on threaded ends of handle and run through holes
in front of lid. See diagram for placement. Secure from inside the
lid using large washers (L), large lock washers (J), and large wing
nuts (I).
Paso 6
Inspeccione la tapa (13). Ubique los dos puntos indentados que
identifican el lugar de colocación de los dos reguladores de aire (15).
Alinee y fije ambos juegos de reguladores de aire en la tapa usando
tornillos para regulador de aire (B), arandelas de cierra pequeñas (K) y
tuercas de mariposa pequeñas (G). Nota: Cada juego de regulador de
aire incluye dos piezas.
Ubique el termómetro (24). Los elementos de ferretería vienen atados al
cuerpo del termómetro. Remueva los elementos de ferretería del cuerpo
del termómetro. Asegure el termómetro en la tapa (13) usando una
arandela para termómetro (R) y una tuerca para termómetro (Q).
Ubique la manija (14) y la arandela resistente al calor (P). Ponga
arandelas resistentes al calor en los extremos roscados de la manija y
pase la manija a través de las perforaciones en el frente de la tapa. Vea
el diagrama donde se muestra la colocación. Asegure la manija desde
el interior de la tapa, usando arandelas grandes (L), arandelas de cierre
grandes (J) y tuercas de mariposa grandes (I).
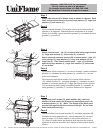
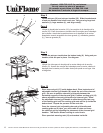
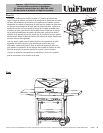
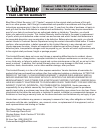
Step 7
Attach lid to assembled grill by resting lid on bottom panels.
Secure with cotter pins (S) and pins (T), as shown.
Paso 7
Fije la tapa a la parrilla armada colocando la tapa sobre los paneles
inferiores. Asegúrela con pernos de horquilla (S) y pernos de ojal (T)
como se muestra.
13
K
L
J
I
G
15
B
P
14
R
Q
24
Q
R
24
S
T