


Special offers from our partners!

Find Replacement BBQ Parts for 20,308 Models. Repair your BBQ today.
Buy Weber Grill Parts. It couldn't be easier. Find your Weber parts here.
16
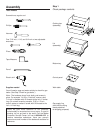
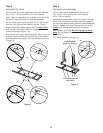
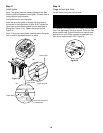
Step 6
Add front panel and tighten all frame bolts
You will need: front panel and two plastic buttons.
Align the panel with the holes in the frame and insert
the plastic buttons through the front panel and frame.
Figure 11.
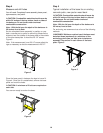
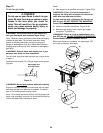
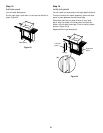
Fully tighten the 1/4-20 bolts in the frame assembly, that
you only started in Step “Continue Frame Assembly”
Figure 12.
Figure 11
Figure 12
Figure 10
Plastic buttons
shown from the rear
of the barbecue
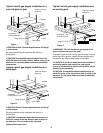
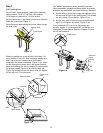
Typical installation of the base for an existing
concrete patio, new pad or wood deck (continued)
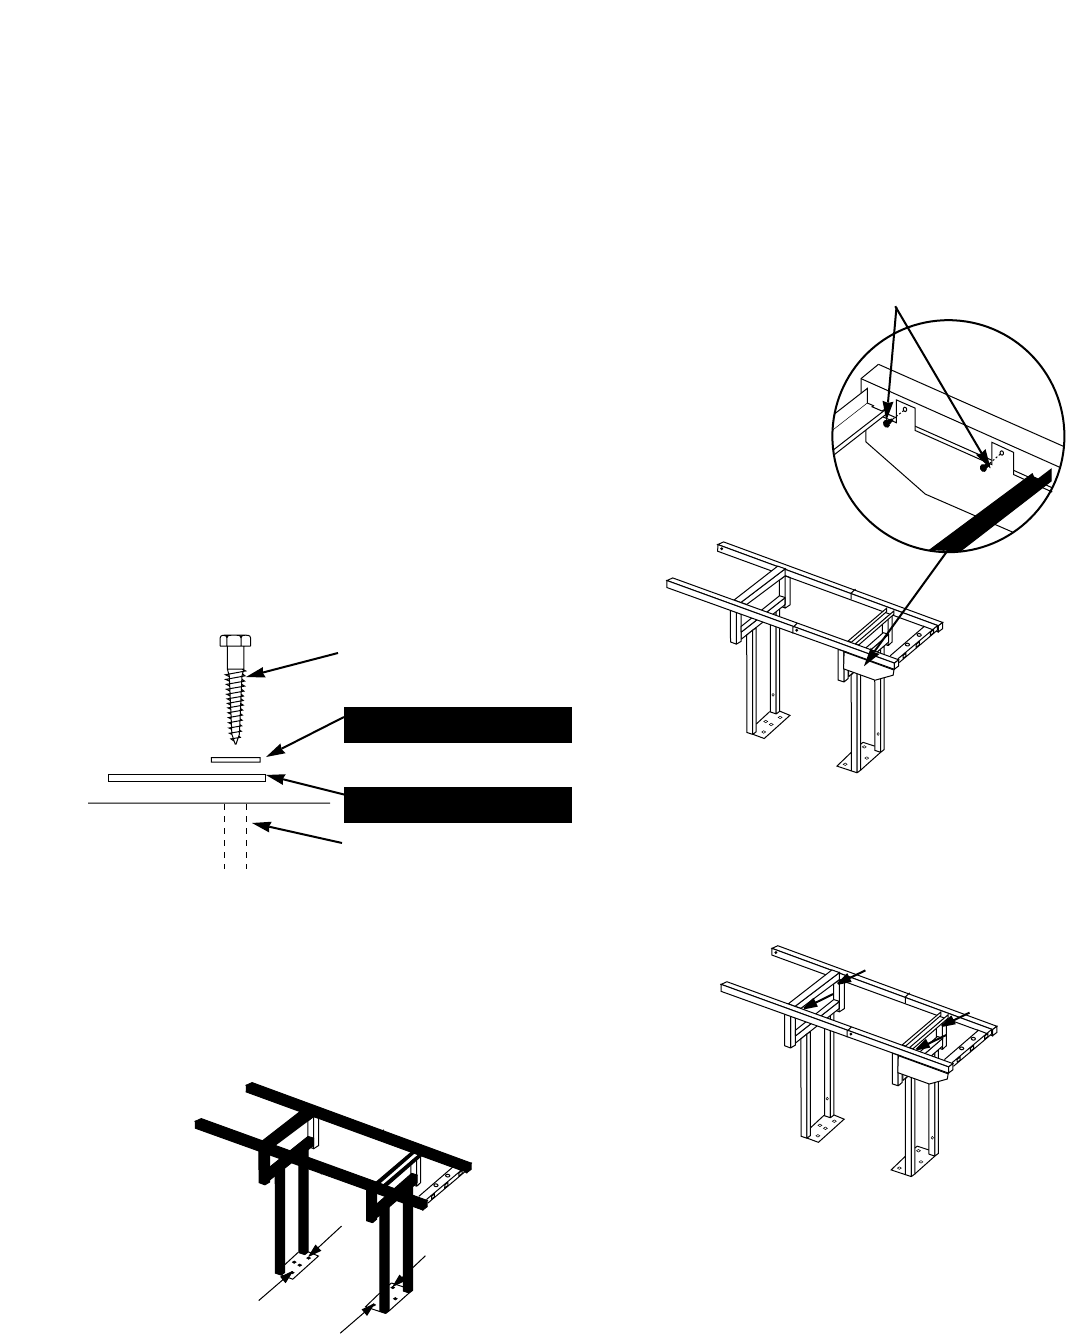
Method 4 - Wood deck
After assembling the base according to the assembly
instructions, position the base assembly on your deck
for anchoring.
ƽCAUTION: Combustible materials should never be
within 24 inches of the top, bottom, back or sides of
the barbecue. Do not locate under overhead
combustible construction.
ƽCAUTION: For a deck installation, it is recommended
to anchor one screw into a joist.
Note - With the lid open, the depth of the barbecue is
28 inches, front to back.
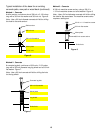
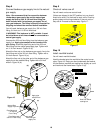
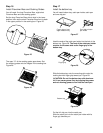
Anchor the base to the deck. We recommend using a
minimum of a 3/8 inch x 1 1/2 inch lag bolt with a 3/8 inch
flat washer. Figure 9.
Note - Use a 3/16 inch drill bit for drilling a pilot hole for a
3/8 inch lag bolt.
3/8 inch x 1 1/2 inch lag bolt
3/8 inch flat washer
Mount plate
Drilled hole
Figure 9
1
2
3
4
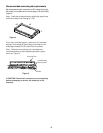
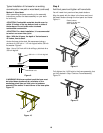
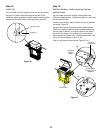
ƽWARNING: Whichever method used, the base must
be bolted down (anchored) at a minimum of four
anchoring points (two per side) prior to barbecue
assembly. One anchor in each corner of the base plate.
Figure 10.