


Special offers from our partners!

Find Replacement BBQ Parts for 20,308 Models. Repair your BBQ today.
Buy Weber Grill Parts. It couldn't be easier. Find your Weber parts here.
19
20
2 -
21
4 -
320
17
3 -
22
m
j
l
k
l
m
n
16
18
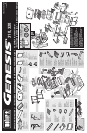
S-310/320
ƽ
1.
ƽ
ƽ
C
A
U
T
ION:
T
U
RN
T
HE G
AS OFF
A
T
TH
E
G
AS
S
U
PPLY
,
B
EFO
RE
ST
AR
TIN
G
.
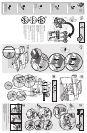
1.
Loosen
Scr
ew
s.
1.
2.
4.
5.
ƽ
3.
b.
1
O
F
F
A
R
R
E
T
E
/
A
P
A
G
A
D
O
1
O
F
F
A
R
R
E
T
E
/
A
P
A
G
A
D
O
6.
a.
50451 12/01/06
ƽ
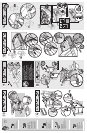
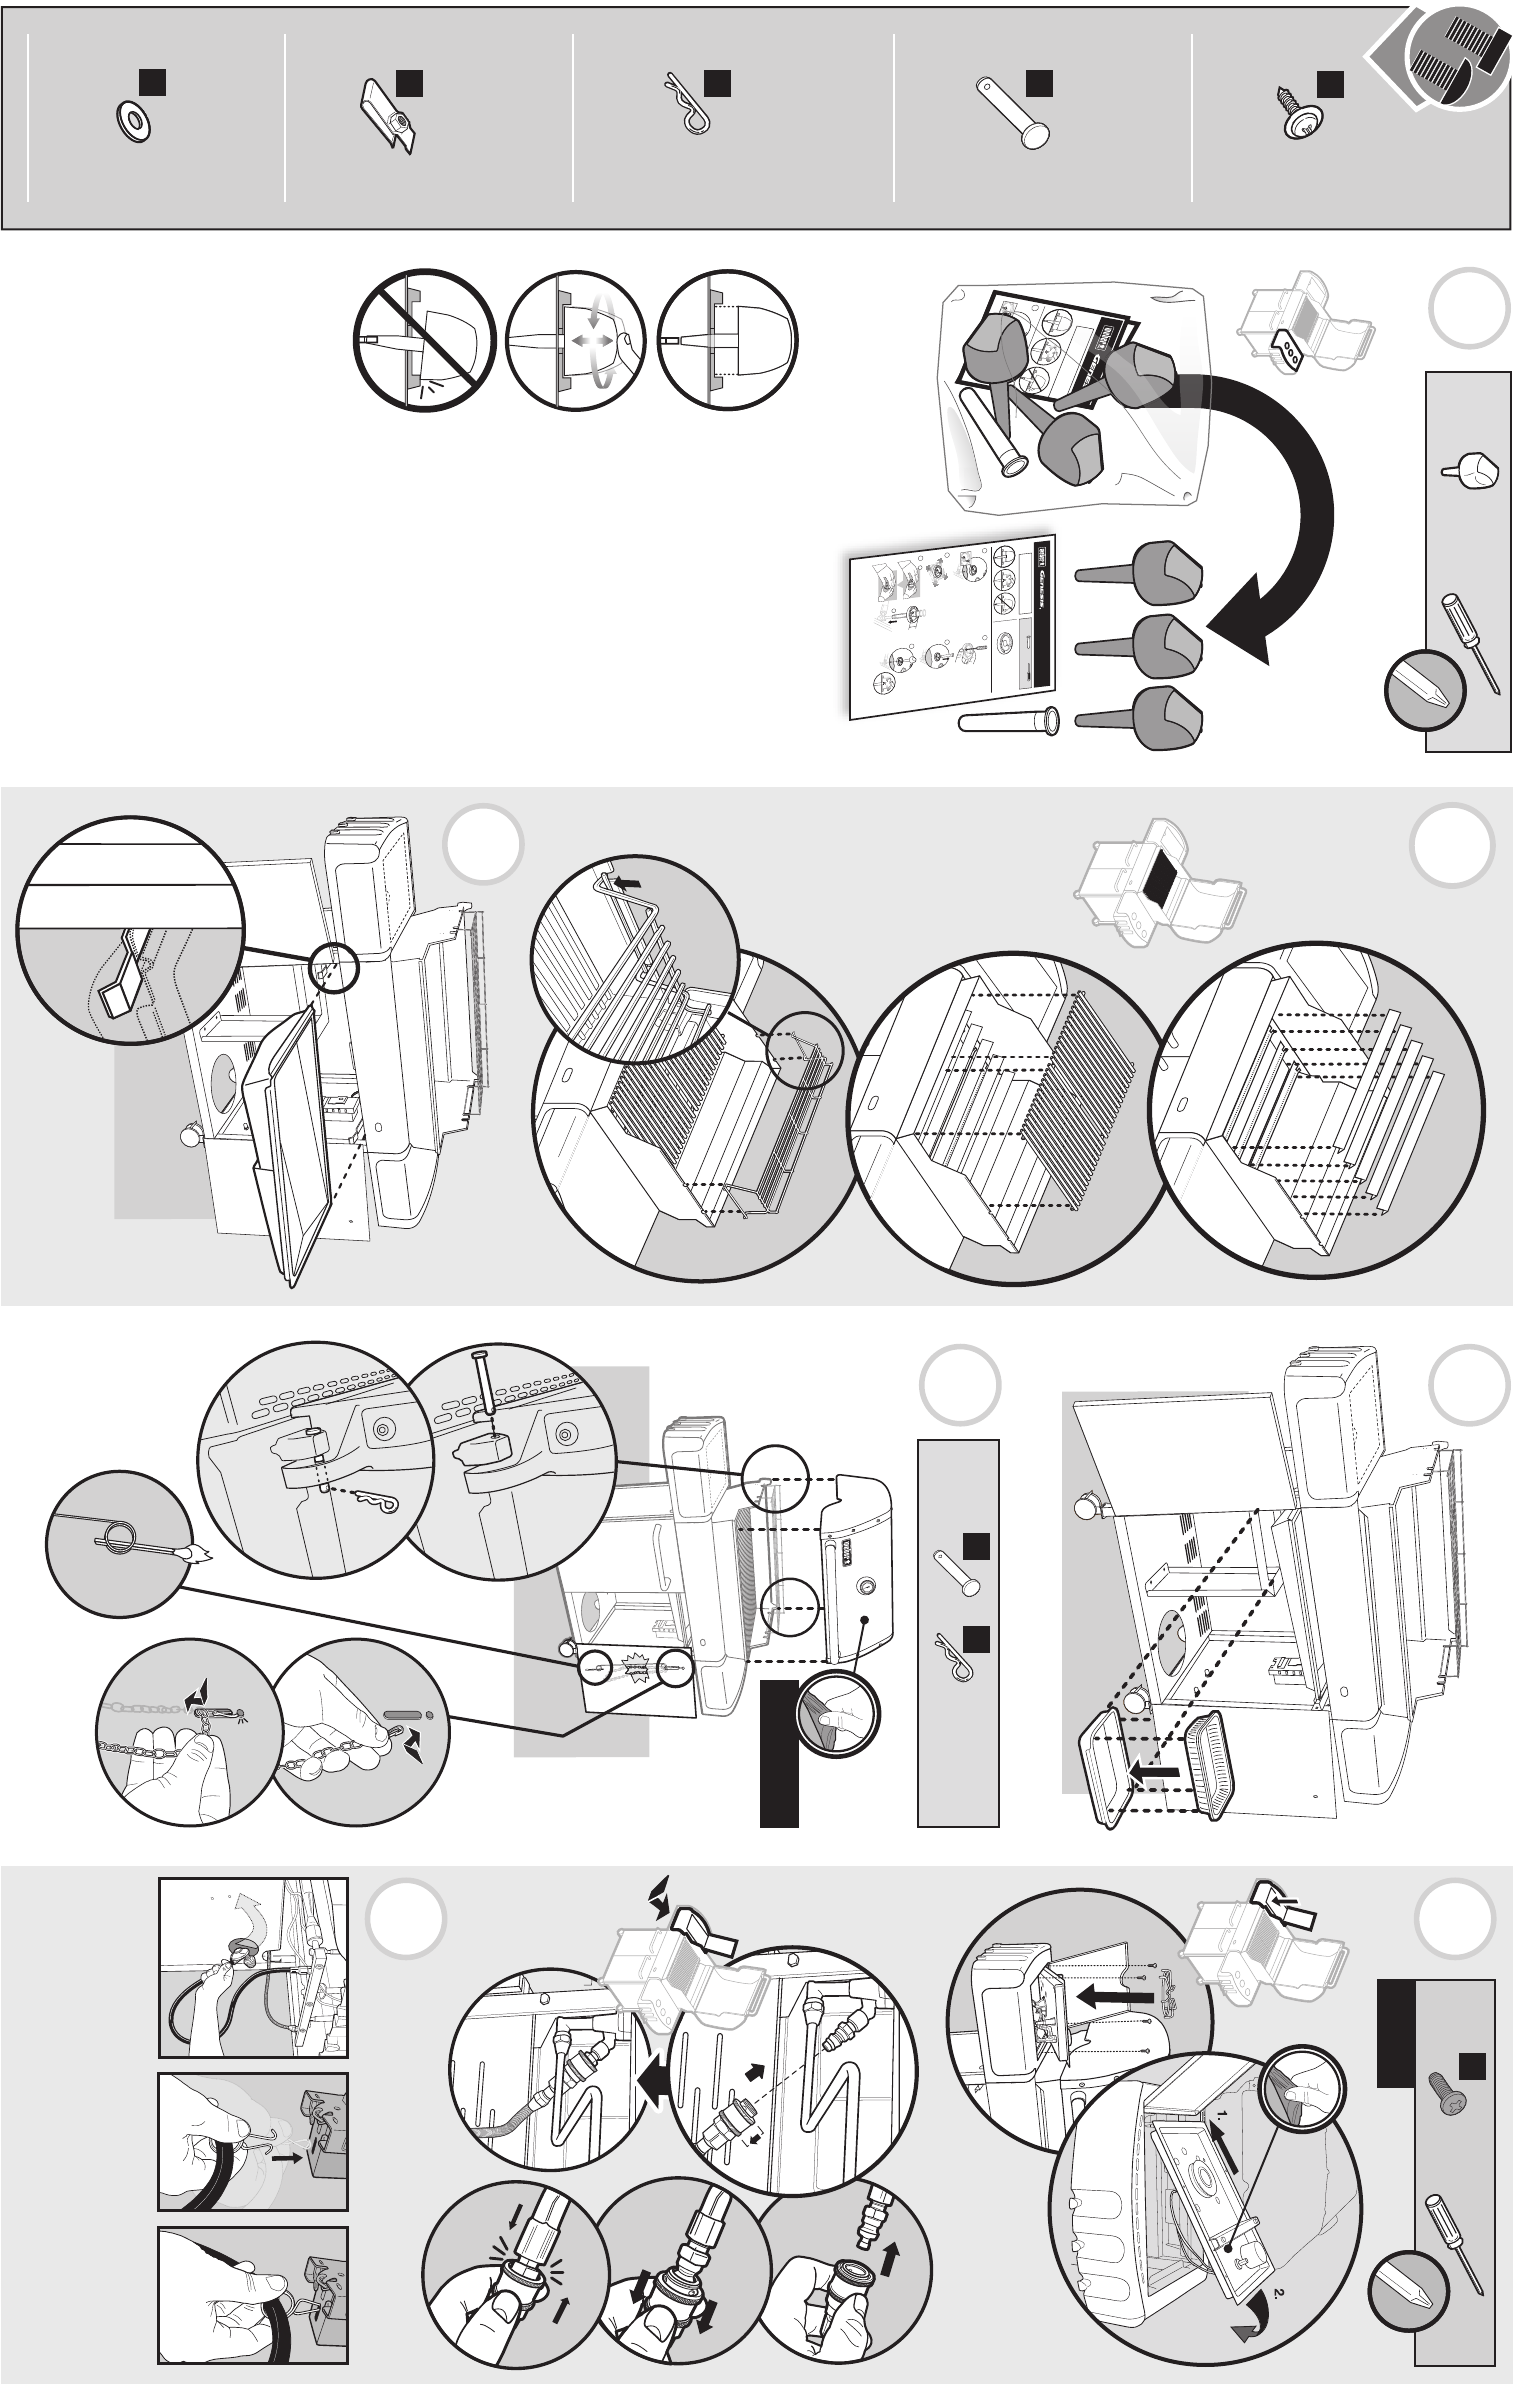
CAUTION: TURN THE GAS OFF AT THE
GAS SUPPLY, BEFORE STARTING.
KNOB BEZEL
ADJUSTMENT INSTRUCTIONS
TOOLS
NEEDED:
1. LoosenScrews.
2. Makesurebezelmovesfreely
in all directions.
3. Matchendofalignmenttoolwithvalvestembylookingdownbarreloftool(a).
Pushalignmenttoolontovalvestem(b).
While holding control knob bezel, gently push alignment tool down.
Tool must freely return to up position.
4. Oncealigned,continueto
hold control knob bezel
and tighten screws. Push
tool again to check for
free movement.
5. Removealignmenttool.
6. Installknobontovalvestem
and test for free movement.
Readjust if necessary.
AlignmentTool Phillips Screwdriver
Knob Bezel
ƽ
ƽ
C
A
U
T
IO
G
AS
S
U
PP
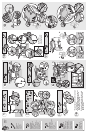
Hardware
Screw - 5
Clevis Pin - 2
Cotter Pin - 2
J-Clip - 7
ƽ IMPORTANT:
Knob bezels must be adjusted at this point.
See sheet in control knob packaging for bezel
adjustment instructions.
• Refer to Owner’s Manual for clip installation warning.
Aluminium Washer - 6
O
ƽ IMPORTANT:
La collerette du bouton doit être ajustée
à ce stade.
Voir la fiche fournie avec le bouton de
commande pour les instructions de
réglage de la collerette.
• Veuillez consulter le Manuel du Propriétaire pour
l’installation de la pince.
Matériel
Vis - 5
Axe - 2
Goupille fendue - 2
Pince en J - 7
Rondelle en aluminium - 6
• Refiérase al Manual del Propietario para la advertencia referente a la
instalación de la presilla.
ƽ IMPORTANTE:
Las molduras decorativas de la perilla deben
ajustarse ahora.
Refiérase a la hoja dentro del empaque de la
perilla de control para las instrucciones sobre
como ajustar las molduras decorativas.
Herrajes
Tornillo - 5
Pasador de horquilla - 2
Clavija hendida - 2
Grapa J - 7
Arandela de aluminio - 6