


Special offers from our partners!

Find Replacement BBQ Parts for 20,308 Models. Repair your BBQ today.
GOLD
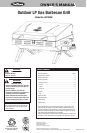
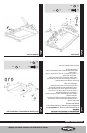
Outdoor LP Gas Barbecue Grill Model No. HBT920W
Contact 1.800.762.1142 for assistance. Do not return to place of purchase.
For great recipes and tips, visit recipes.uniflame.com.
Operating Instructions
This grill is designed to operate with a one pound 7-3/8” high disposable / 16.4 oz. or 14.1 oz.
propane gas tank (DOT 39 Cylinder).
DO NOT ATTEMPT TO REFILL ANY ONE POUND (16.4 oz. or 14.1 oz.) PROPANE GAS TANKS!
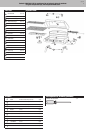
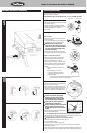
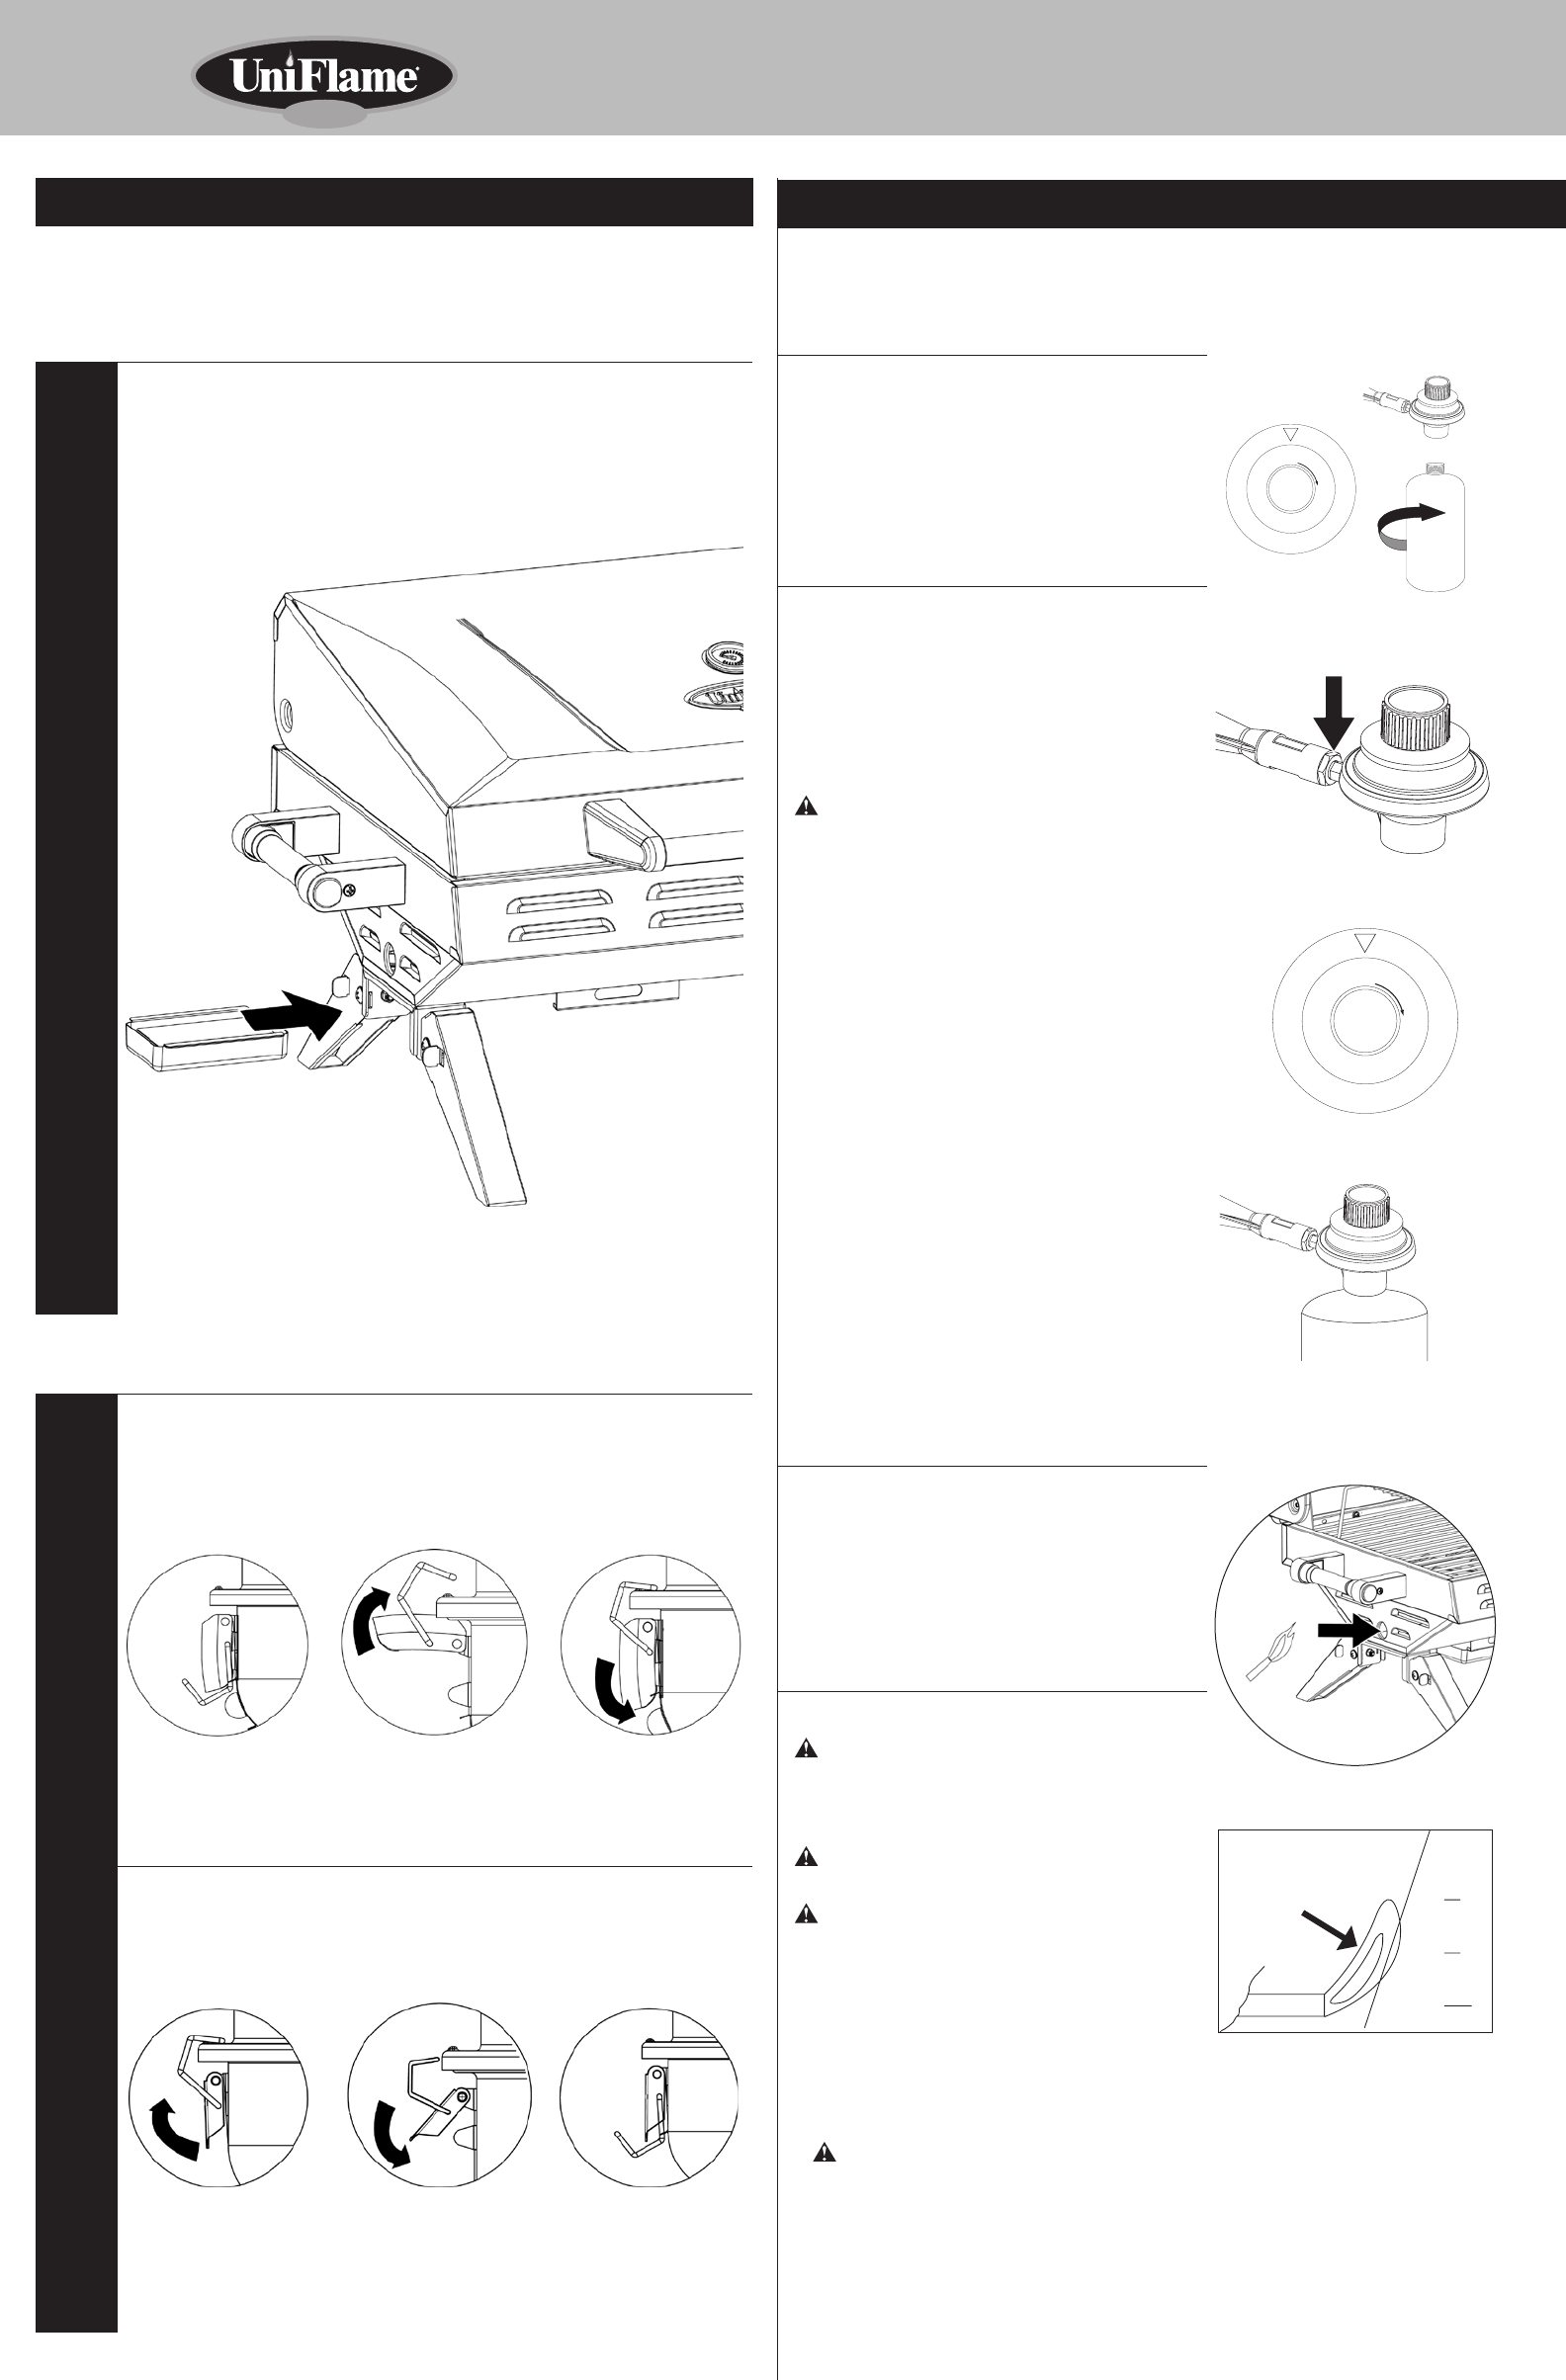
Connecting Gas Tank
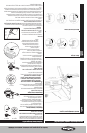
1. Make sure the regulator/control valve is in the “LOCK
OFF” position. (Figure 1a)
2. Lubricate the threads of the regulator valve with
petroleum jelly, insert the gas tank into the regulator
valve and hand-tighten firmly. (Figure 1b)
3. Test for leaks
Checking for Leaks
Burner Connection
1. Make sure the control valve is securely fastened to
the burner. (Figure 2)
If your unit was assembled for you, visually check the
connection between the burner and control valve.
WARNING: Failure to inspect this
connection or follow these instructions
could cause a fire or an explosion which
can cause death, serious bodily injury,
or damage to property.
2. If the burner pipe does not rest flush to the control
valve, please contact 1.800.762.1142 for assistance.
Regulator / 1# LP Gas Tank Connection
1. Make 2-3 oz. of leak solution by mixing one part
liquid dishwashing soap with three parts water.
2. Make sure control knob is “OFF”. (Figure 3)
3. Spoon several drops of solution, or use squirt bottle,
at the LP gas tank to regulator connection. (Figure 4)
4. Inspect the solution at the connection, looking for
bubbles.
a. If NO bubbles appear, the connections are
secure.
b. If bubbles appear, you have a leak.
1. Loosen and retighten this connection,
making sure the connection is secure.
2. Retest with solution.
a. If you continue to see bubbles after several attempts, disconnect propane
source and contact 1.800.762.1142 for assistance.
First Use
1. Make sure all labels, packaging and protective films
have been removed from the grill.
2. Remove manufacturing oils before cooking on this
grill for the first time, by operating the grill for at least
15 minutes on “HIGH” with the lid closed. This will
“heat clean” the internal parts and dissipate odors.
Lighting
Caution: Keep outdoor gas cooking
appliance area clear and free from
combustible materials, gasoline and
other flammable vapors and liquids.
Caution: Do not obstruct the flow of
combustion and ventilation air.
Caution: Check and clean burner/venturi
tubes for insects and insect nests. A
clogged tube can lead to a fire beneath
the grill.
1. Make sure all labels, packaging and protective films
have been removed from the grill.
2. Open lid. Attempting to light the burner with the lid closed may cause an explosion!
3. Make sure there are no obstructions of airflow to the gas unit. Spiders and insects can nest
within and clog the burner / venturi tube at the orifice.
A clogged burner tube can lead to a fire beneath the appliance.
4. Control knob must be in the “LOCK OFF” position. (Figure 3)
5. Turn the control knob to “HIGH”
6. Press the Igniter button repeatedly to light burner.
7. If ignition does not occur in 5 seconds, turn burner control knob OFF, wait 5 minutes and
repeat lighting procedure.
8. If igniter does not light burner, use a lit match secured with the lighting rod provided to light
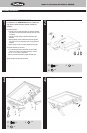
burner manually. Access the burner through the hole in bottom bowl as indicated. (Figure 5)
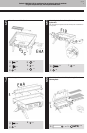
Assembly Instructions (continued)
Figure 1a Figure 1b
LOCK
OFF
OFF
LOW
MED
HIGH
PUSH
TO
TURN ON
Figure 2
Figure 3
LOCK
OFF
OFF
LOW
MED
HIGH
PUSH
TO
TURN ON
Figure 4
X
X
Figure 5
Match
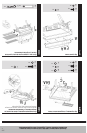
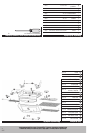
Figure 6
1/2"
12.7 mm
6.4mm
0mm
1/4"
0"
Flame
10
Lock Lid
Unlock Lid
9
Insert Grease Tray