Special offers from our partners!

Find Replacement BBQ Parts for 20,308 Models. Repair your BBQ today.

Beforeassembly read
instructions carefully. Assemble grill
on a clean, flat
surface.
This unit is
heavy.
DO NOT
ASSEMBLE
WITHOUT ASSISTANCE. GET A
HELPER!
'
Tools needed for assembly:
Adjustable Wrench
Philips Head Screwdriver
CAUTION: Unit is heavy. Carefully orient grill lid
& body (1) as shown.
Be careful when moving grill body, installed
charcoal pan may move.
STEP
1
Do not tighten screws all the way. Legs may
need to be adjusted later.
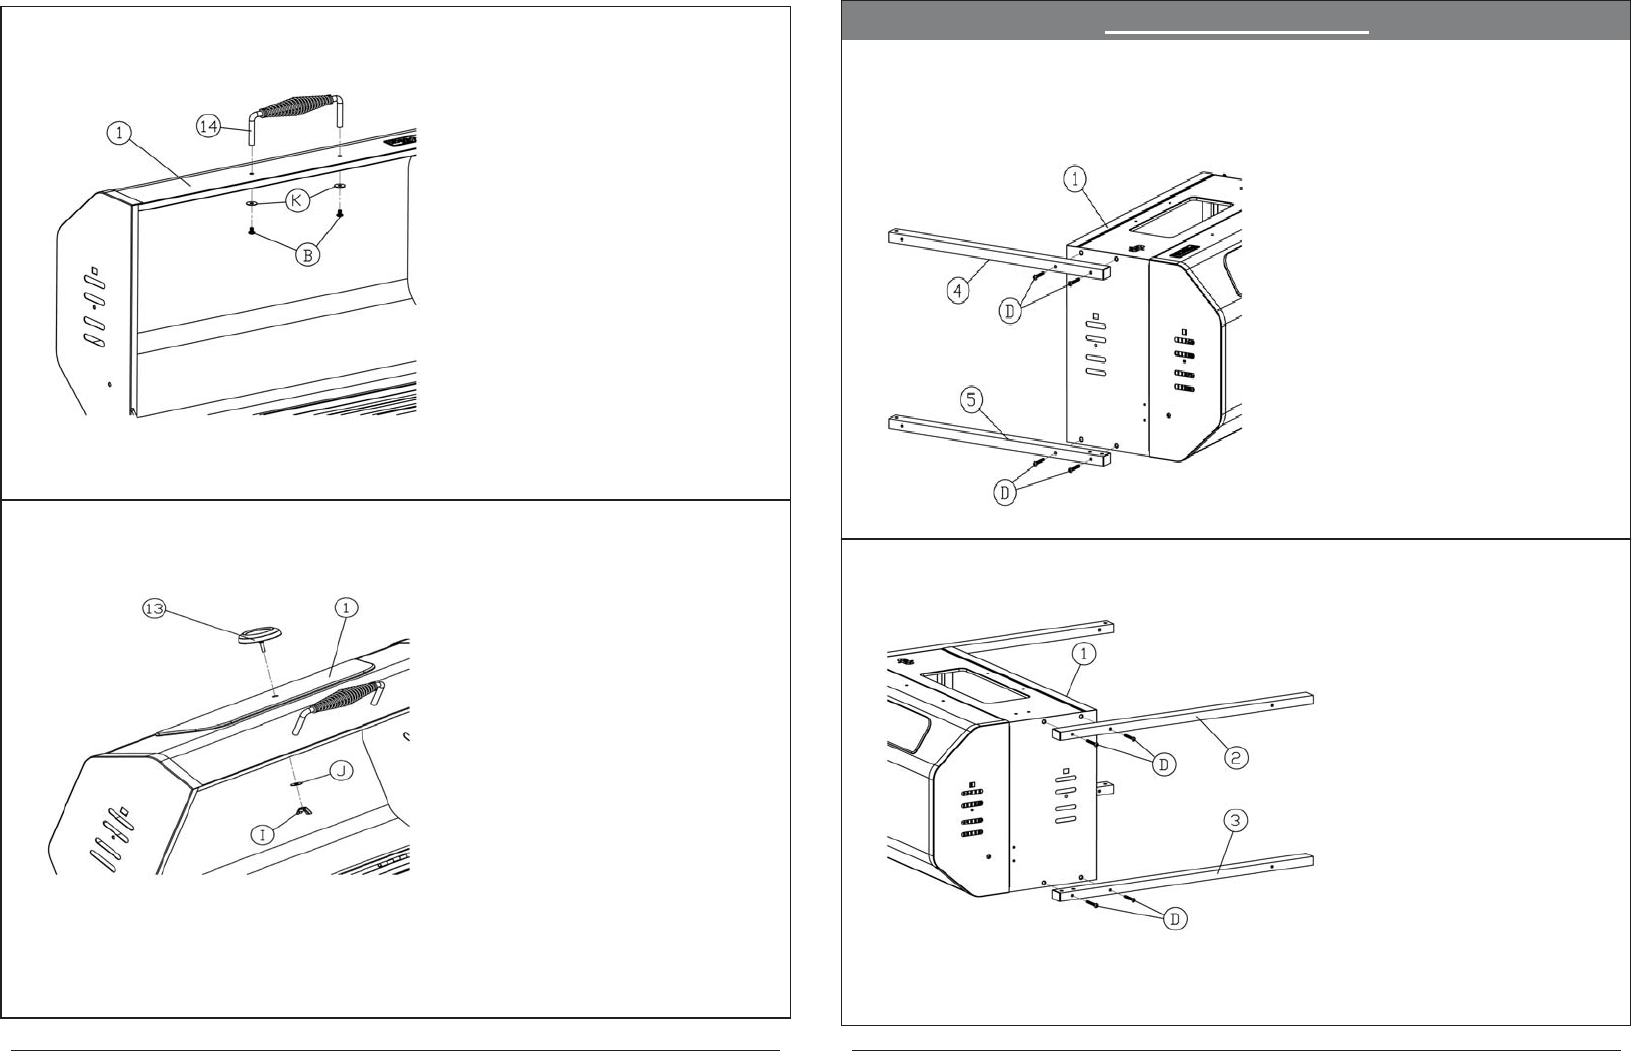
Position rear short leg (5) on the grill lid & body
(1) using M6*50 (D) as shown.
Repeat s
tep on front side with front short leg
(4).
STEP 2
Do not tighten screws all the way.
Position rear long leg (3) on the grill body (1)
using M6*50 (D) as shown.
Repeat step on front side with front long leg
(2).
STEP 8
Note: Attach both ends of lid
handle before fully tightening hex
flange nuts.
Insert handle (14) through
pre-drilled holes in grill lid (1).
Secure handle to lid with M6
Screw (B) and M6 flat washer
(K).
STEP 9
Insert temperature gauge (13)
through pre-drilled holes in grill lid
(1).
Secure gauge to lid with wing nut (I)
and M10 flat washer (J).
Page 6
customer service 1-888-577-9820
Page 9
customer service 1-888-577-9820
ASSEMBLY INSTRUCTIONS


