


Special offers from our partners!

Find Replacement BBQ Parts for 20,308 Models. Repair your BBQ today.

19
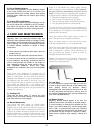
H3. Fixing the Regulator to the Gas Bottle
Confirm all barbecue control knobs are in the off
position. Connect the regulator to the gas bottle
according to your regulator and bottle dealer’s
instructions.
H4. Leak Testing (To be performed in a well-
ventilated area.)
Confirm all control knobs are in the off position. Open
the gas control valve on the bottle or regulator.
Check for leaks by brushing a solution of ½ water
and ½ soap over all gas system joints, including all
valve connections, hose connections and regulator
connections. NEVER USE AN OPEN FLAME to test
for leaks at anytime. If bubbles form over any of the
joints, there is a leak. Turn off the gas supply and
retighten all joints. Repeat test. If bubbles form again,
do not use the barbecue. Please contact your local
dealer for assistance. Leak test annually. Check that
the hose connection to the barbecue is tight and leak
test whenever the gas bottle is reconnected.
I. Operation
I1. Warning
• Before proceeding, make certain that you
understand the IMPORTANT INFORMATION
section of this manual.
I2. Preparation Before Cooking
To prevent foods from sticking to the cooking grill,
please use a long handled brush to apply a light coat
of cooking or vegetable oil before each barbecuing
session. (Note: When cooking for the first time,
paint colours may change slightly as a result.
This is normal and should be expected.)
I3. Lighting the Barbecue
• Open the barbecue hood.
• Ensure all knobs are in the off position. Open the
gas control valve on the gas bottle or regulator.
• Push and turn the leftmost control knob to the
high position. Press the ignition button rapidly
several times unti l left portion of the burner is lit.
If burner fails to ignite, turn control knob to the off
position and turn gas off at the bottle or regulator.
Wait five minutes, then repeat the above steps.
After successful lighting of the left side, ignite the
remaining portion of the burner. If the burner fails
to ignite after following above procedure, turn all
the knobs to the off position. Close the gas valve
on the gas bottle. Wait 5 minutes, then repeat the
above steps. If the barbecue still fails to light,
please refer to the manual ignition instructions in
section below.
• After ignition, the burner should be burned at the
high position for 3-5 minutes in order to preheat
the barbecue. This process should be done
before every cooking session. The hood (where
applicable) should be open during preheating.
• After preheating, the burner should normally be
turned down to a lower setting for best cooking
results.
I4. Manual Ignition Instructions
• Insert lit match through the match-lighting hole
on the right side of the barbecue.
• Push and turn the rightmost control knob anti-
clockwise to the high position.
• After the right portion of the burner is lit, light the
remaining portion of the burner.
• If burner fails to ignite, contact your local dealer
for assistance.
• After ignition, the burner should be burned at the
high position for 3-5 minutes in order to preheat
the barbecue. This process should be done
before every cooking session. The hood (where
applicable) should be open during preheating.
• After preheating, the burner should normally be
turned down to a lower setting for best cooking
results.
I5. Grill Cooking
The burner heats up the lava rock underneath the
grill, which in turn heats the food on the grill. The
natural food juices produced during cooking fall onto
the hot lava rock below and vaporise. The
subsequent rising smoke bastes the food, as it
travels upwards, imparting that unique barbecued
flavour. More even cooking of food will be achieved
by using the BBQ with the hood down. This should
only be done wi th the burners on low.
I6. Roasting Hood Cooking
Barbecues equipped with a roasting hood give the
option of cooking with hood closed to form an ‘oven’
for roasting food, such as joints of meat, whole
chickens, etc.
When roasting, turn the burner under the food to the
OFF position. Close the hood and turn the other
burner down to a lower setting i.e. low to medium to
achieve the temperature required. DO NOT ALLOW
YOUR BARBECUE TO OVERHEAT. Avoid lifting the
hood unnecessarily as heat is lost each time the
hood is opened.
I7. Flare-Up Control
Flare-ups occur when meat is barbecued, and its fat
and juices fall upon the hot lava rock. Smoke helps
give food its barbecued flavour, but avoid excessive
flare-up to prevent food being burned. To control
flare-up, it is advisable to trim away excess fat from
meat and poultry before grilling. To reduce flare ups,
the burner should be turned down to the low setting.
Flare-ups can be extinguished by applyi ng baking
soda or salt directly onto the lava rocks. Always
protect your hands when handling anything near the
cooking surface of the barbecue.