


Special offers from our partners!

Find Replacement BBQ Parts for 20,308 Models. Repair your BBQ today.
13
Mountings
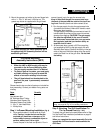
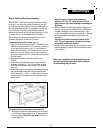
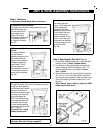
Step 2: Built-In Mounting Assembly
IMPORTANT: Since the mounting is attached directly
to the grill, you must first partially assemble your grill
by attaching the control panel to the grill head (refer to
the appropriate grill section for assembly instructions).
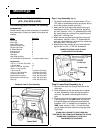
Then the built-in mounting heat shield must be at-
tached to the bottom of the grill head using four ¼-20 x
¾" bolts, see fig. 14 “Complete View” illustration.
Do not forget to remove the protective film from all
stainless steel parts of your built-in mount.
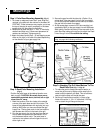
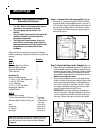
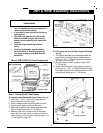
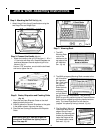
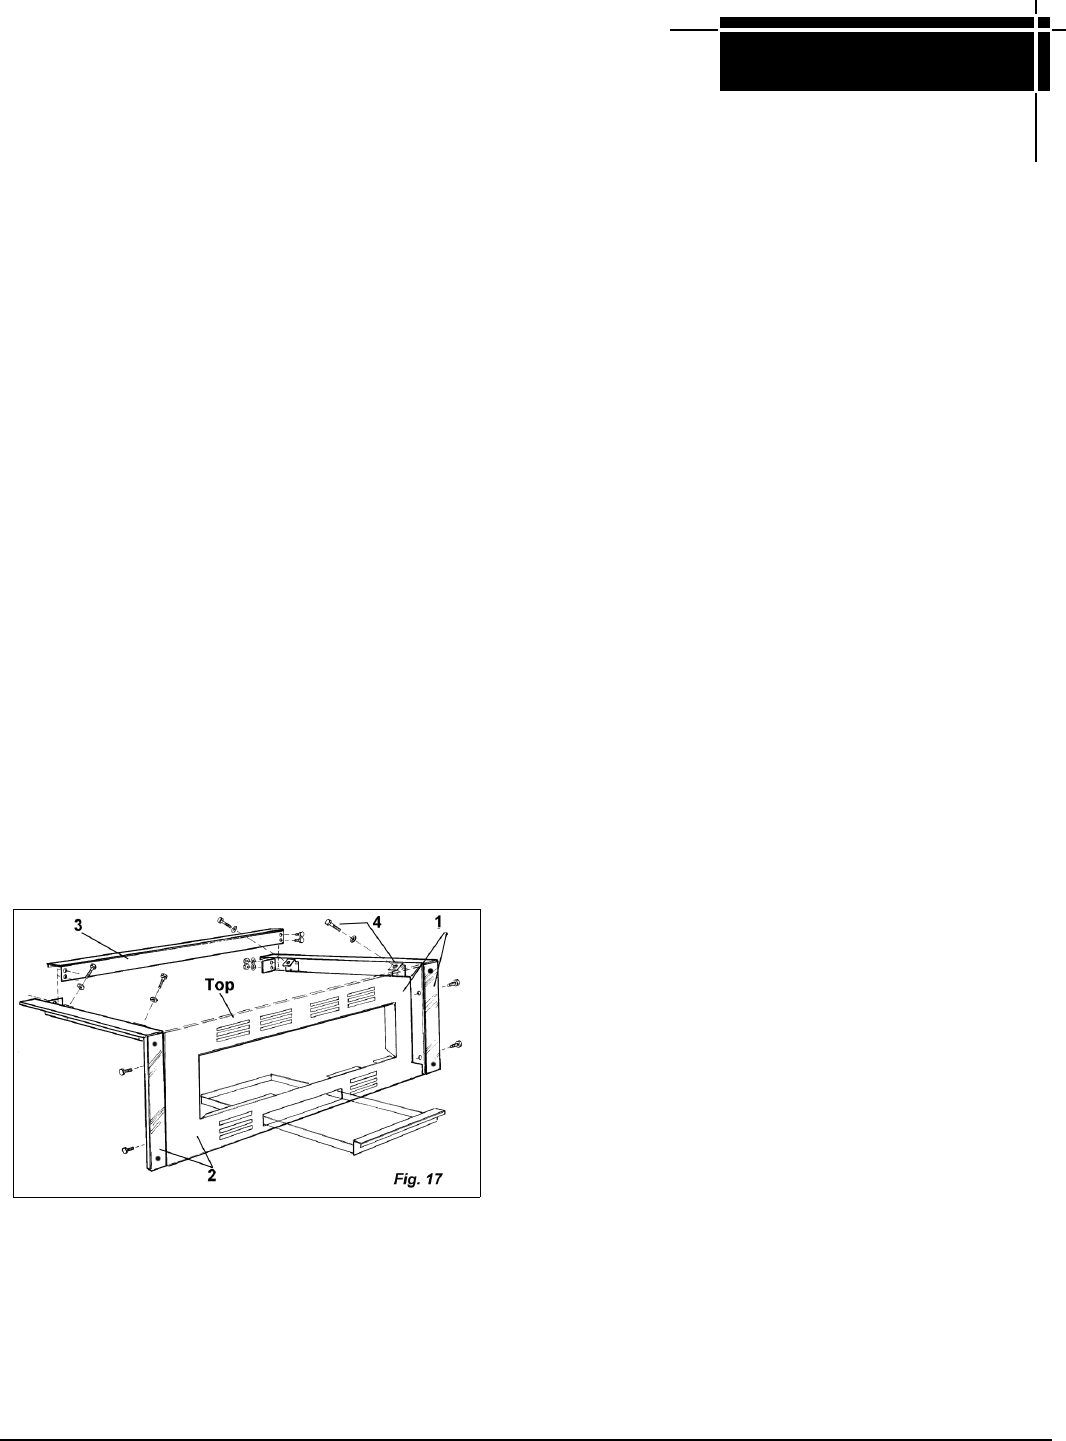
To assemble the built-in frame
(Fig. 17)
1. Align the holes of the right hand “L” bracket with the
face panel (the face panel’s 12 vent slots should be
on the top) and insert two 1/4 x ¾" Hex bolts and
fasten with flat washer, lock washer and nut, do not
tighten at this time. When properly connected the
grill support tabs on the “L” bracket should be facing
up and inward.
2. Repeat procedure to connect the left hand “L”
bracket.
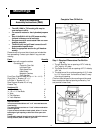
3. Attach the rear bracket to both the right and left “L”
brackets using two ¼ - 20 x ¾" Hex bolts at each
end. Secure bolts with a flat washer, lock washer
and nut.
4. Attach the frame to the bottom grill head by aligning
the frame support tabs with the grill head bottom
holes. Insert the ¼ - 20 x 1 ¼" Hex bolt from inside
the grill head and screw it into the threaded frame
support tab.
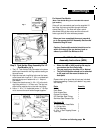
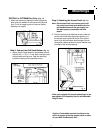
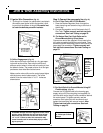
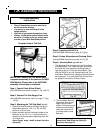
To connect the full assembly to the enclosure.
5. Slide the grill head into the opening 3/4 of the way
in. Connect the gas supply using an approved out-
door connector. Check for gas leaks. (See Gas
Leaks page 23.)
Note: Be certain that the gas pressure is
between 6.5" and 7.5" water column. Excess
gas pressure can cause warping and damage to
grill head.
6. When finished connecting gas supply, slide grill all
the way into to opening so that the “L” bracket face
flanges fit snuggly to your enclosure face. Drill a
hole in the masonry to match up with the “L” bracket
face flange holes and fasten with lag bolts (not
supplied).
Do not build a shelf below the bottom of the
grill. The grill requires an open area for proper
ventilation and service access.
7. Install the pre-assembled door kit by securing with a
suitable fastening method. (Anchors and/or screws
not included.)
When you complete the mount assembly go to
the appropriate Grill Assembly Section and fin-
ish assembling the grill head.