


Special offers from our partners!

Find Replacement BBQ Parts for 20,308 Models. Repair your BBQ today.
6
9
Before each use check all nuts and bolts to be sure that
they are tight and secure.
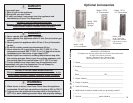
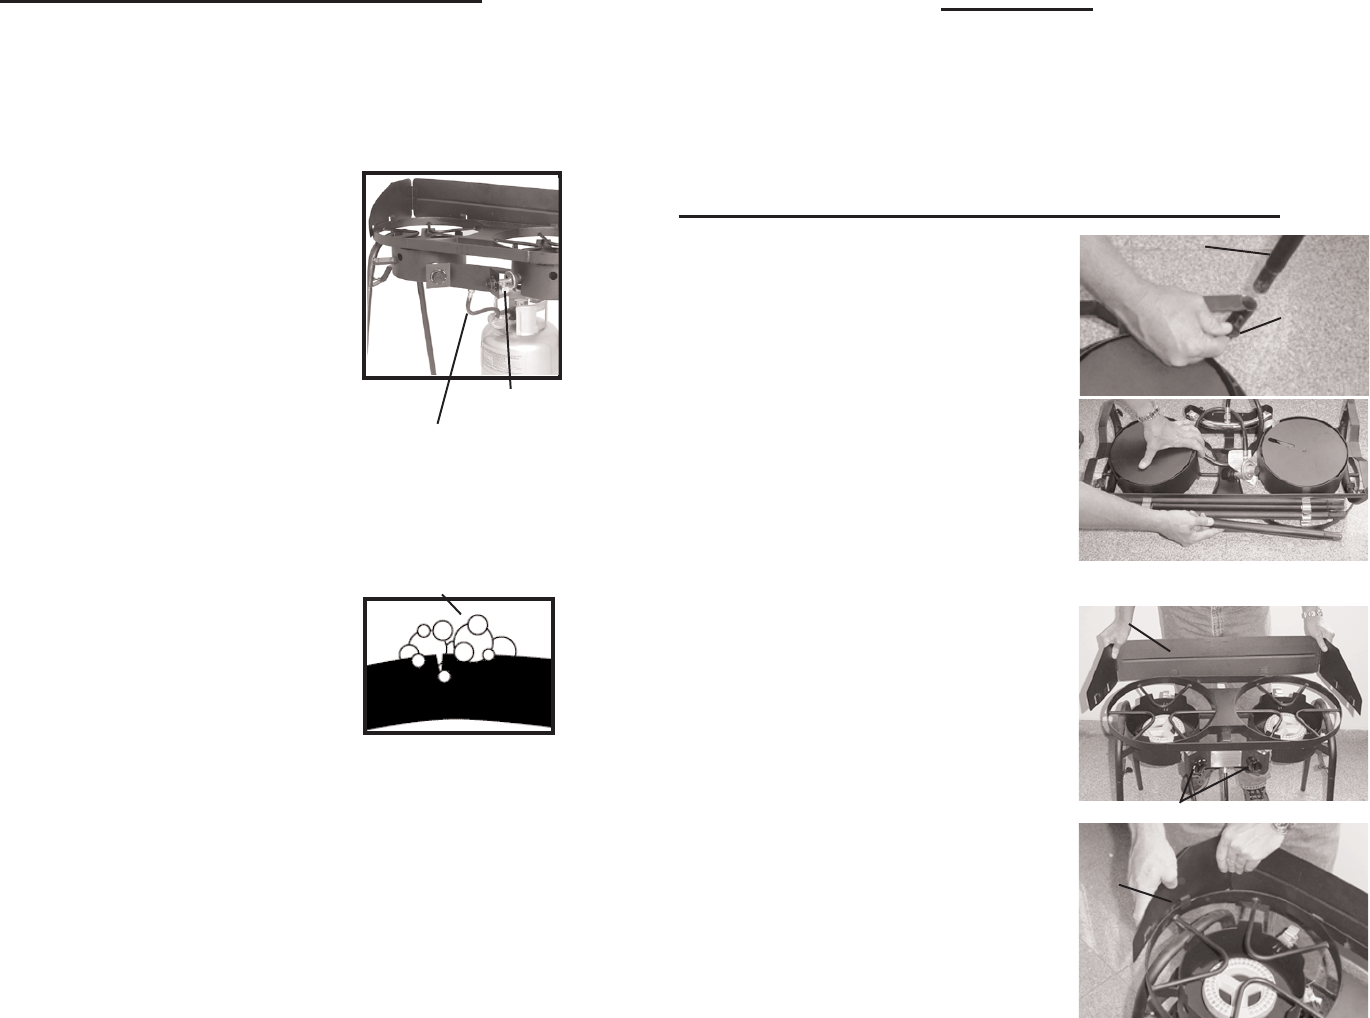
Assembly:
Insert extension legs into leg holder on
cooker frame. Secure with wing bolt.
Storage:
Snap 2 legs into each bracket as
shown.
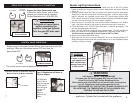
Control Knobs:
Align flat side of the control knob inset
with flat side of control knob shaft and
push knob firmly into place.
Wind Guard Assembly:
Secure back two mounting tabs onto
the cooker frame as shown.
Form left and right side of wind guard
around the cooker security ring and
slip remaining tabs into place.
Control Knobs and
Wind Guard Assembly
Extension Legs Assembly
and Storage
Extension Legs
Wing Bolt
Wind Guard
Control Knobs
Wind Guard Tabs
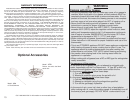
Outdoor LP
Gas Cooker Assembly Instructions
(Cylinder Not Included)
1 Double Cooker Frame
2 Cast Burners with Air Shutters,
Springs and Bolts (pre-mounted)
1 Hose/Tee Assembly (pre-mounted)
1 Hose, Regulator Assembly
(pre-mounted)
2 Valve Assembly (pre-mounted)
2 Heat Shields (pre-mounted)
1 Wind Guard Assembly
2 On/Off Control Knobs
4 Extension Legs with 4 Wing Bolts
Parts List
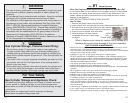
Soapy Water Test W
arning and Procedures
• The Soapy Water Test must be performed each time the gas cylinder is connected
to your appliance or each time the appliance is used.
• The Soapy Water Test must be performed outdoors in a well-ventilated area.
• When performing the Soapy Water Test, always keep cooker away from open
flames, sparks, or lit cigarettes.
• The Outdoor Gas Cooker is designed to operate with propane gas only.
This product will not operate with natural gas.
• Never use an open flame to test for gas leaks.
• Always remove any cookware from cooker stand when
performing the Soapy Water Test.
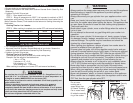
PROCEDURE:
1. Remove any cookware from your cooker stand.
2. Turn valves to OFF position, and turn the gas
cylinder valve to the OFF position.
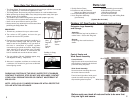
3. Prepare your soapy water solution by combining (1)
one part dish washing liquid with (3) three parts
water to test for the possibility of any gas leaks in
the hose or connections to regulator, regulator
connection to gas cylinder and valves. Apply soapy
water solution to the gas cylinder valve, regulator
and up the hose to where it is connected to the
burner manifold and around the burner valves.
4. Turn gas cylinder ON only, If bubbles appear, stop,
and retighten the fitting. Repeat test.
5. After test is complete, and there are no leaks, wait
a minimum of 5 minutes for gas fumes to diminish
before lighting cooker.
Bubbles in Soapy
Water Test
Hose,
Regulator
and
Cylinder
Valve
Burner
Manifold
and
Valves
DURING ANY PORTION OF THE SOAPY WATER TEST, IF BUBBLES
CONTINUE TO APPEAR, STOP, DO NOT USE APPLIANCE, CONTACT
YOUR LOCAL PROPANE DEALER OR CONTACT MASTERBUILT AT
800-489-1581.
NOTE: USE A 20 LB. CYLINDER OR SMALLER WITH A PROTECTIVE
COLLAR WITH THIS APPLIANCE.