Special offers from our partners!

Find Replacement BBQ Parts for 20,308 Models. Repair your BBQ today.

10
5
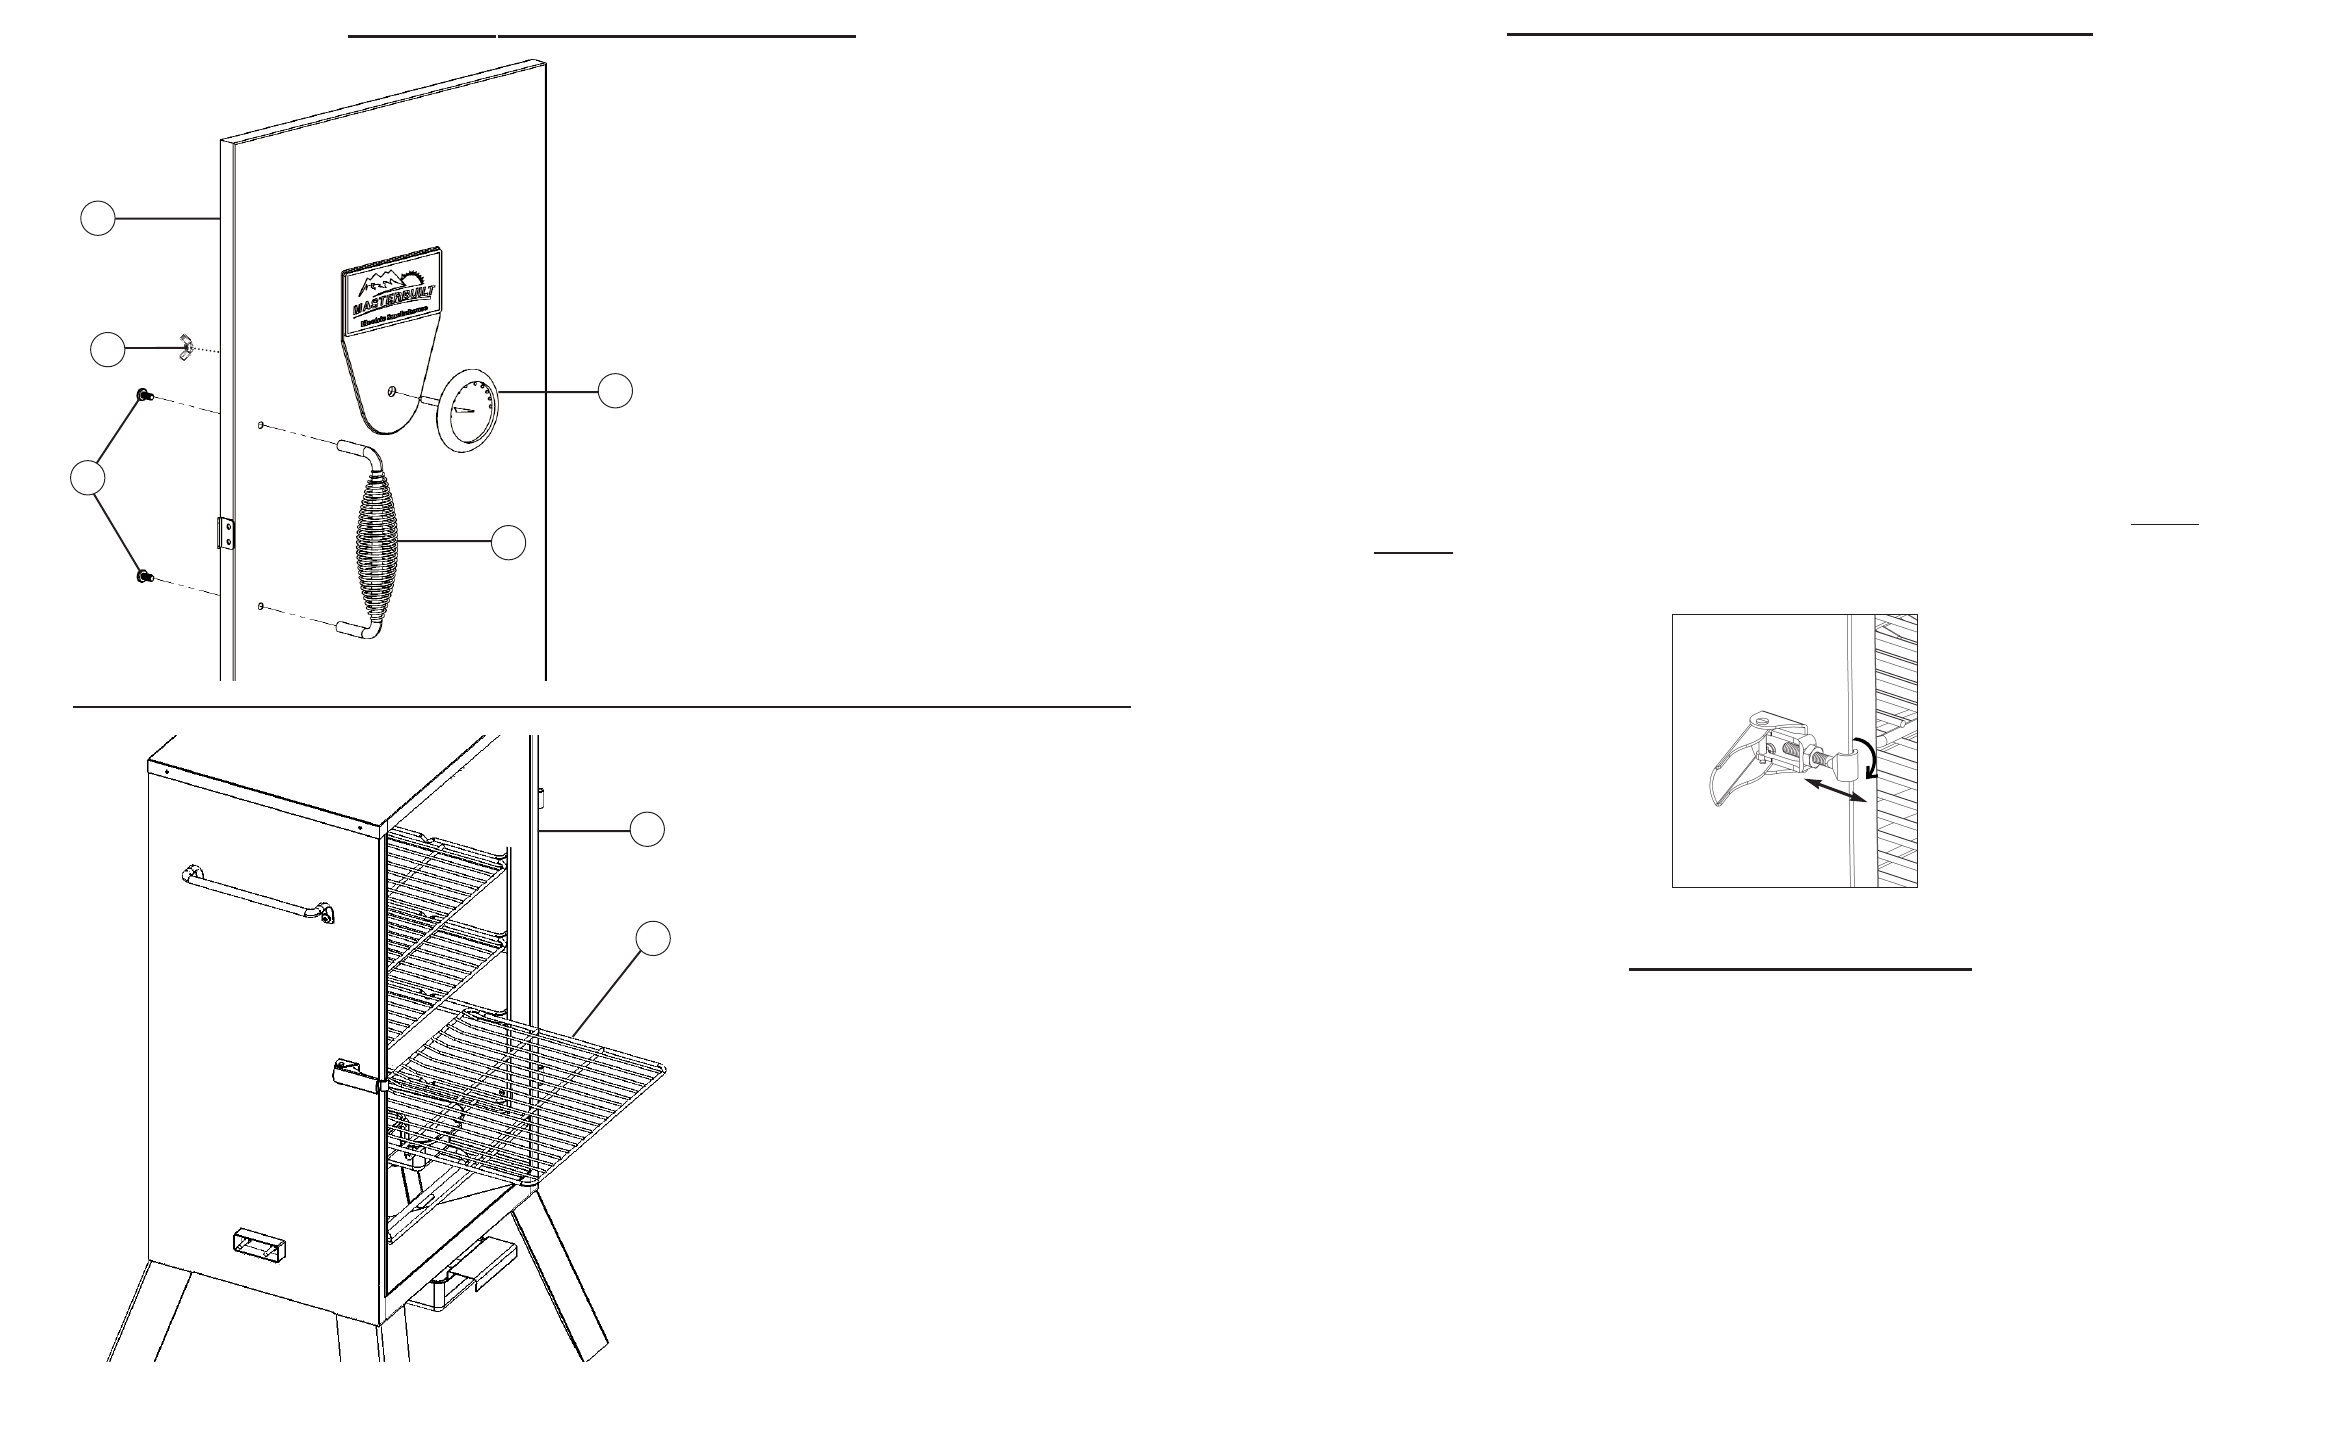
Step 3
Insert temperature gauge (16) stem
through hole in smoker door (9) as
shown. Secure with wing nut (C).
Mount door handle (10) to smoker
door (9) using screws (B).
SOME PARTS NOT SHOWN FOR
CLARITY
.
Step 4
Slide cooking grates (6) onto guides
inside smoker body (1).
10
9
16
B
HOW
TO CLEAN SMOKER
For cooking grates, water bowl and drip tray use a mild dish detergent. Rinse and
dry thoroughly.
For wood chip bowl, clean frequently to remove ash build up, residue and dust.
For the interior and exterior of smoker simply wipe down with a damp cloth. Do not
use a cleaning agent. Make sure to dry thoroughly.
ALWAYS MAKE SURE UNIT IS UNPLUGGED AND COOL
TO THE TOUCH BEFORE CLEANING AND STORING.
IMPORTANT FACTS ABOUT USING SMOKER
• Maximum temperature will range between 350°F- 400°F (177°C- 204°C) when
control panel is set on HI.
• Wood chip bowl MUST be in place when using smoker. This minimizes the chance
of wood flare ups.
• Wood chips must be used in order to produce smoke and create the smoke flavor.
See “Wood Smoking Guide for Meats” section in this manual.
• Check drip tray often during cooking. Empty drip tray before it gets full. Drip tray
may need to be emptied periodically during cooking.
• Do not open smoker door unless necessary. Opening smoker door causes heat to
escape and may cause wood to flare up. Closing the door will re-stabilize the
temperature and stop flare up.
• Do not leave old wood ashes in the wood tray. Once ashes are cold empty tray.
Tray should be cleaned out prior to and after each use to prevent ash buildup.
• This is a smoker. There will be a lot of smoke produced when using wood chips.
Smoke will escape through seams and turn the inside of smoker black. This is
normal. To minimize smoke loss around door, door latch can be adjusted to further
tighten door against body.
Loosen hex nut on door
latch. Turn hook clockwise
to tighten as shown.
Secure hex nut firmly
against door latch.
1
6
C
ASSEMBLY INSTRUCTIONS Continued


