Special offers from our partners!

Find Replacement BBQ Parts for 20,308 Models. Repair your BBQ today.

28
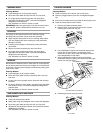
WARMING SHELF
Cleaning Method:
■ Liquid detergent or an all-purpose cleaner.
■ Rinse with clean water and dry with soft, lint-free cloth.
■ For tough spots or baked-on grease, use Heavy Duty
Degreaser Part Number 31552, a commercial degreaser
designed for stainless steel.
See “Assistance or Service” section to order.
IMPORTANT: Make sure gas supply is off and all control knobs
are in the OFF position. Make sure the side burner is cool.
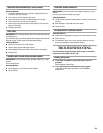
EXTERIOR
The quality of this material resists most stains and pitting,
providing that the surface is kept clean and protected.
■ Apply stainless steel polish to all non-cooking areas before
first use. Reapply after each cleaning to avoid permanent
damage to surface.
■ Cleaning should always be followed by rinsing with clean
warm water.
■ Wipe the surface completely dry with a soft cloth.
■ For tough spots or baked-on grease, use Heavy Duty
Degreaser Part Number 31552, a commercial degreaser
designed for stainless steel.
See “Assistance or Service” section to order.
INTERIOR
Discoloration of stainless steel on these parts is to be expected,
due to intense heat from the burners. Always rub in the direction
of the grain. Cleaning should always be followed by rinsing with
clean, warm water.
Cleaning Method:
■ Liquid detergent or all-purpose cleaner.
■ Rinse with clean water and dry completely with a soft, lint-
free cloth.
■ A heavy-duty scrub sponge can be used with mild cleaning
products.
■ For small, difficult-to-clean areas, use Heavy Duty Degreaser
Part Number 31552, a commercial degreaser designed for
stainless steel.
See “Assistance or Service” section to order.
SIDE BURNER CAPS AND GRATE
Cleaning Method:
■ Clean with a brass bristle brush.
■ Wash grate using mild detergent, warm water and degreaser.
■ Rinse with clean water and dry with soft, lint-free cloth.
■ KitchenAid
®
Stainless Steel Cleaner and Polish Part Number
4396920 (not included):
See “Assistance or Service” section to order.
U-SHAPED BURNERS
Cleaning Method:
■ Clean the exterior of the burner with a wire brush.
■ Clear any clogged burner ports with a straightened paper
clip.
■ Do not use a toothpick as it may break off and clog the port.
■ Check and clean burner/venturi tubes.
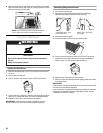
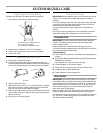
1. Remove grill grates and sear plates.
2. Remove the 2 screws that hold the burner in place.
Remove gas burner from the grill.
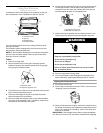
3. Use a flashlight to inspect into the burner through the
burner inlet to ensure there is no blockage. If any
obstruction is seen, use a metal coat hanger that has
been straightened to clear them.
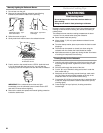
4. After inspecting the inside of burner for blockage,
reassemble burner by sliding the middle tube of the gas
burner over the gas orifice.
5. Reattach gas burner using 2 screws.
A.2 screws
A. Burner/orifice connection
A. 2 screws
A
A
A


