


Special offers from our partners!

Find Replacement BBQ Parts for 20,308 Models. Repair your BBQ today.

26
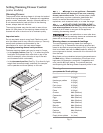
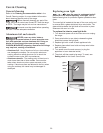
As soon as Self Clean becomes active, a motor driven
lock mechanism will begin locking the oven door
automatically, and door Loc will appear in the display
(See Fig. 1). DO NOT open the oven door when door
Loc is displayed (allow 15 seconds for the lock
mechanism to lock the oven).
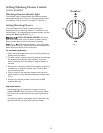
Once the oven door has locked, CLn will appear in the
display indicating Self Clean has started (Fig. 2).
Self Clean
Fig. 1
Fig. 2
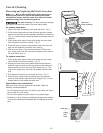
When Self Clean is finished:
Use caution when opening the oven door
after self-cleaning. The oven may still be VERY HOT and
can cause burns. To avoid possible burns stand to the
side of the oven when opening the oven door to allow hot
air or steam to escape.
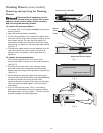
1. CLn message will turn off and Hot will appear in
display window (See Fig. 3).
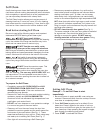
2. Once the oven has cooled down (about 1 hour) and
Hot is no longer displayed the door OPn message will
appear (Fig. 4). When this message turns off the
oven door may be opened.
3. When the oven interior has completely cooled, wipe
away any residue or powdered ash with a damp cloth
or paper towel.
Important notes:
The kitchen area should be well ventilated using an
open window, ventilation fan or exhaust hood during the
1st self-clean cycle. This will help eliminate the normal
odors associated with the 1st self-clean cycle.
If Self Clean is active and then interrupted by power
failure or cancelled before the oven was thoroughly
cleaned, it may be necessary to run a self-clean cycle
again. If the oven temperature was high enough when
interrupted you may need to allow up to 4 hours for the
oven to cool before Self Clean can be started again.
When the clean time finishes the oven door will remain
locked until the range has cooled sufficiently. In addition
to the clean time that was programmed, you must allow
about 1 additional hour for the oven to cool before you
will be able to open the oven door.
The Self Clean function will not operate whenever a
Control Lock is active.
Fig. 3
Fig. 4
Delayed Start Self Clean
Example To start a delay Self Clean with
default clean time of 3 hours and a start time of
9:00 oclock:
1. Be sure the clock is set with the correct time of day, the
oven is empty and ALL oven racks are removed. Be
sure oven door is completely closed.
2. Press Delay Start keypad.
3. Using numeric keypad enter 9 0 0 for time to start.
4. Press START to accept.
5. Press Self Clean keypad.
6. Press START.
If it becomes necessary to stop Self Clean when
active:
1. Press OFF.
2. If Self Clean has heated the oven to a high
temperature, allow enough time for the oven to cool
and for the door OPn message to appear (Fig. 4).
When this message turns OFF the oven door may be
opened.
3. Restart Self Clean if needed.
Important notes:
When Self Clean function is active you may check the
amount of clean time remaining by pressing the Self
Clean keypad once.
If your control is set with the default 12 hour display
mode, the Delay Self Clean can only be set to start up
to 11 hours and 59 minutes in advance. To set a Delay
Start Self Clean to begin 12 or more hours (maximum is
23 hours and 59 minutes) in advance, be sure to set the
control for 24 hour display mode.