


Special offers from our partners!

Find Replacement BBQ Parts for 20,308 Models. Repair your BBQ today.
www.desatech.com
122273-01A14
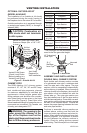
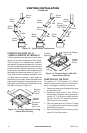
Figure 24 - Installing Brick
Brick
Stamped
Letter
Location
Brick Housing
Flanges
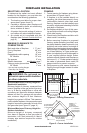
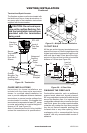
BRICK INSTALLATION
-
place is placed in a permanent
location.
The brick housings are already installed on
the panels. When installing brick housing
panels into replace, wear gloves as edges
may be sharp.
1. Beginning with left side panel, place
panel, bottom edge rst, at an angle into
replace. Secure to bottom of replace
with screws provided.
2. Install right side as left side in step 1 using
screws provided.
3. Install back panel and secure back to
sides and bottom of rebox with screws
provided.
4. Using self-tapping screws and a drill, place
screws into large holes in back and side
panels (see Parts, page 34), through wire
mesh and into rebox wrapper to secure.
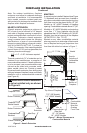
Figure 23 - Hole in Side Panel to Attach
to Firebox Wrapper
Hole in
Side Panel
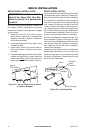
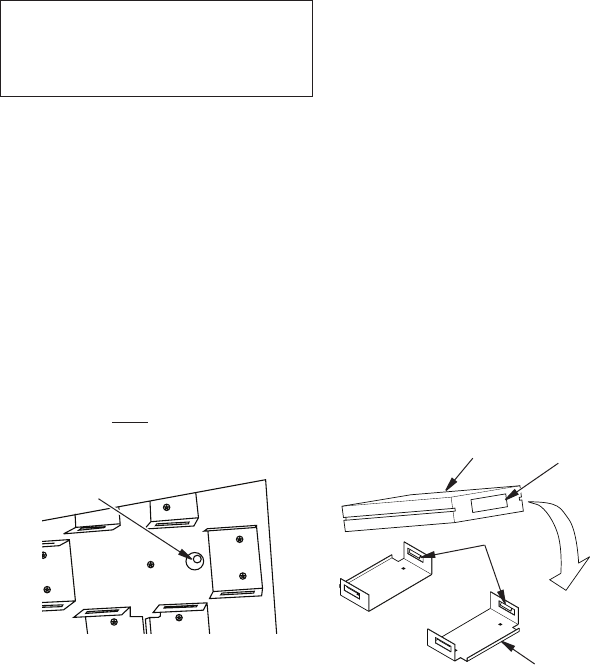
Each brick housing is stamped with a number
(full size bricks are not stamped). These num-
bers will help identify the brick when installing.
It is important to install these bricks exactly as
instructed. Press brick rmly into brick housing
until it snaps. Groove line on side of brick will
come in contact with ange on the brick hous-
ing. This secures brick into housing (see Figure
24). Smaller bricks may require a small portion
of furnace cement applied to back of brick to
secure it until grouting has been completed.
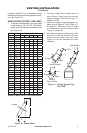
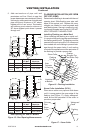
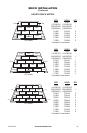
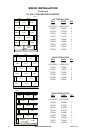
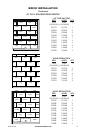
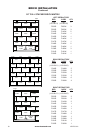
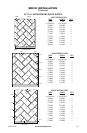
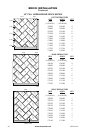
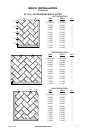
Bricks are packaged in separate boxes. The
brick matrixes on pages 15 through 27 show
how bricks are packaged and placed for each
size replace and the number of bricks per
box. There are 2 extra full bricks included in
Hearth Brick package.
Install bricks one section at a time starting with
hearth panel followed by the rear panel, left
panel and right panel. It is important to install
the bricks in sequence. Please note, full size
bricks are NOT stamped.