


Special offers from our partners!

Find Replacement BBQ Parts for 20,308 Models. Repair your BBQ today.
Page 11B101361-0-1008
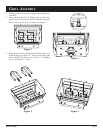
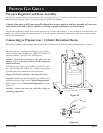
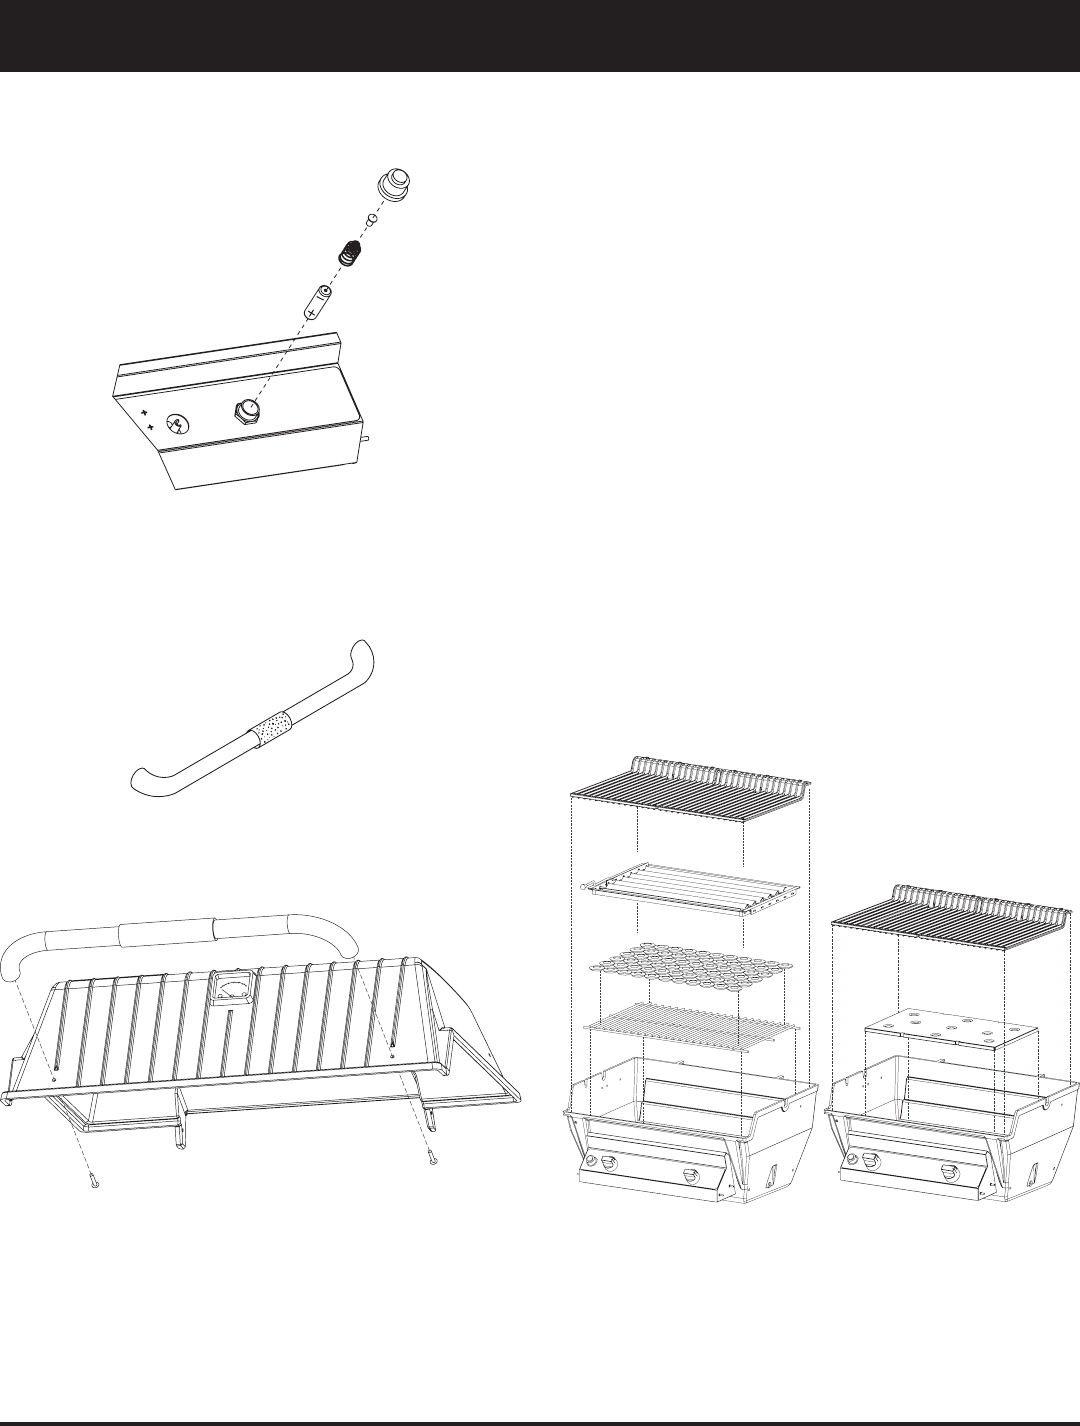
8. Re-attach the ignitor to the control panel , then tighten
nut and insert AA battery, positive side down, and re-
place ignitor button. See Figure 9.
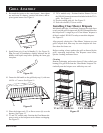
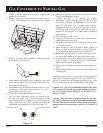
9. Install foam grip (4) on lid handle (3). See Figure 10.
Tip: For ease of installation, slightly lubricate the lid
handle with liquid soap before pushing the foam grip
into place.
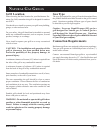
10. Fasten the lid handle to the grill body top (1) with two
#10-24 x 1" screws. See Figure 11.
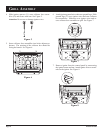
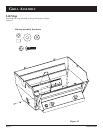
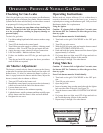
11. Place the briquet rack (7) or flavor screen (9) over the
burners. See Figure 12.
12. T3 and T3C models only: Position the Char-Master bri-
quets evenly on the briquette rack without overlapping.
See Figure 12.
Figure 9
Figure 10
Figure 11
GRILL ASSEMBLY
13. T3CA models only: Position Smoker Shutter (26) see
the DPA100 instruction manual included with the T3CA
grills. See Figure 12.
14 Set the cooking grids (6). See Figure 12.
15. Push valve knobs (22) on to valves.
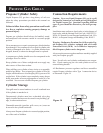
Installing Char-Master Briquets
Individually place the ‘Char-Master’ briquets in a single layer
evenly on your grill’s briquet rack; DO NOT dump them onto
the briquet rack. A single layer of ‘Char-Master’ briquets is
all that’s needed. DO NOT overlap or stack the briquets.
See Figure 12.
After properly placing the ‘Char-Master’ briquets on your
grill’s briquet rack, there may be some briquets left over.
Save them for future use.
Before cooking, always preheat the grill as directed by the
grill’s operating instructions. Hot briquets cause better,
quicker cooking and better flavor.
Cleaning
Routine preheating and routine burn-off (also called post
heating) of a grill will clean the ‘Char-Master’ briquets. Pe-
riodically turn the briquets over while they are cool.
Figure 12
T3 & T3C MODELS T3CF MODELS