


Special offers from our partners!

Find Replacement BBQ Parts for 20,308 Models. Repair your BBQ today.

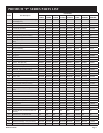
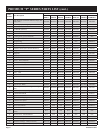
Page 9B101362-2-0610
Before You Begin
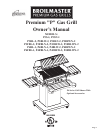
All Broilmaster grills require some assembly and installation.
Follow all instructions unless noted to apply only to other specic
models.
If you purchased an accessory with your Broilmaster, follow
the instructions provided with the accessory for assembly and
installation. If an instruction refers to a step that is not required
for your grill model, please continue to the next step.
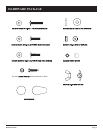
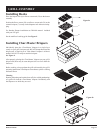
Each step of the installation is illustrated. In each illustration
parts are identied with “Key” numbers. Key numbers appear in
parenthesis after a part name is mentioned for the rst time in the
instructions and are labeled on the illustrations. You can reference
each part by its key number on the Parts List if you need help in
identifying a part.
Compare the parts found in the shipping container to the parts list
provided. If any parts are missing contact your Broilmaster
®
dealer
before beginning assembly.
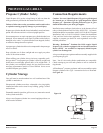
CAUTION: FOR YOUR SAFETY
Parts may have sharp edges. Wear leather work gloves and
handle parts carefully during the unpacking, assembly and
installation.
GRILL ASSEMBLY
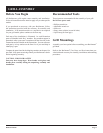
Recommended Tools
These items are recommended for the assembly of your grill:
Do NOT use power tools.
• Phillips screwdriver
• Adjustable wrench set
• Socket set
• Soapy water solution (to test for leaks)
• Liquid soap (for foam grip)
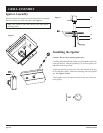
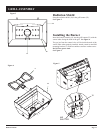
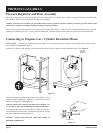
Grill Mountings
Assemble your base option before assembling your Broilmaster
®
grill head.
Refer to the Broilmaster
®
Cart, Base, and Post instructions pro-
vided with each accessory for assembly, installation, and mounting
procedures.