


Special offers from our partners!

Find Replacement BBQ Parts for 20,308 Models. Repair your BBQ today.

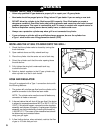
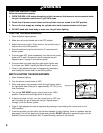
LIGHTING INSTRUCTIONS:
Follow the instructions exactly.
1. OPEN THE GRILL LID before attempting to light a burner so that fumes do not accumulate inside
the grill. An explosion could occur if grill lid is down.
2. Check that all burner control knobs and the cylinder valve are turned to the OFF position.
3. Turn on the fuel supply by rotating the cylinder valve knob counterclockwise to full open.
4. DO NOT stand with head, body, or arms over the grill when lighting.
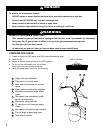
LIGHTING THE MAIN BURNERS:
1. Open lid before lighting burner.
2. Make sure all control knobs are in the OFF position.
3. Select the burner to be lit. Push and turn the control knob of
that burner to the HIGH position.
4. Press the electronic igniter and hold for 3-5 seconds until
burner ignites.
5. If burner does NOT ignite immediately, turn the burner control
knob to OFF, wait 5 minutes for gas to evacuate the grill.
Repeat steps 1 through 5 until burner ignites.
6. If burner does not ignite using the push button igniter wait
5 minutes, see "Match Lighting the Main Burners" section.
7. Once lit, light adjacent burners in sequence by pressing in
and rotating the control knob to the HIGH position.
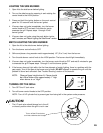
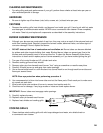
MATCH LIGHTING THE MAIN BURNERS:
1. Open lid before lighting.
2. Turn the burner control knobs to OFF.
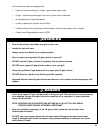
3. Strike and place a long wooden match through lighting hole in
the right hand side of the grill to approximately 1/2" (2 to 3 cm)
from the burner.
4. Turn on the FAR RIGHT burner control knob to the HIGH
position. The burner should light within 5 seconds.
5. If the burner does not light, turn the control knob to OFF and
wait 5 minutes for gas to evacuate the grill. Repeat steps 1
through 5 until the burner ignites.
6. Once lit, light adjacent burners in sequence by pressing in and rotating the control knob to the
HIGH position.
7. If the burner does not light within the first few attempts of match lighting, there is a problem with the
gas supply. Turn off the gas at the burner and cylinder. DO NOT attempt to operate the grill until the
problem is found and corrected. See “Trouble Shooting” section of this manual.
WARNING
9
Lighting Hole