


Special offers from our partners!

Find Replacement BBQ Parts for 20,308 Models. Repair your BBQ today.
6
WARNING
• Never use your grill without leak testing all gas connections and hoses. See the section on
"Leak Testing" in this manual for proper procedures.
The pressure regulator and hose assembly supplied with your gas grill is designed to work with an
LP gas supply cylinder.
• DO NOT attempt to connect it to any other fuel supply source such as a natural gas line.
• DO NOT use any other pressure regulator/hose assembly other than the one supplied with your grill.
• DO NOT attempt to adjust or repair the regulator. A replacement regulator can be supplied by
contacting Brinkmann. The regulator is designed to operate at a maximum output pressure of
11 inches of water column (2.74 kPa).
During assembly and/or replacement of the gas cylinder, keep the gas supply hose free of kinks and/or
damage.
Visually inspect the hose assembly prior to each use for evidence of damage, excess wear, or
deterioration. If found, replace the assembly before using your grill. Only the Brinkmann supplied
replacement should be used.
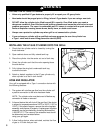
CONNECTING HOSE AND REGULATOR TO AN LP GAS CYLINDER
• Insure the tank valve is CLOSED prior to connecting the LP gas cylinder to your grill. Turn the
valve knob clockwise to properly close the valve. Read and follow all instructions and warnings
on the supply hose safety tags. Read and follow all warnings in this manual concerning the safe
use of LP gas cylinders and the hose and regulator before connecting cylinder to grill. Read
and follow all warnings on the LP cylinder.
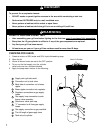
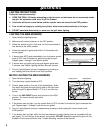
1. Check that the cylinder valve is closed by turning the knob clockwise.
2. Check that the grill’s burner knobs are in the OFF positions.
3. Remove the protective plastic cap from the cylinder valve and the connection device.
4. Insert the nipple of connection device into the valve outlet. Insure that the device is centered properly.
5. Turn the large coupling nut clockwise by hand and tighten to a full stop. Take care not to cross thread
the coupling nut onto the cylinder valve. Do not over-tighten the knob onto the valve. Do not use tools
to tighten connection.
NOTE: If you are unable to make the connection, repeat steps 4 and 5.
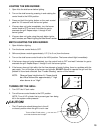
6. Check that the hose does not contain kinks, does not contact sharp edges, and does not contact
surfaces that may become hot during use.
7. Leak check all fittings before lighting your grill. See section on "Leak Testing" in this manual.
WARNING
WARNING