


Special offers from our partners!

Find Replacement BBQ Parts for 20,308 Models. Repair your BBQ today.
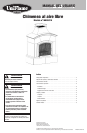
GOLD
Outdoor Fireplace Model No. WAF607A
Contact 1.800.762.1142 for assistance. Do not return to place of purchase.
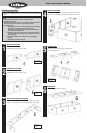
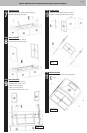
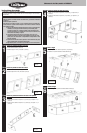
Step
1
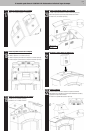
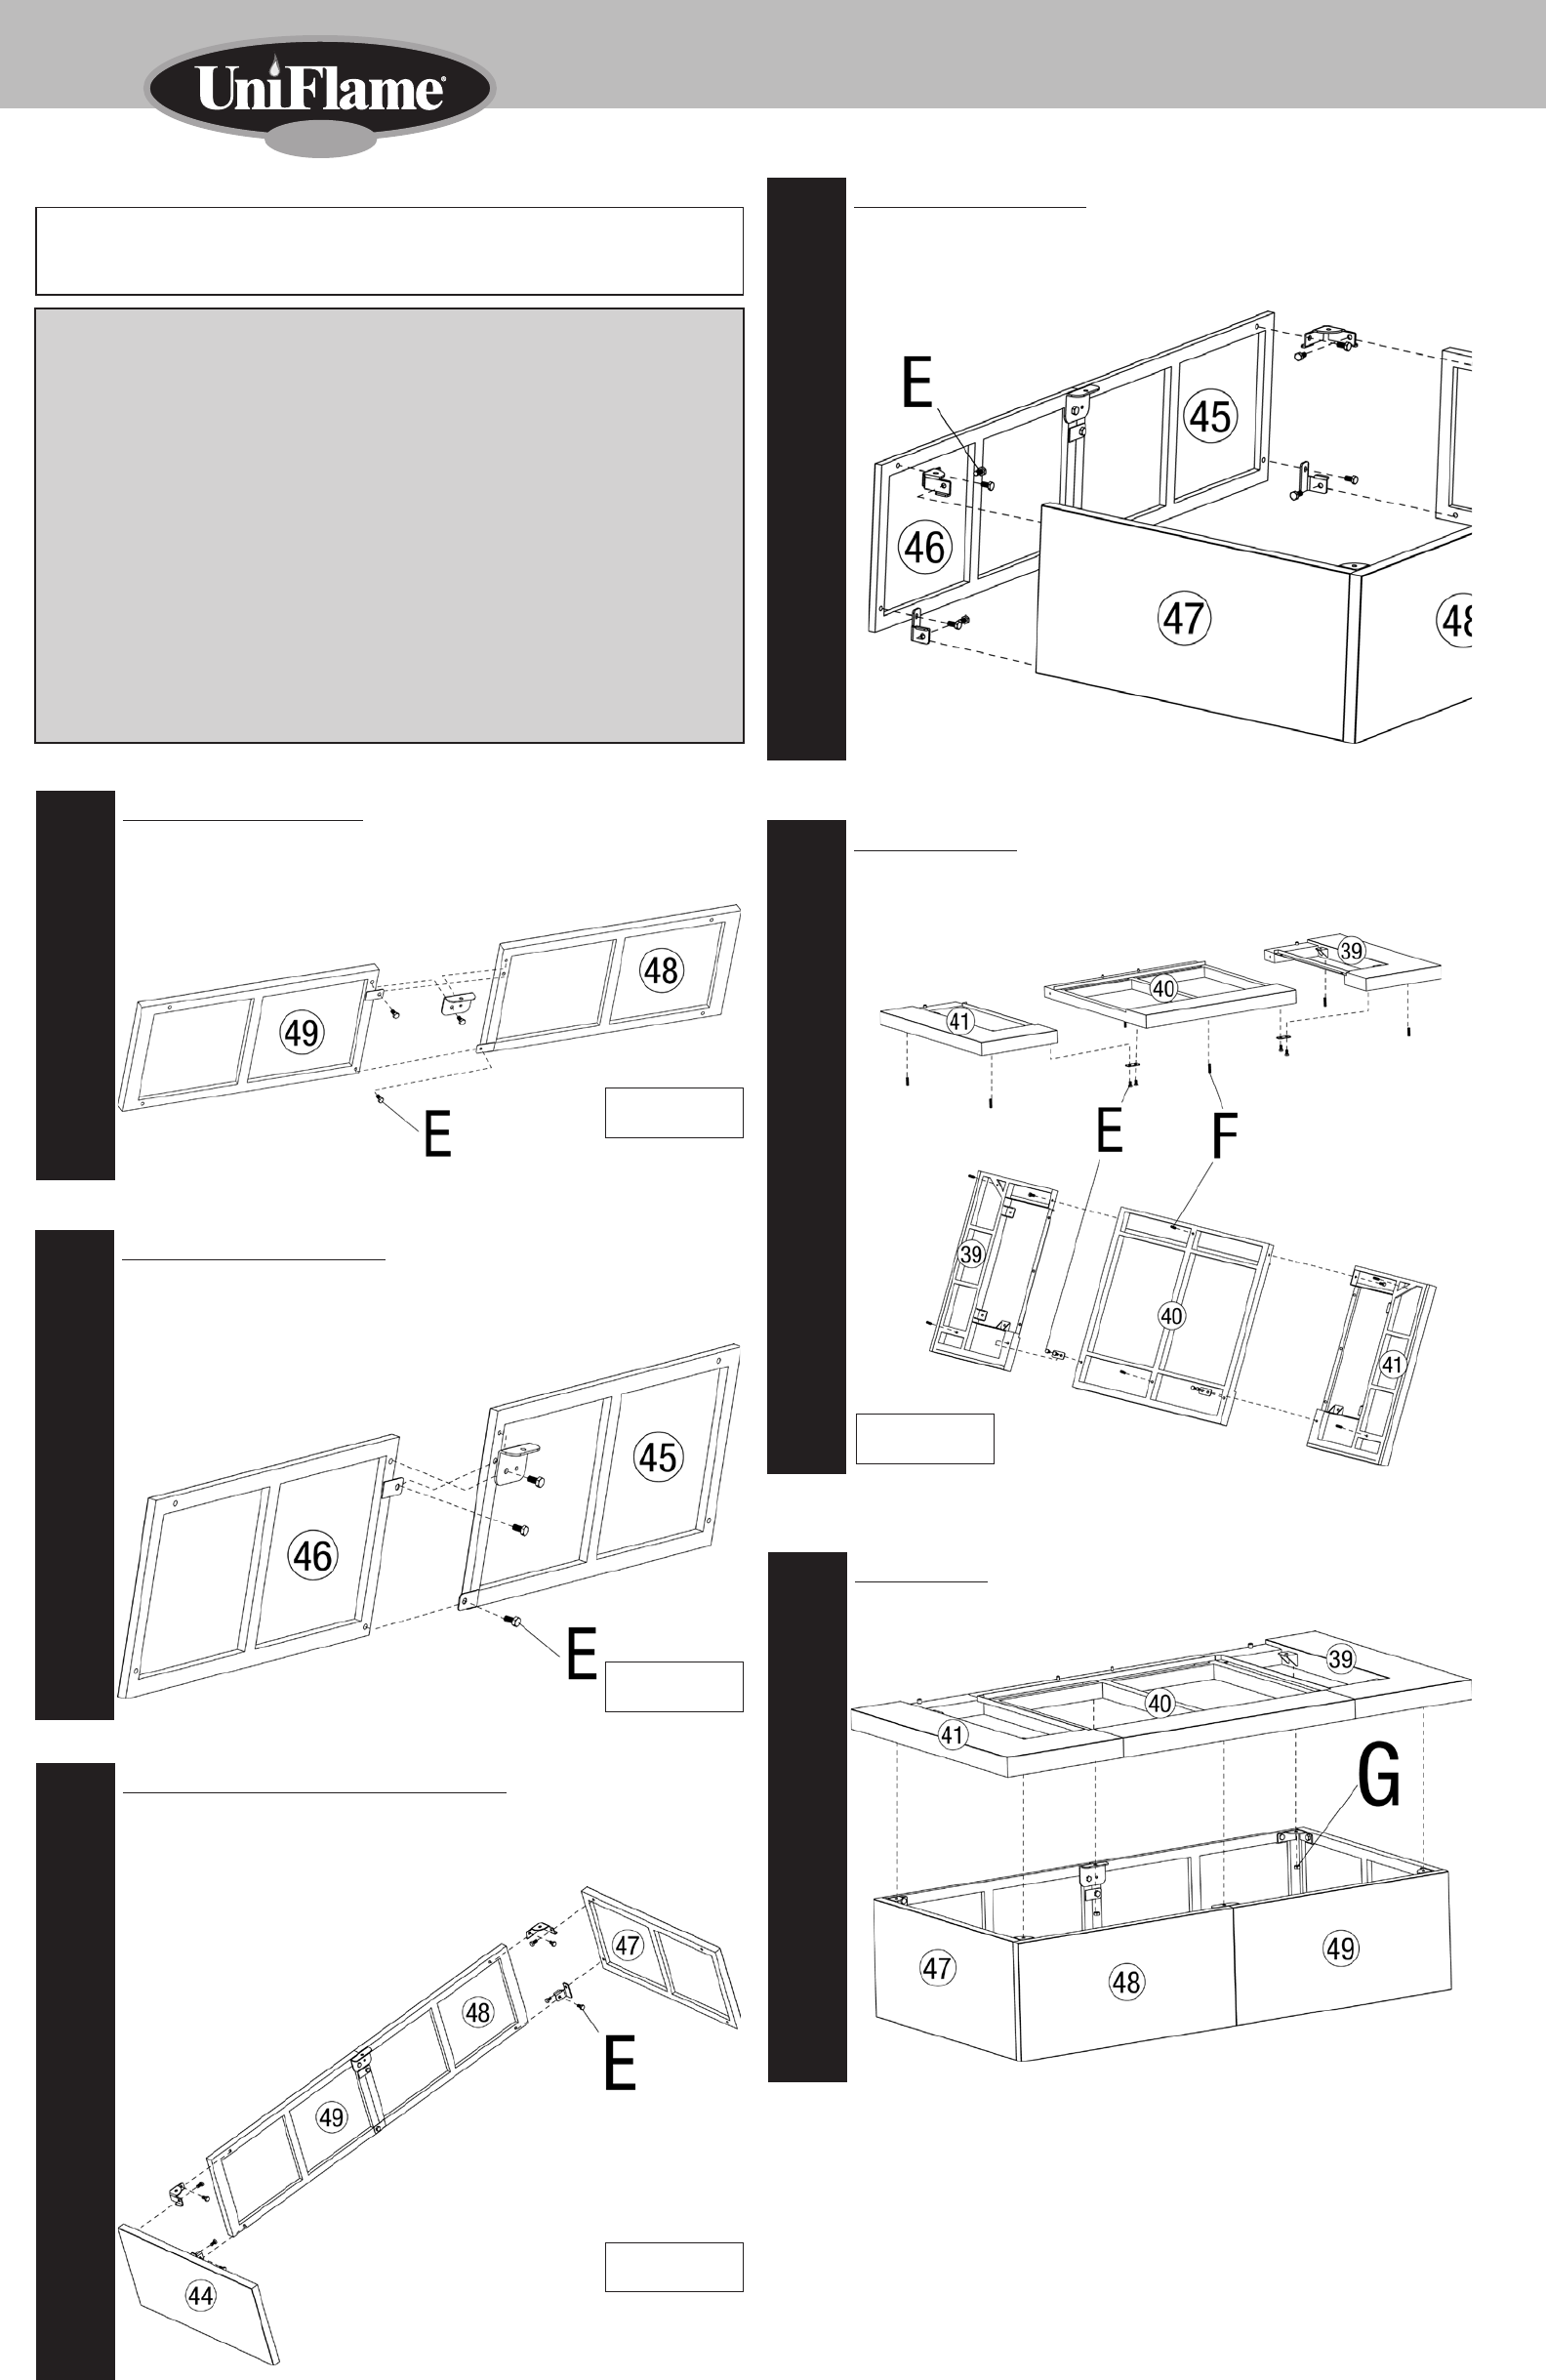
Attach front base panels
A. Attach 48 to 49 using 2 bolts (E).
B. Attach bracket K to 48 and 49 using 1 bolt (E).
Step
2
Assemble rear base panels
A. Attach 46 to 45 using and 2 bolts (E).
B. Attach bracket K to 46 and 45 using 1 bolt (E).
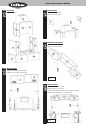
Step
3
Attach side base panels to front panels
A. Attach 44 to 49 using bracket G and 2 bolts (E), and bracket H and 2 bolts (E).
B. Attach 47 to 48 using bracket G and 2 bolts (E), and bracket J and 2 bolts (E).
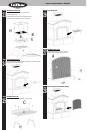
Step
6
Attach hearth
Secure hearth to base panels using 6 nuts (G).
Assembly Instructions
DO NOT RETURN PRODUCT TO STORE.
For assistance call 1-800-762-1142 toll free. Please have your owner’s manual available for
reference.
Step
4
Attach rear base panels
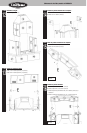
A. Attach 46 to 47 using bracket G and 2 bolts (E), and bracket H and 2 bolts (E).
B. Attach 45 to 44 using bracket G and 2 bolts (E), and bracket J and 2 bolts (E).
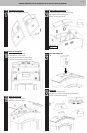
Step
5
Assemble hearth
A. Attach 41 and 39 to 40 using 2 brackets C and 6 bolts (E).
B. Attach 6 two sided bolts (F).
Note: Parts shown
from back.
Note: Parts shown
from back.
Note: Parts shown
from back.
Note: Parts shown
upside down.
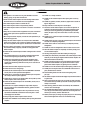
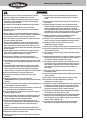
NOTICE
1. Before starting assembly read all cautions and warnings on page 2.
2. Assembly requires 2 people.
3. This fireplace is heavy and relocation is not recommended. Assembly must be done
where the unit will be used. Prepare area prior to starting assembly.
4. For ease of assembly:
A. Carefully remove all inner cartons from the packing crate first. Remember
the contents may be fragile so handle with appropriate care.
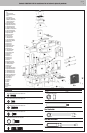
Each component is labeled on the back with a letter that is noted in the
instructions. Do not substitute parts.
B. Hardware is contained in 4 packs (in box 2). The hardware and brackets
are grouped by step. To avoid losing parts, open only the cell for the step
you are performing.
C. Hand tighten all hardware first. At the end of each step fully tighten
hardware.
D. Follow all steps in the order shown here.