


Special offers from our partners!

Find Replacement BBQ Parts for 20,308 Models. Repair your BBQ today.
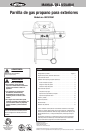
Outdoor LP Gas Barbecue Grill Model No. GBC9129M
Contact 1.800.762.1142 for assistance. Do not return to place of purchase.
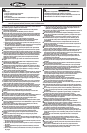
Operating Side Burner
NOTE: Side burner can be used while main burners
are operating.
Never use side burner as a grill.
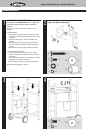
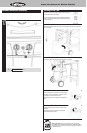
Lighting
1. Open lid. Attempting to light the burner with the
lid closed may cause an explosion!
2. Make sure there are no obstructions of airflow to the
burner. Spiders and insects can nest within and clog
the burner / venturi tube at the orifice. A clogged
burner tube can lead to a fire beneath the appliance.
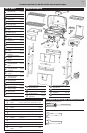
3. Control knob must be in the “OFF” position.
(Figure 7)
4. Turn LP gas tank valve to “OPEN”.
5. Push and turn control knob counterclockwise to
“HIGH”.
6. Press the electronic igniter button and hold for 5
seconds to light burner.
7. If ignition does not occur in 5 seconds, turn burner
control knob “OFF”, wait 5 minutes, and repeat
lighting procedure.
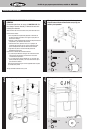
8. If igniter does not light burner, use a lit match
secured with the lighting rod provided to light
burners manually. Position the lit match near side of
the burner. (Figure 8)
Important: Always use the lighting rod provided when
lighting burners with a match.
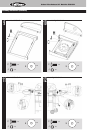
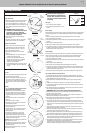
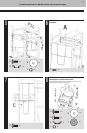
9. After lighting, observe the burner flame, make sure
all burner ports are lit and flame height matches
illustration. (Figure 9)
CAUTION: If burner flame goes out
during operation, immediately turn the
gas “OFF” and open lid to let the gas
clear for about 5 minutes before re-lighting.
Turning Off
1. Turn LP gas tank valve to “CLOSED”.
2. Turn control knob clockwise to the “OFF” position.
Note: A “poof” sound is normal as the last of the LP gas is burned.
Cooking
1. Open lid and ignite the burner per lighting instructions in owner’s manual.
2. Adjust controls to desired flame height.
3. Place pan on center of grid.
4. Cook and adjust temperature as needed.
5. Turn grill OFF by turning the LP gas tank valve to “CLOSED”. Burn off remaining gas in lines
by waiting 15 seconds then turn all burner controls to the “OFF” position. A “poof” sound is
normal as the last of the LP gas is burned.
Cleaning and Care
CAUTION:
1. All cleaning and maintenance should
be done when grill is cool and with
the fuel supply disconnected.
2. DO NOT clean any grill part in a self
cleaning oven. The extreme heat will
damage the finish.
Notices
1. This grill should be thoroughly cleaned and
inspected on a regular basis.
2. Abrasive cleaners will damage this product.
3. Never use oven cleaner to clean any part of grill.
4. Do not clean any grill part in a self cleaning
oven. The extreme heat will damage the finish.
Before Each Use:
1. Keep the grill area clean and free from any
combustible materials, gasoline, and other
flammable vapors and liquids.
2. Do not obstruct the flow of the combustion of LP
and the ventilation air.
3. Keep the ventilation opening(s) of the LP gas tank
area free and clear from debris.
4. Visually check the burner flames to make sure your
grill is working properly.
Figure 9
Burner
Flame
Slight
Yellow
Slight
Blue
Dark
Blue
Figure 7
Figure 8
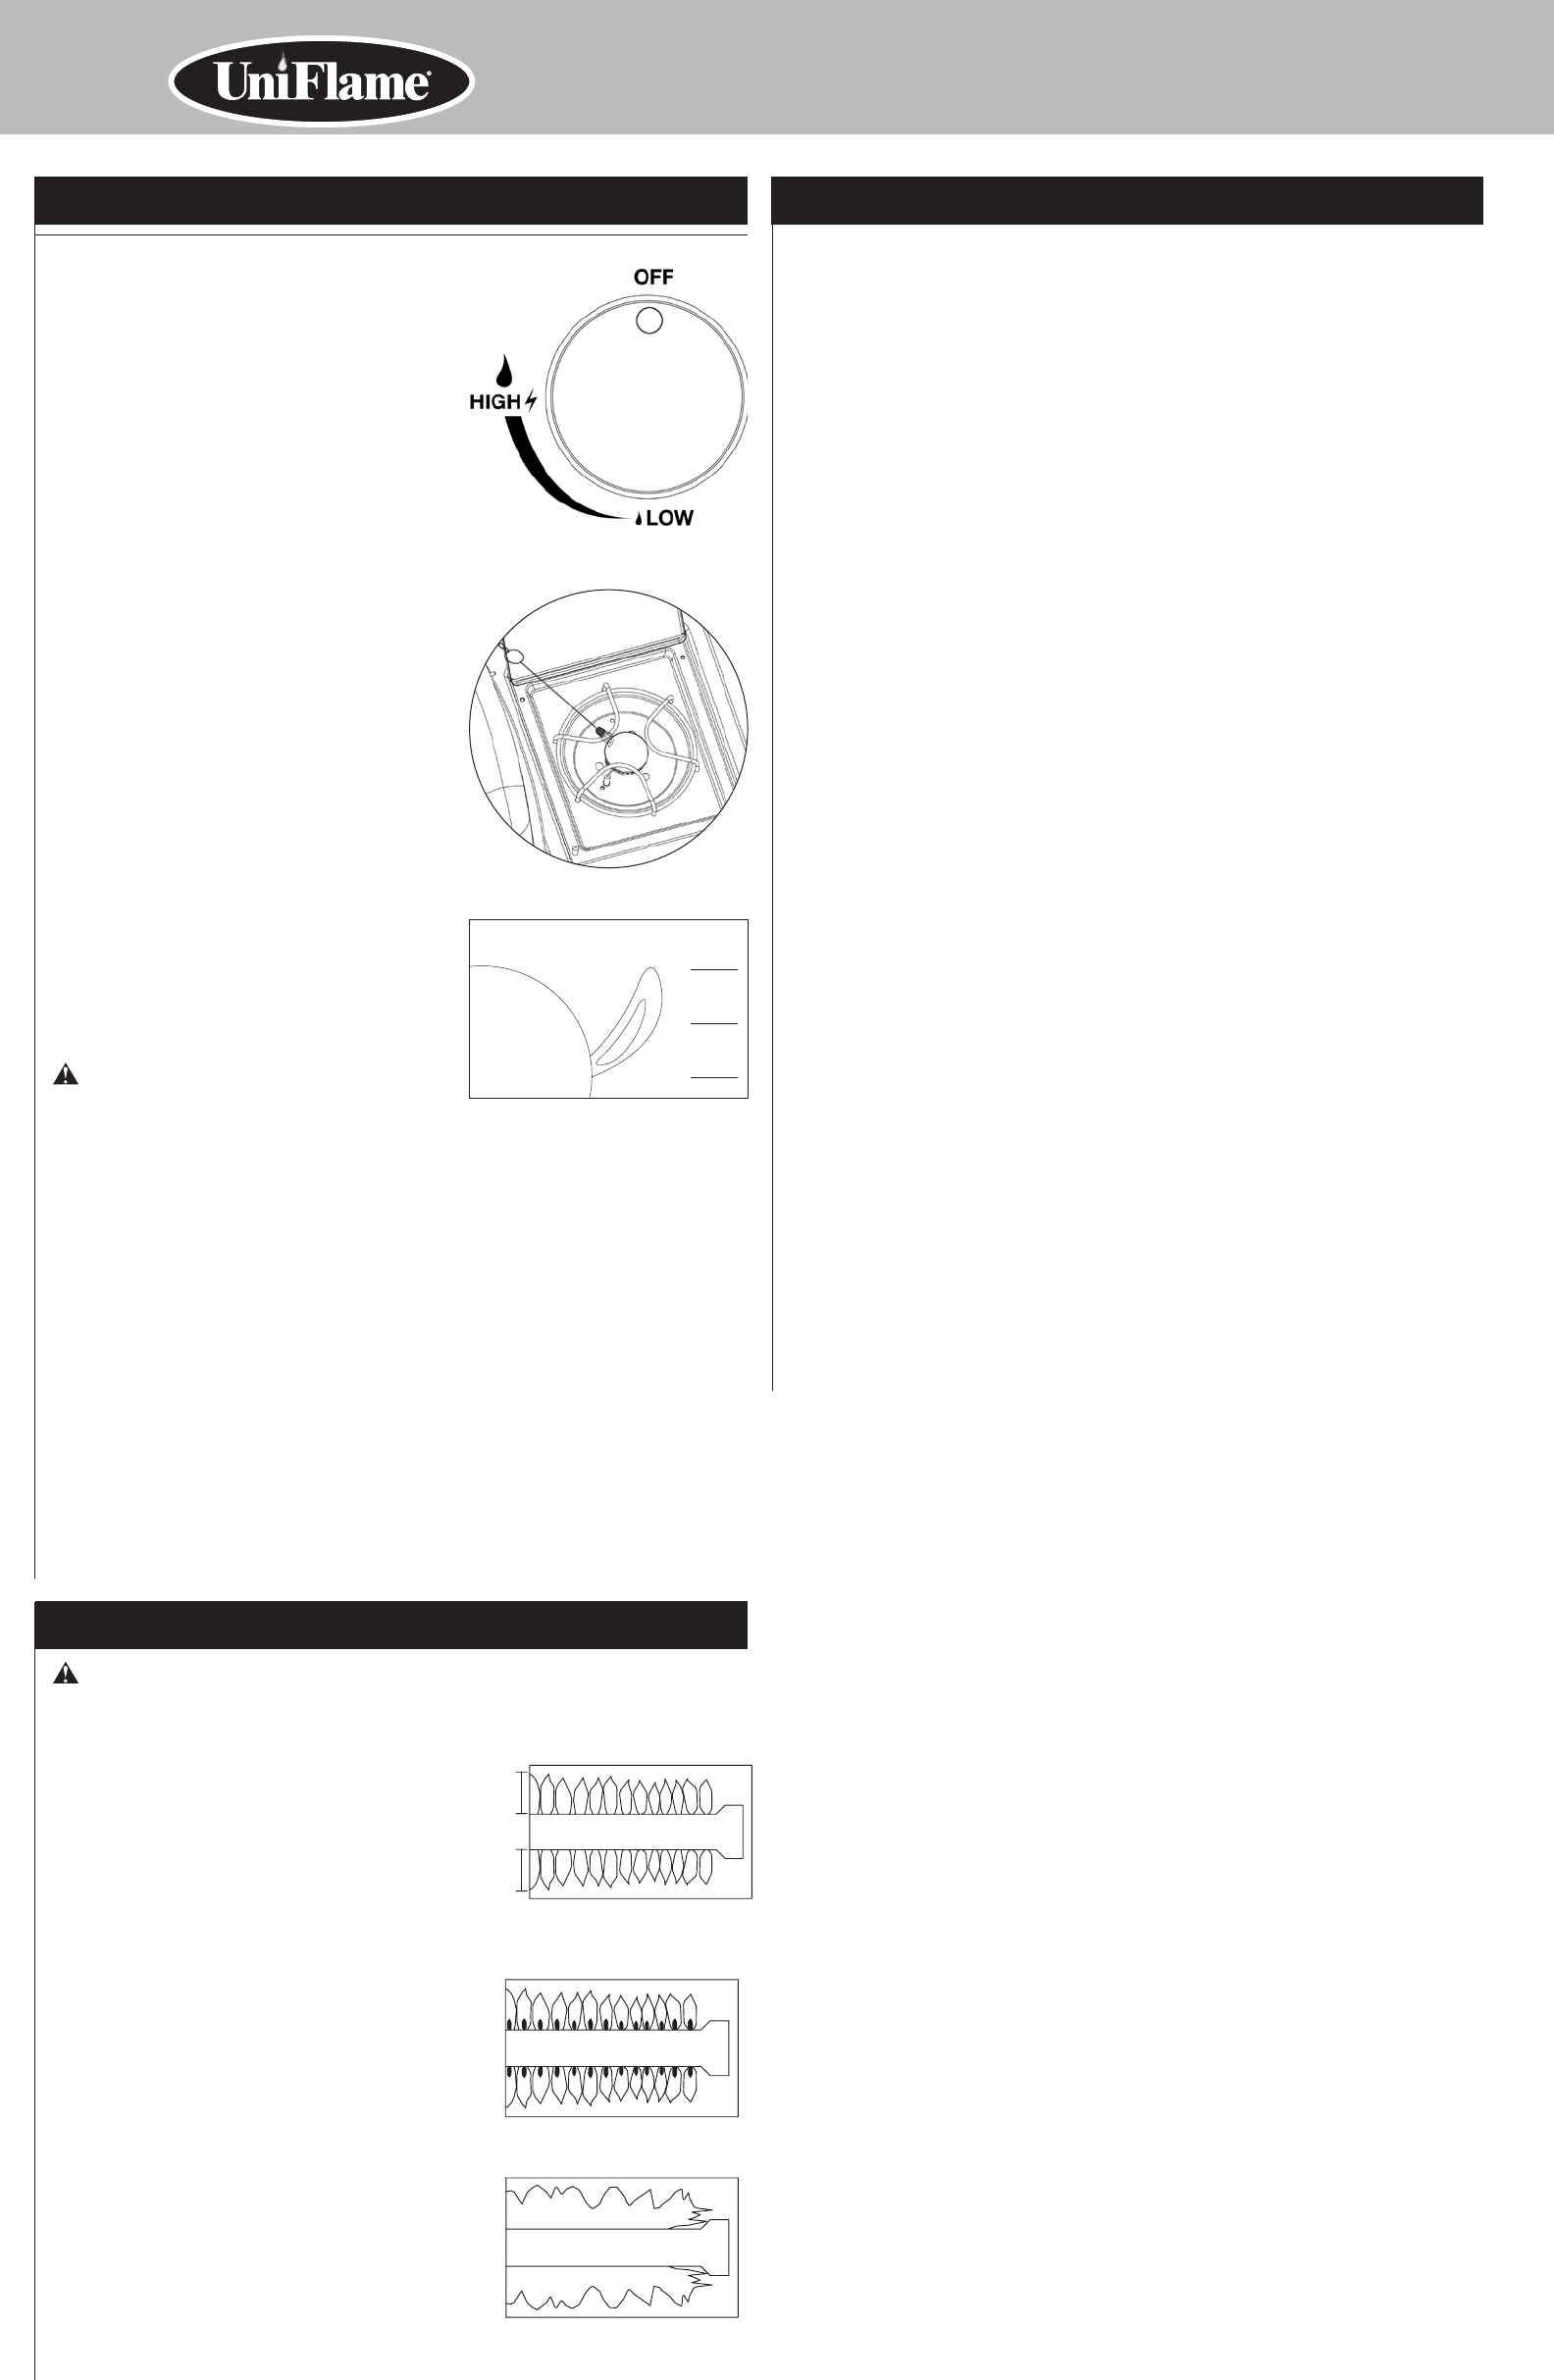
Figure 10
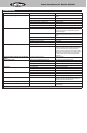
Burner Flame Conditions
Use this chart check to see if your
burners need to be cleaned.
1-2 in. /
25.4 - 50.8 mm
1-2 in. /
25.4 - 50.8 mm
Normal: Soft blue flames with
yellow tips between 1 in. - 2 in.
hight.
Needs Cleaning: Noisy with hard
blue flames.
Has to be cleaned: Wavy with
yellow flames.
5. See sections below for proper cleaning instructions.
6. Check and clean the burner/venturi tubes for insects and insect nests. A clogged tube can
lead to a fire beneath the grill.
Cleaning Surfaces
1. Wipe surfaces clean with mild dishwashing detergent or baking soda mixed with water.
2. For stubborn surfaces use a citrus based degreaser and a nylon scrubbing brush.
3. Rinse clean with water.
4. Allow to air dry.
Cleaning Main Burner
1. Turn gas “OFF” at the control knobs and LP gas tank valve to “CLOSED”.
2. Remove cooking grid and heat plates.
3. Remove burner by removing the fasteners securing the burner to the grill bottom.
4. Lift burner up and away from gas valve orifice.
5. Disconnect wire from spark electrode.
6. Clean inlet (venturi) of burner with small bottle brush or compressed air.
7. Remove all food residue and dirt on burner surface.
8. Clean any clogged ports with a stiff wire (such as an opened paper clip)
9. Inspect burner for any damage (cracks or holes). If damage is found, replace with new
burner.
10. Reinstall burner, check to insure that gas valve orifice is correctly positioned inside burner
inlet (venturi). Also check position of spark electrode.
11. Replace heat plate and cooking grid.
12. Perform leak test.
Cleaning Side Burner
1. Turn gas “OFF” at the control knobs and LP gas tank valve to “CLOSED”.
2. Remove side burner grid.
3. Remove burner by removing the screws securing the burner to the side shelf.
4. Lift burner up and away from gas valve orifice.
5. Clean inlet (venturi) of burner with small bottle brush or compressed air.
6. Remove all food residue and dirt on burner surface.
7. Clean any clogged ports with a stiff wire (such as an opened paper clip)
8. Inspect burner for any damage (cracks or holes). If damage is found, replace with new
burner.
9. Reinstall burner, check to insure that gas valve orifice is correctly positioned inside burner
inlet (venturi). Also check position of spark electrode.
10. Replace cooking grid.
11. Perform leak test.
Cleaning and Care (continued)Operating Instructions (continued)