


Special offers from our partners!

Find Replacement BBQ Parts for 20,308 Models. Repair your BBQ today.
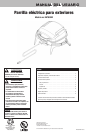
Contact 1.800.762.1142 for assistance. Do not return to place of purchase.
For great recipes and tips, visit recipes.uniflame.com
page no.
5
5
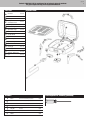
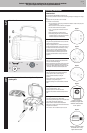
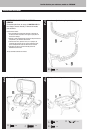
Attach Handle
E
x 2
F
x 2
G
x 2
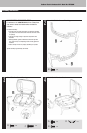
Assembly Instructions
6
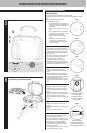
Insert Temperature Control Assembly, Grease Cup and
Cooking Grid
Extension Cord
Note: Grill functions best WITHOUT an extension cord.
The short cord is provided to reduce the risk of becoming entangled in or tripping over a longer
cord.
An extension cord may be used, if care is exercised.
If an extension cord is necessary:
• Use a UL approved, 3 prong plug (grounded) that is rated for at least 15 amperes, and
suitable for outdoor use.
• Never connect two or more extension cords together.
• Use the shortest extension cord possible.
• A 12- or 14-gauge cord of less than 50 feet is
preferable.
• Keep connections dry and off the ground.
• Avoid draping the grill cord over the countertop
or tabletop where it can be pulled on by children,
animals or tripped over unintentionally.
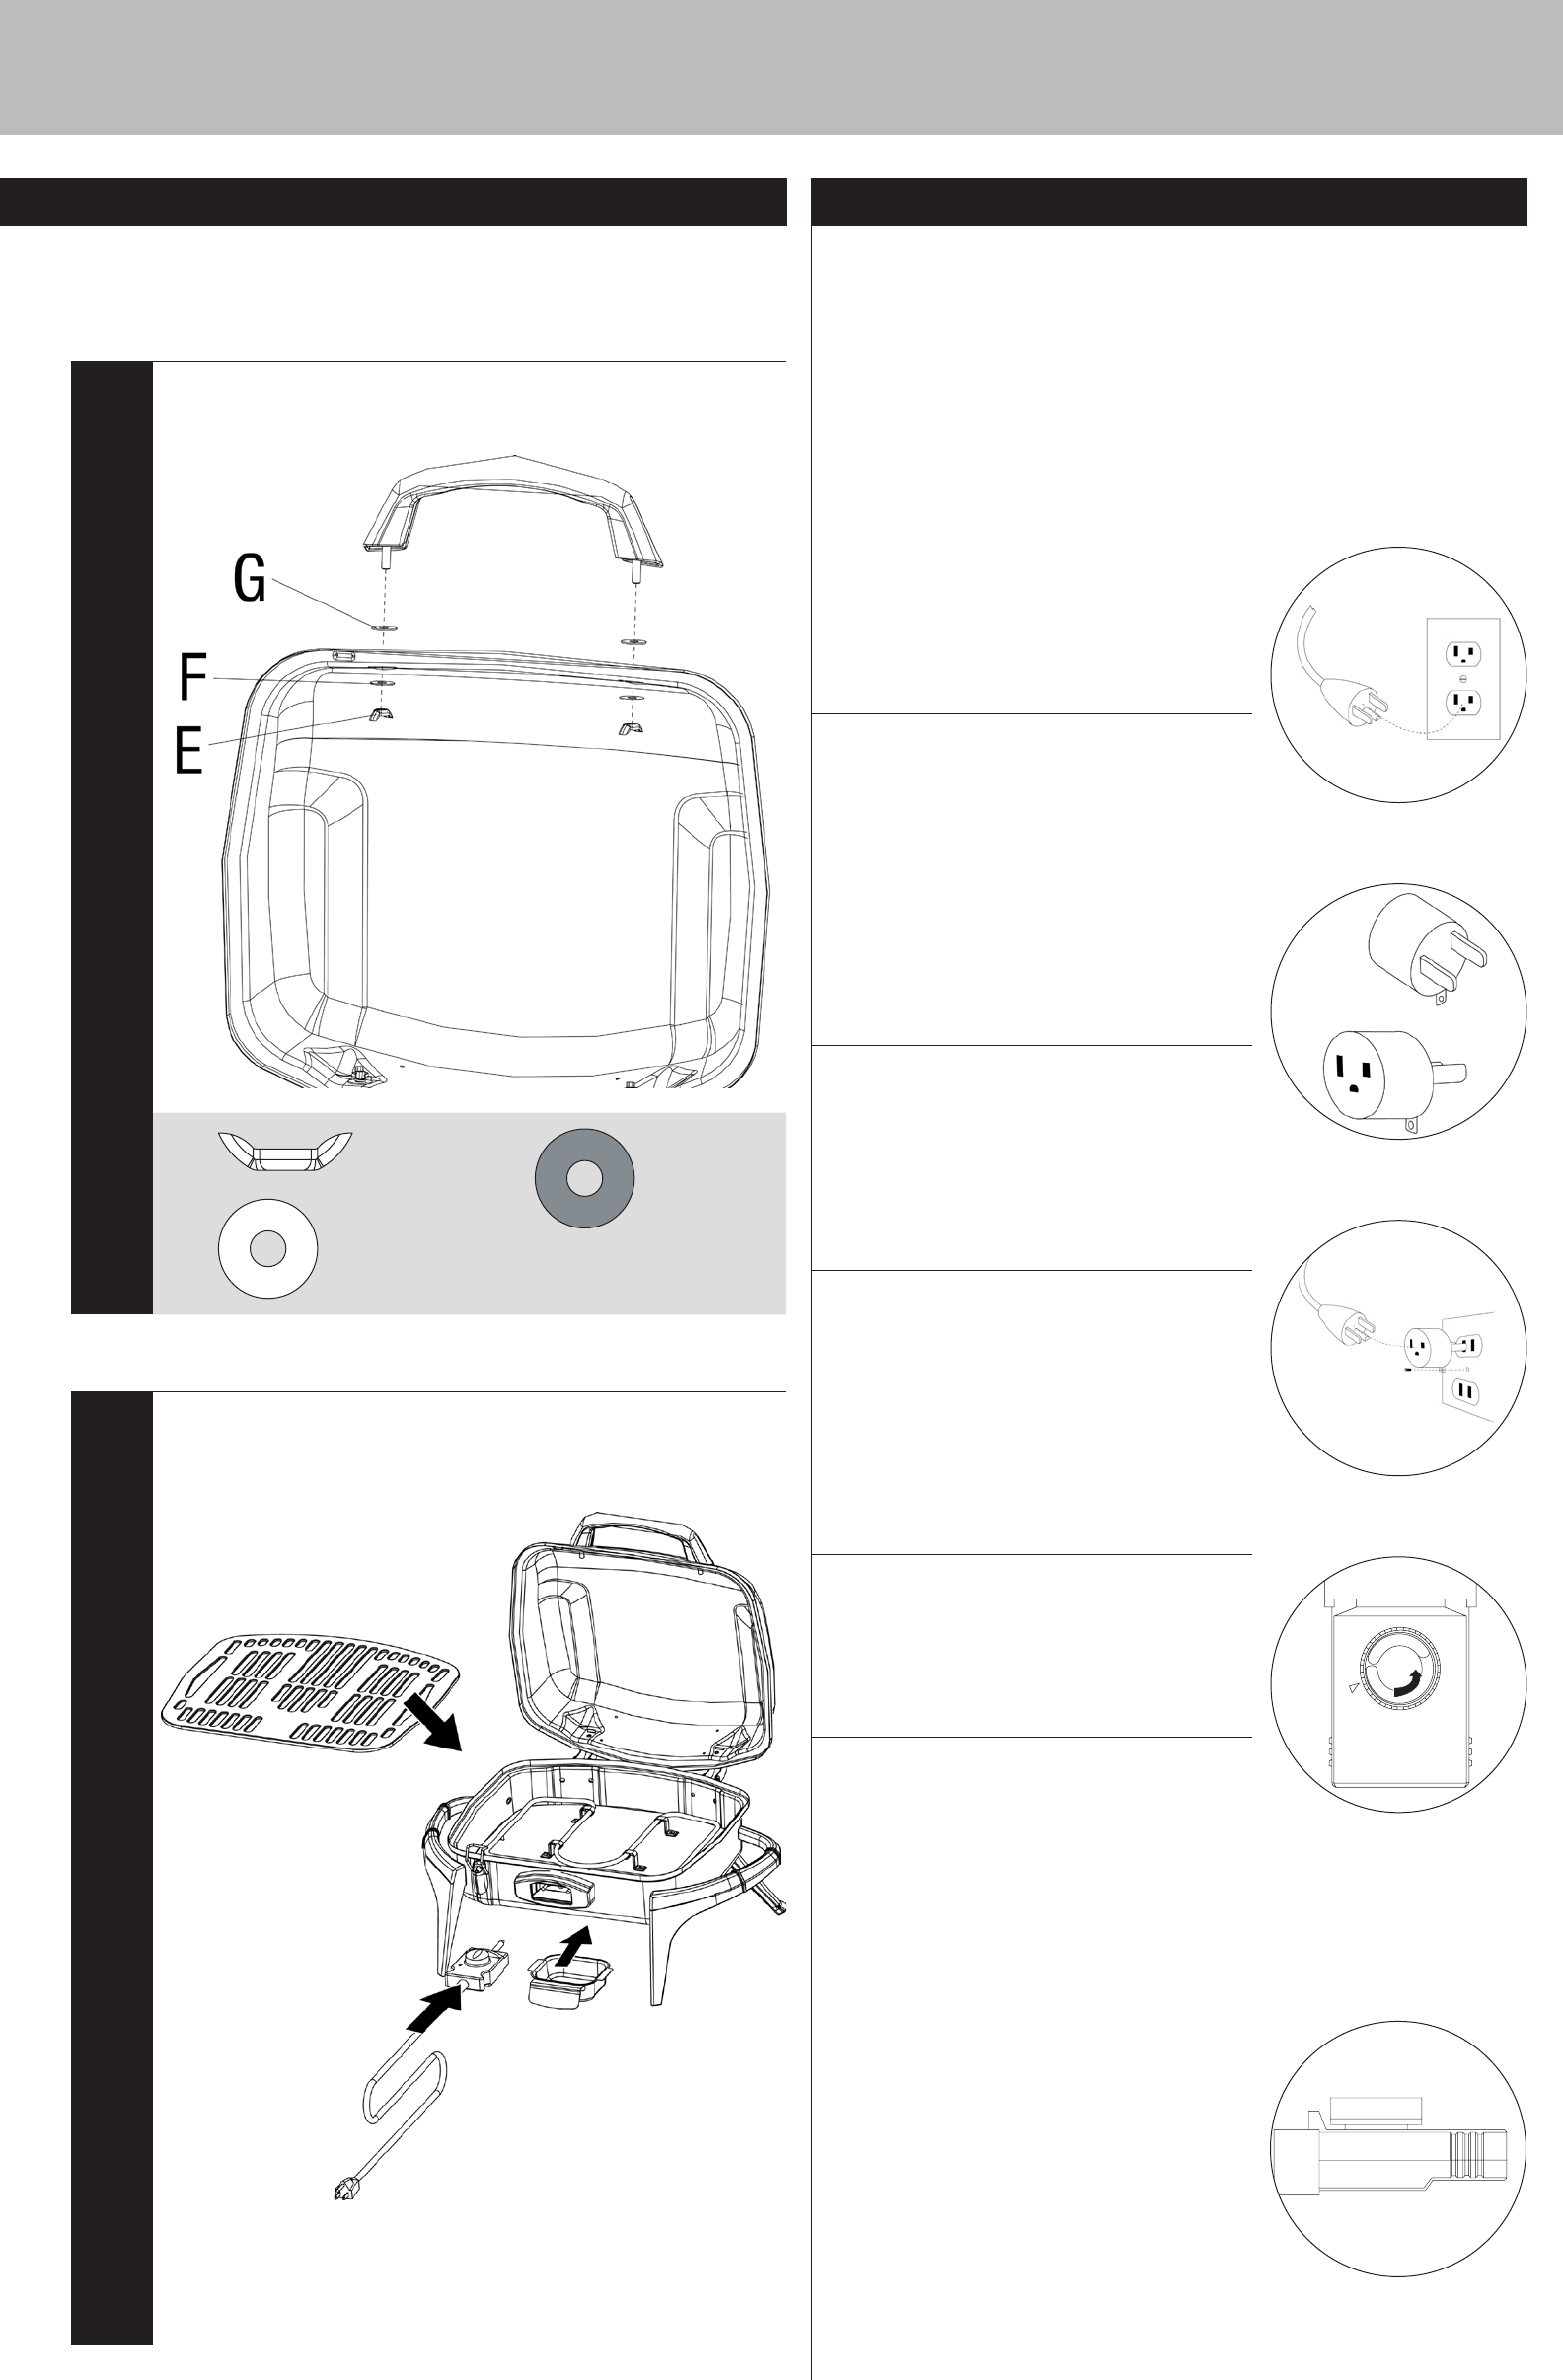
Grounding Instructions
1. This grill must be grounded while in use to protect the
operator from electrical shock.
2. The grill is equipped with a 3-conductor cord and a dry
GFI (Ground-Fault Interceptor) 3 prong outlet. (Figure 1)
3. An adaptor should be used for connecting a 3-proing
plug to a 2-plug to 2-prong receptacle. (Figure 2)
4. The grounding tab, which extends from the adaptor,
must be connected to a permanent ground such as
a properly grounded outlet box using a metal screw.
(Figure 3)
First Use
1. Make sure all labels, packaging and protective films
have been removed from the grill.
2. Remove manufacturing oils before cooking on this grill
for the first time by operating the grill for at least 15
minutes on “HIGH” setting with the lid closed. This will
“heat clean” the internal parts and dissipate odors.
Turning On
1. Make sure that temperature controller assembly is
turned fully to the “OFF” position. (Figure 4)
2. Plug the controller assembly into the grill.
(Figure 5)
3. Plug the other end into a dry GFI (Ground-Fault
Interceptor) 3 prong outlet. (Figure 1)
4. Adjust the settings on the control assembly to desired
level.
Turning Off
1. Turn the controller knob to “ OFF”.
2. Unplug the power cord from the wall outlet.
3. Unplug the temperature controller assembly from the
grill.
Cooking
1. Close lid and preheat grill on “HIGH” setting.
2. While wearing protective gloves open lid and place food
onto cooking grid with long handle tongs.
3. Adjust control as needed to desired temperature.
4. With lid open or closed, cook until desired internal food
temperatures are achieved.
5. Turn control to “OFF” and leave lid open to cool off.
Operating Instructions
Figure 1
Figure 2
Figure 3
Figure 4
O
F
F
O
N
L
O
W
M
E
D
I
U
M
H
I
G
H
Position of controller is
indicated by triangular mark.
Illustration shows controller
in “OFF” position.
Figure 5
O
F
F
O
N
L
O
W
M
E
D
I
U
M
H
I
G
H
Raised lip of controller should
be inserted until it is snug
against element bracket.