


Special offers from our partners!

Find Replacement BBQ Parts for 20,308 Models. Repair your BBQ today.

20
To reduce the risk of a laceration hazard:
• Wear protective gloves when installing warming rack. Hood and Bowl edges could be sharp.
CAUTION
!
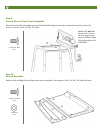
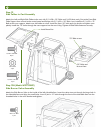
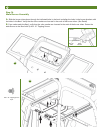
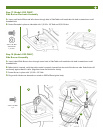
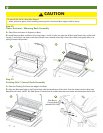
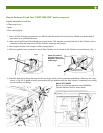
Step 22
Flavor Activator / Warming Rack Assembly
A.
Place Flavor Activator on Supports in Bowl.
B. Install Warming Rack as follows: First insert legs 1 and 2 in holes on right side of Bowl and Hood. Next, while hold-
ing leg 3, insert leg 4 into hole in left side of Hood. Last, carefully insert leg 3 into hole in Bowl and gently allow it to
spring outward into position.
A
B
A
B
2
1
3
4
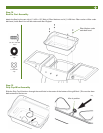
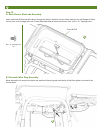
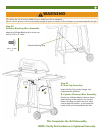
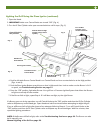
Step 23
Cooking Grid / Control Knob Assembly
A.
Place the Cooking Grid onto the ledge in the Bowl.
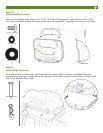
B. Align the flat keyed hole in the Control Knob with the keyed stem of the valve. Push the knob onto the valve stem.
Repeat for all valves. NOTE: The Side Burner Control Knob is smaller than the main knobs and located on the far left.
Side Burner
Control Knob
(Model 6122 Only)