


Special offers from our partners!

Find Replacement BBQ Parts for 20,308 Models. Repair your BBQ today.
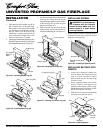
20
107570
UNVENTED PROPANE/LP GAS FIREPLACE
For more information, visit www.desatech.com
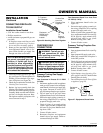
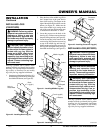
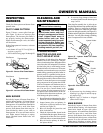
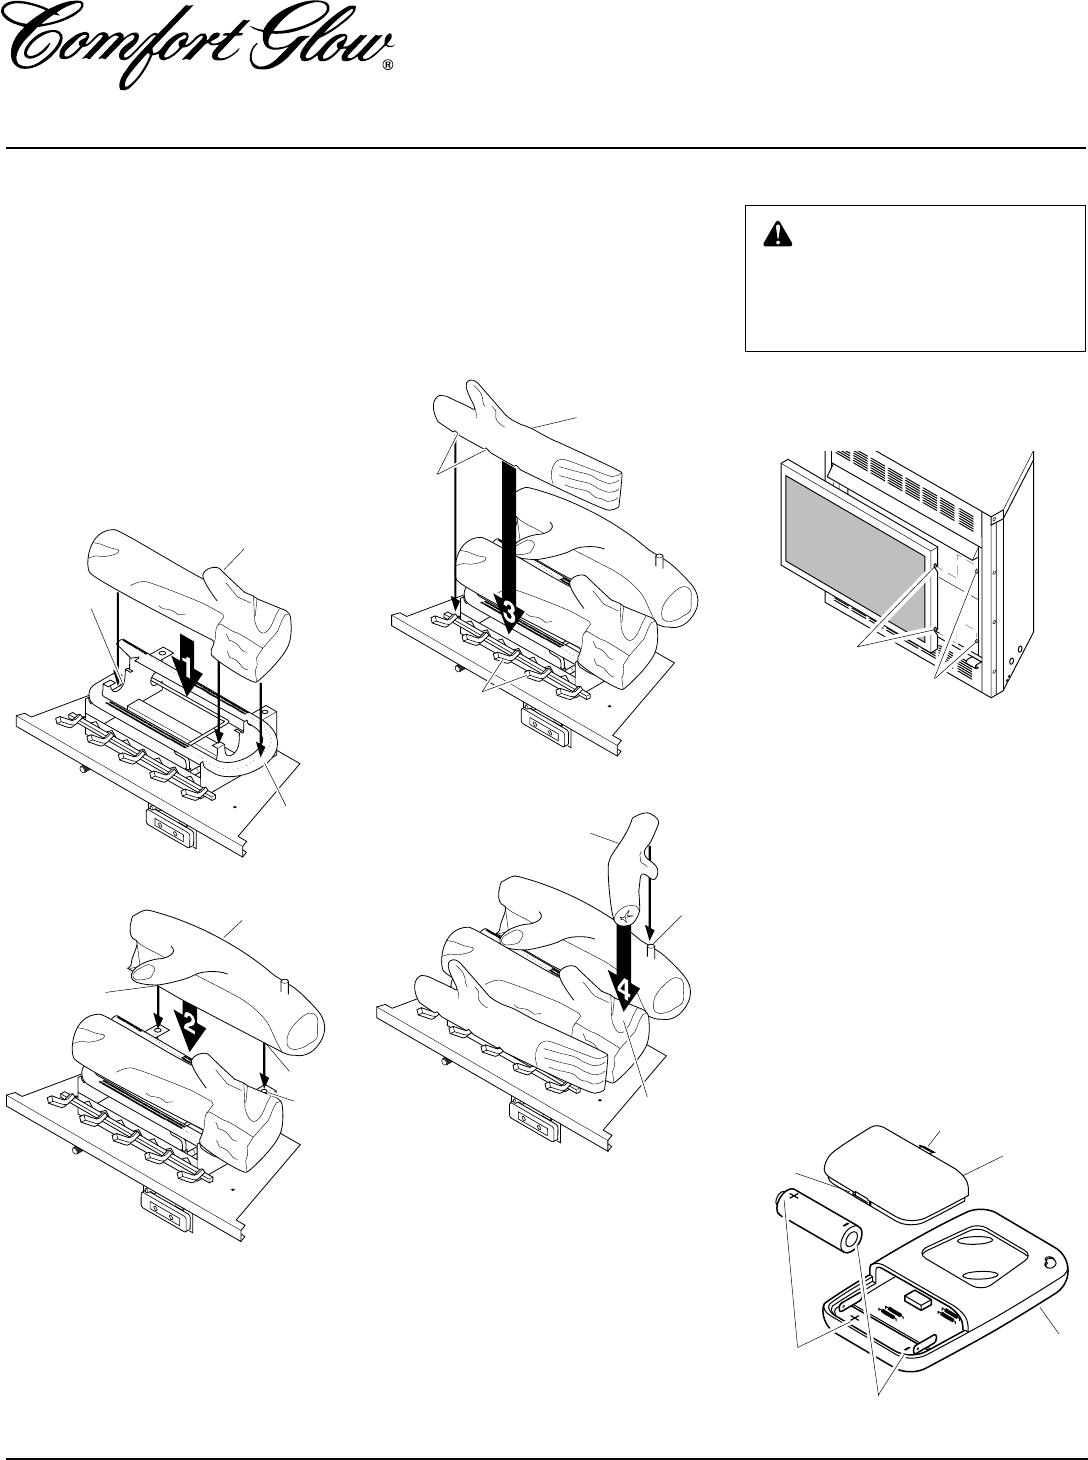
Figure 48 - Installing Fireplace Screen
WARNING: You must operate
this fireplace with the fireplace
screen in place. Make sure fire-
place screen is in place before
running fireplace.
Install fireplace screen by slipping notches
of fireplace screen over screws on front of
fireplace (see Figure 48).
INSTALLING SCREEN
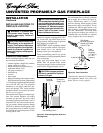
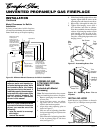
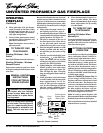
Figure 47 - Installing Crossover Log (#4)
Crossover Log (#4)
Peg
Recess
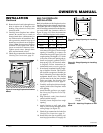
Figure 45 - Installing Back Log (#2)
Figure 46 - Installing Front Log (#3)
Back Log (#2)
Peg
Peg
Front Log (#3)
Grate Fingers
Notches
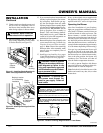
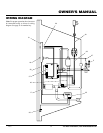
1. Place the base of the middle log (#1) in
the U-shaped slots of the grate base.
The cutout on the right of the middle
log should fit over the burner (see Fig-
ure 44). Make sure the front of the
middle log is resting on the tabs of the
grate base and the cutout area is cen-
tered over the burner “U” bend.
2. Locate pegs on the bottom of back log (#2).
Slide these pegs into the holes in the grate
base behind the burner (see Figure 45).
INSTALLATION
Continued
Figure 44 - Installing Middle Log (#1)
Middle Log
(#1)
"U"-shaped
Cutout in
Base
Burner
3. Locate the notches in the bottom of the
front log (#3). Place the front log on
the grate fingers. Make sure the notches
of the front log line up with the grate
fingers (see Figure 46).
4. Place crossover log (#4) onto the peg
(right) on back log (#2) and into the re-
cess of the middle log (#1) (see Figure 47).
INSTALLING BATTERY INTO
REMOTE
1. Locate slot at bottom of remote con-
trol (see Figure 49). Firmly insert tool
such as a small screwdriver, butter
knife, or dime into the slot and lift up
to remove cover.
2. Insert supplied battery into remote
control. Positive and negative are
marked inside remote control casing.
Note:
Remote will not function if bat-
tery is not installed correctly.
3. Slide tab on cover into remote housing
and snap cover back into place.
Notches
Screws for Mounting
Screen
Positive
Figure 49 - Installing Battery
Negative
Tab
Cover
Remote
Control
Slot