


Special offers from our partners!

Find Replacement BBQ Parts for 20,308 Models. Repair your BBQ today.
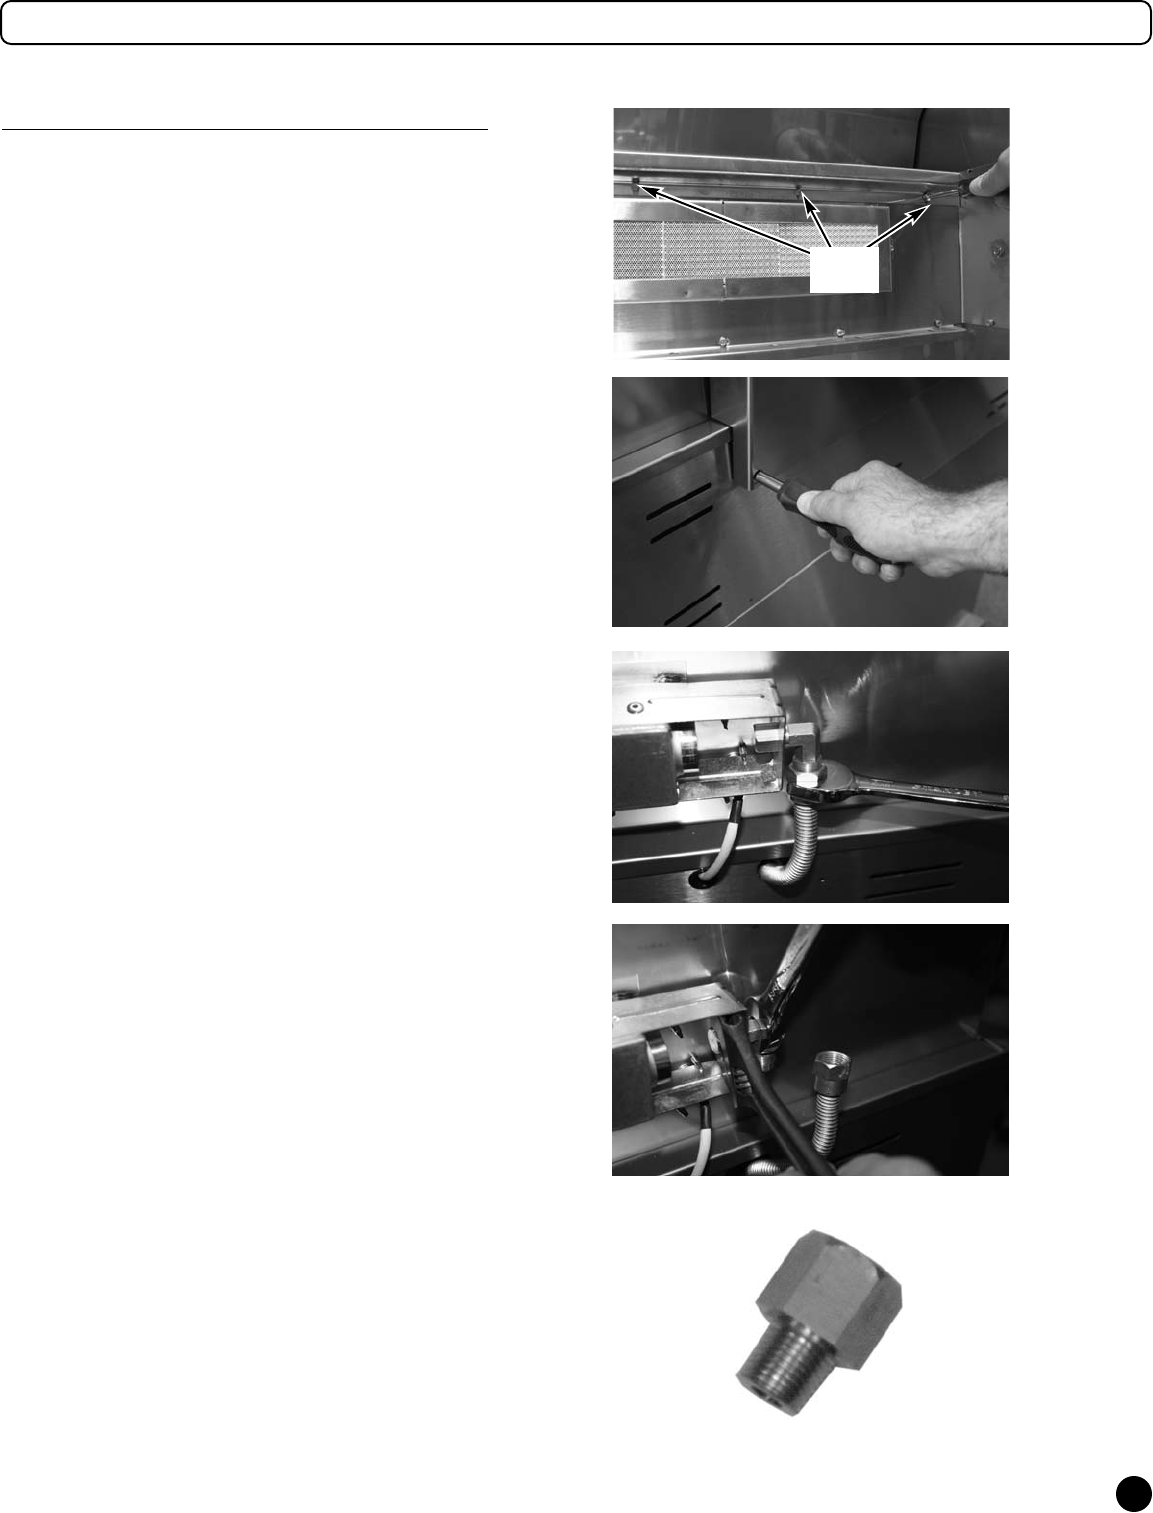
Fig 30
Fig 31
Fig 32
Fig 33
Fig 34
Natural Gas Conversion Instructions
Converting the Rear Infrared Burner to NG
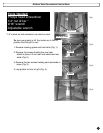
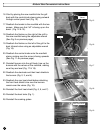
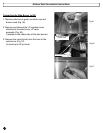
1. Remove the four screws on the inside of the grill
that hold the rear infrared cover in place (Fig. 30).
2. Close the grill hood slowly.
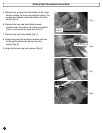
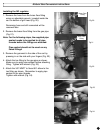
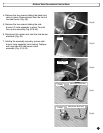
3. Remove the two screws from the back infrared
cover, located on the back of the grill (Fig. 31).
4. Grasp rear infrared cover and remove it from the
grill.
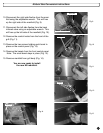
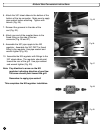
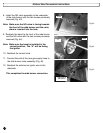
5. Disconnect flex line and twist orifice elbow to
remove LP orifice (Fig. 32 & 33).
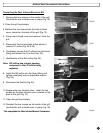
6. Completely remove the LP orifice from the flared
fitting and discard the LP orifice (Fig. 33).
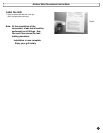
7. Identification of the NG orifice (Fig. 34).
Note: NG orifice has a larger opening
compared to the LP orifice being
replaced.
8. Install the NG orifice into the flared fitting and
tighten completely with an adjustable wrench
(Fig. 33).
9. Reconnect the flexline (Fig. 32).
10. Replace the rear infrared cover. Install the two
screws on the back infrared cover, located on the
back of the grill (Fig. 31).
11. Open the grill hood slowly.
12. Reinstall the four screws on the inside of the grill
that hold the rear infrared cover in place (Fig. 30).
This completes the Rear Infrared Burner Conversion.
9
Rear
Screws