


Special offers from our partners!

Find Replacement BBQ Parts for 20,308 Models. Repair your BBQ today.

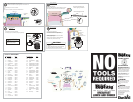
Back of Grill
Place end of chain through hole, reattach coupling to end of chain.
Thread eyelet on other end of chain into loop of match holder.
Items to Assemble:
1 Chain with Coupling
1 Match-Holder
See Use & Care Manual for
“Match Lighting Instructions”
Eyelet End
Match-Holder
Remove coupling from chain
THIS GRILL IS FOR
OUTDOOR USE ONLY
Failure to follow all manufacturer’s
instructions could result in serious
personal injury and/or property
damage.
WARNING
!
CAUTION
!
Some parts may contain sharp edges
– especially as noted in the manual!
Wear protective gloves if necessary.
CAUTION:
INSTALLER/ASSEMBLER:
CONSUMER:
Read and follow all safety
statements, assembly instructions,
and use and care directions before
attempting to assemble and cook.
Leave
these instructions with consumer.
Keep this manual for
future reference.
4638263
ASSEMBLY MANUAL
If you have any questions or need
assistance during assembly, please
call 1-800-241-7548.
4638263 / 1–4165052 (02-13-02)
Visit us on the web at:
www.charbroil.com
Parts List - Model 4638263
Key Qty. Description Part #..........
A
1 Condiment Wire .....4151005
B 3 Tent Frame .........4151014
C 1 Deep Dish..........4152039
D 1 Cooking Grid, 12” ....4152054
E 1 Cooking Grid, 15” ....4152055
F 2 Wheel .............4154417
G 1 Sideburner Toolholder. 4154519
H 1 Condiment Tray .....4154528
I 1 Sideburner Grate ....4156179
J 1 Chef’s Delite ........4156455
K 1 LPTank............4158015
- - 1 Spit Rod ...........4158063
L 3 Burner Tent .........4500226
M 1 Rotisserie Burner ....4500249
N 1 Tank Retainer .......4503105
O 1 Storage Shelf .......4503107
P 1 Tank Support........4503114
Q 1 Upper Panel ........4503119
R 1 Lower Panel ........4503121
- - 1 Rotisserie ..........4507294
S 2 #10x1/2” Screw, 4080043
T 2 Pivot Pin ...........4080066
U 3 3/16 Pal Nut ........4153096
V 1 Ignitor Wire .........4153184
W 2 Caster .............4154261
X 2 Caster Socket .......4154514
Y 2 Hitch Pin ...........4156515
Z 2 Carry-over Tube .....4500228
Self-tap
Key Qty. Description Part #..........
AA 1 Right Leg ..........4503147
BB 1 Left Leg............4503148
CC 1 Console Assembly . . . 4530047
DD 1 Ignitor .............4153186
EE 1 Rotisserie Ignitor Wire 4153806
FF 1 Sideburner Valve Cup. 4154476
GG 1 Sideburner Ignitor Wire5156110
HH 1 Grill Bottom.........4508387
II 3 Burner.............5068016
JJ 1 Left Shelf Assembly . . 4520016
KK 1 Sideburner Assembly . 4520018
LL 1 Sideburner Burner . . . 5068017
MM 1 Grill Lid ............4570044
- - 1 Grill Cover..........4985710
NN 1 Rotisserie Knob .....4154214
OO 1 Sideburner Knob.....4154471
PP 3 Control Knob........4154507
QQ 1 Heat Indicator .......4157142
RR 1 AAA Battery ........4153177
SS 1 Button .............4157156
- - 1 Hardware, Cart Assy. . 4254009
- - 1 Hardware, Shelf .....4254012
- - 1 Hardware, Swing Grid. 4254018
TT 1 Shield .............4501356
UU 1 Grease Clip.........5156607
Center of
grill bottom
Grease clip
CAUTION
!
• Failure to install can in clip will cause hot
grease to drip from bottom of grill with
risk of fire or property damage.
Hang grease clip from center of grill bottom.
Use an empty soup can (not included) to hang from grease clip.
Items to Assemble:
1 Grease Clip
14
IMPORTANT
Proper
tube-to-valve
engagement
+
–
Button
13
1st
Insert Valve into Sideburner Tube and snap valve cup
into bottom of shelf (see inset for proper engagement). Place Sideburner Knob.
2nd
Place “AAA” battery into module, secure with Button.
2nd
1st
3rd
3rd
Attach long wire from beneath console to electrode beneath Sideburner.
15
Battery
12
Loosen wing-nut on tank retainer.
Center base of tank in notches between wheels.
Lower tank retainer onto tank and tighten the wing-nut.
CAUTION
!
• Tank collar opening must face to front of cart once tank is
attached.
• Failure to install tank correctly may allow gas hose to be
damaged in operation, resulting in the risk of fire.
Items to Assemble:
1LPTank
Facing
Front
Tank
Notch in Tank
Retainer
Regulator
Hose going
to Sideburner valve
Wing-Nut
LP tank is shipped empty. Fill and leak check before
attaching to grill and regulator.
See Use and Care to perform the “Burner Flame Check”
and important safety instructions before using
A
Remove coupling from chain.
Sideburner
Knob
J
QQ MM
L
B
U
V
JJ
Z
II
NN
DD
SS
HH
Y
Y
CC
T
T
S
S
H
C
O
BB
UU
X
W
Q
R
EE
PP
GG
AA
P
F
K
N
RR
FF
G
LL
KK
TT
OO
M
I
DE